Copyright © Lojer Oy, 2012 4
09/2012 Rev. 3.0
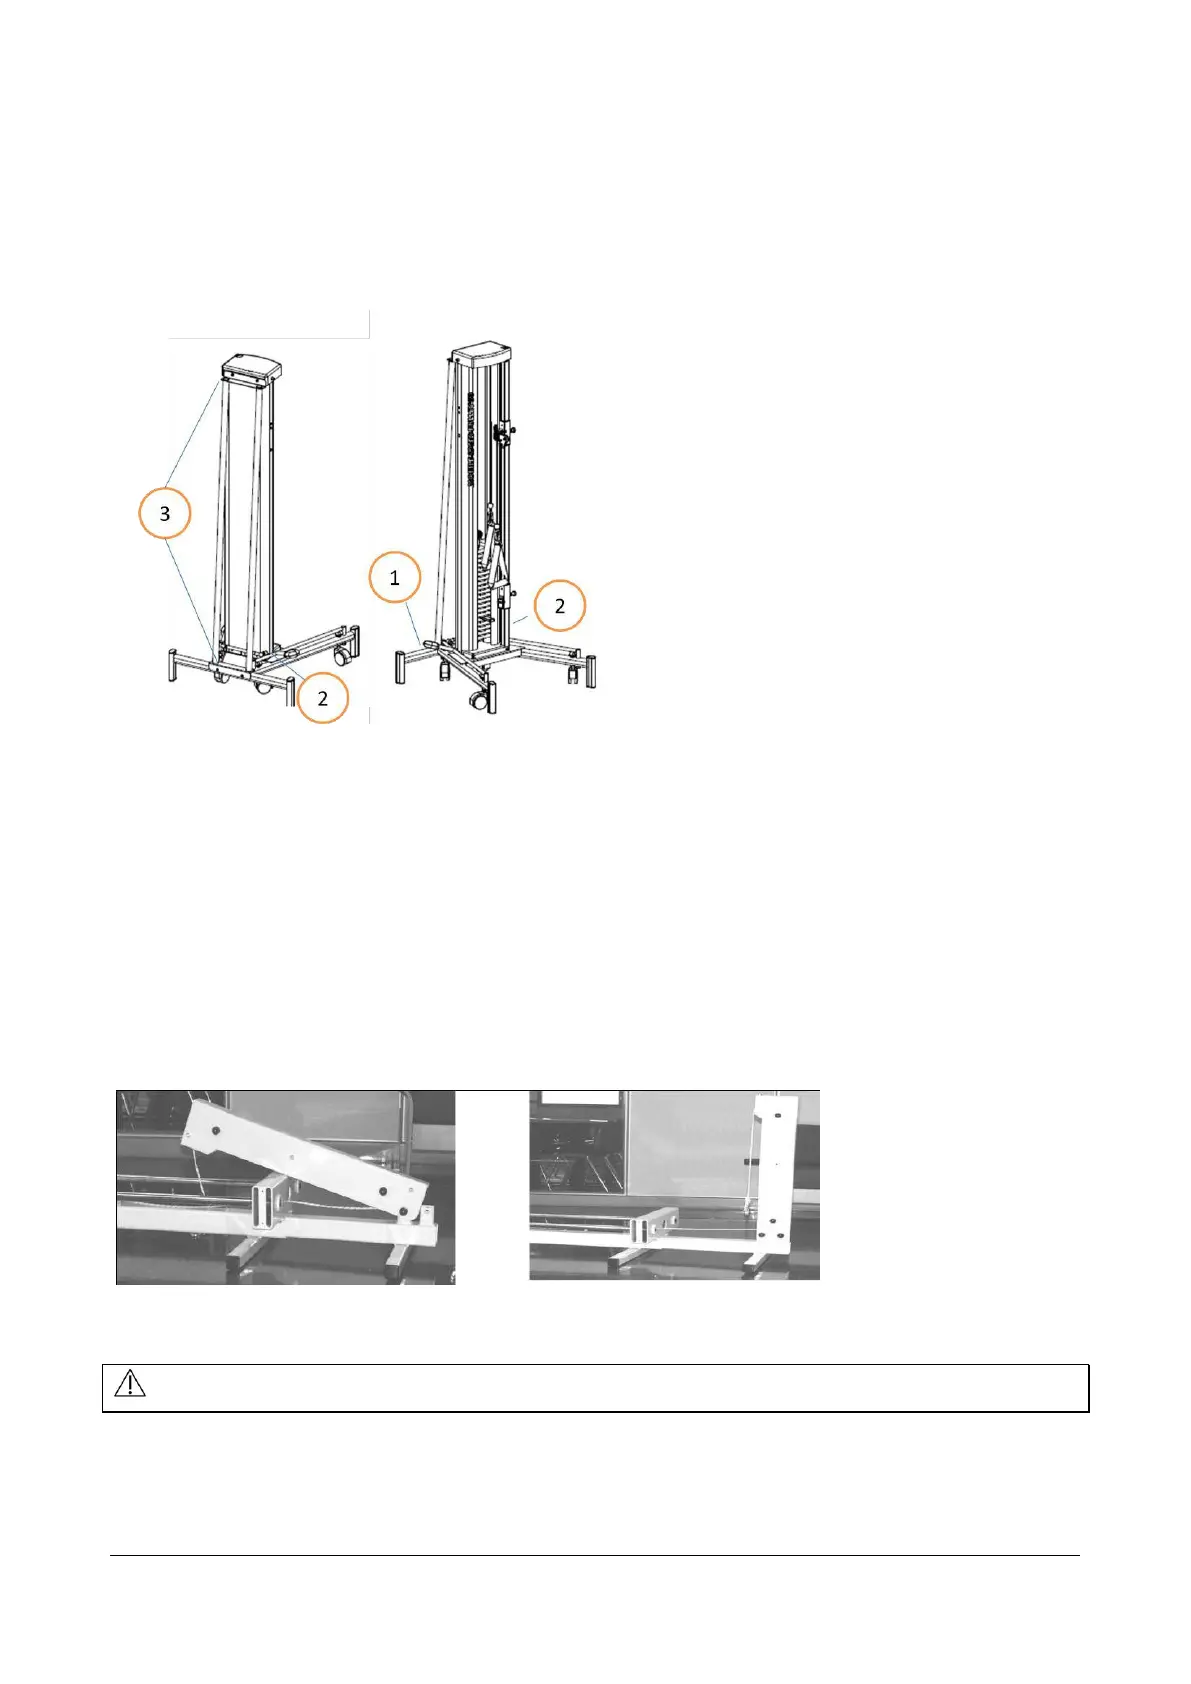
Figure 4: Installing the mobile pulley
2.3 Installing the Mobile Pulley
Assemble the mobile section to the Speed Pulley (Figure 4) with supports and screws exactly to vertically position in
case the delivery occurs separately.
Lift the pulley to the mobile stand
Screw M8X20 (4) both sides
Screw the back bracket on M6X20 with washers (4). Make sure the pulley is in straight line.
2.4 Installing the Vertical Pull
Fix the Vertical Pull against a solid wall that can stand the utilization of the device. The Vertical Pull must be installed
exactly vertically (when looked at both from the side and from the front).
Install the Vertical Pull as follows:
First compile the top part of the Vertical Pull by turning the bearer into its place and clamping the bolts. Then push the
top part into its place inside the frame (Figure 5).
Attach the Vertical Pull firmly against the wall. Fix the top part (the bearer) to the wall as high as possible, the
maximum height being however 70 cm from its lowest position.
Pull the rope/wire tight and make sure it functions properly.
Make sure the wall is solid enough before installing the device.
Figure 5: Installing the vertical pull