10
On the wall
01 Insert 2 screws or hooks into the wall using the
template provided in the box.
If you use the screws, do not screw them all the
way in, leave the tip protruding about 5 mm.
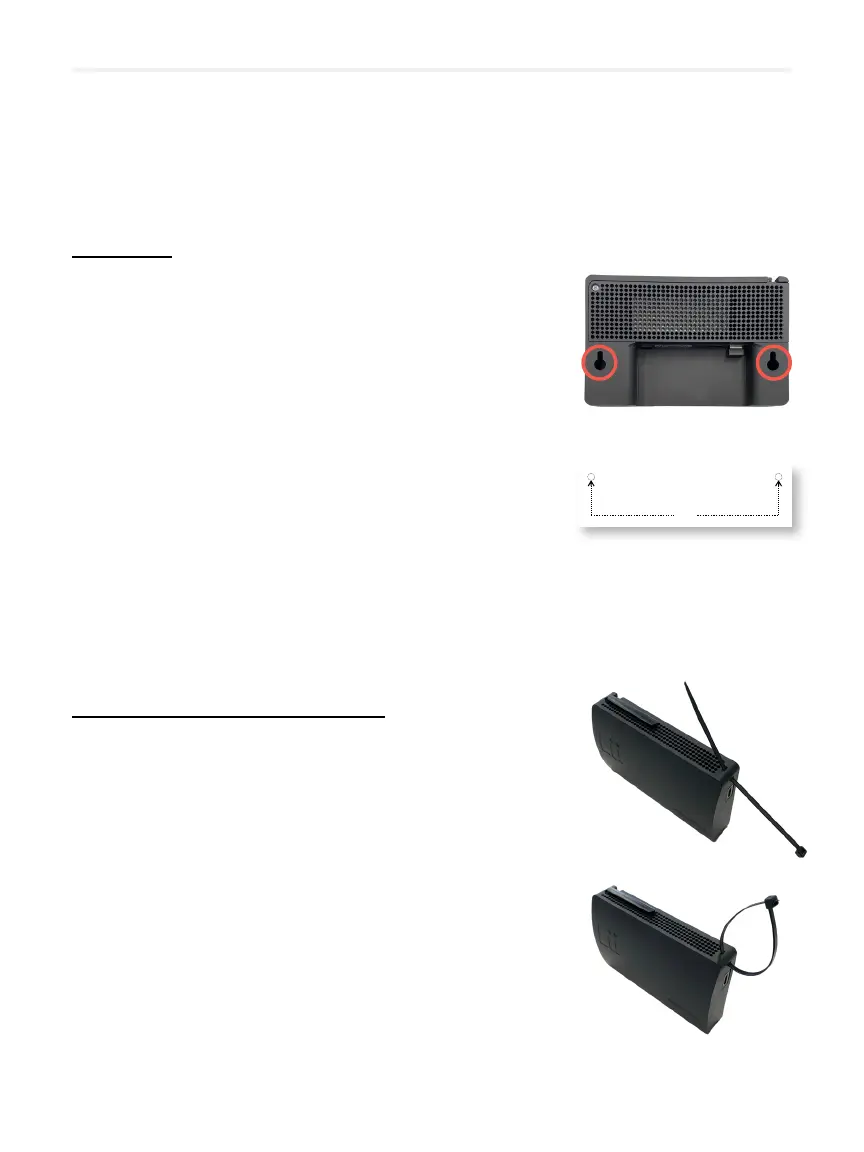
02 Make sure the system is upright and align
the 2 holes behind the module with the 2 screw
heads or hooks on the wall.
03
hooks on the wall through the narrowest part
of the holes and lock your system in a secure
position.
Behind your interactive whiteboard
01 Insert the tie wraps into the slots provided in the
4 upper and lower corners of your module.
02 Attach your module to a secure place behind
your interactive whiteboard (wire cover,
support).
03 Tighten the tie wraps and cut the excess.
Installing Lü in your classroom
INSTALLATION TEMPLATE FOR HOOKS OR SCREWS
GABARIT D’INSTALLATION POUR LES VIS OU CROCHE TS
141 mm
INSTALLATION TEMPLATE FOR HOOKS OR SCREWS
GABARIT D’INSTALLATION POUR LES VIS OU CROCHE TS
INSTALLATION TEMPLATE FOR HOOKS OR SCREWS
GABARIT D’INSTALLATION POUR LES VIS OU CROCHE TS
INSTALLATION TEMPLATE FOR HOOKS OR SCREWS
GABARIT D’INSTALLATION POUR LES VIS OU CROCHE TS
INSTALLATION TEMPLATE FOR HOOKS OR SCREWS
GABARIT D’INSTALLATION POUR LES VIS OU CROCHE TS
INSTALLATION TEMPLATE FOR HOOKS OR SCREWS
GABARIT D’INSTALLATION POUR LES VIS OU CROCHE TS