4.4 Presenter Frame
4.5 Stage Frame
www.MyLumens.com
Copyright ©2020 Lumens Digital Optics Inc. All rights reserved.
4.6 Tracking Area
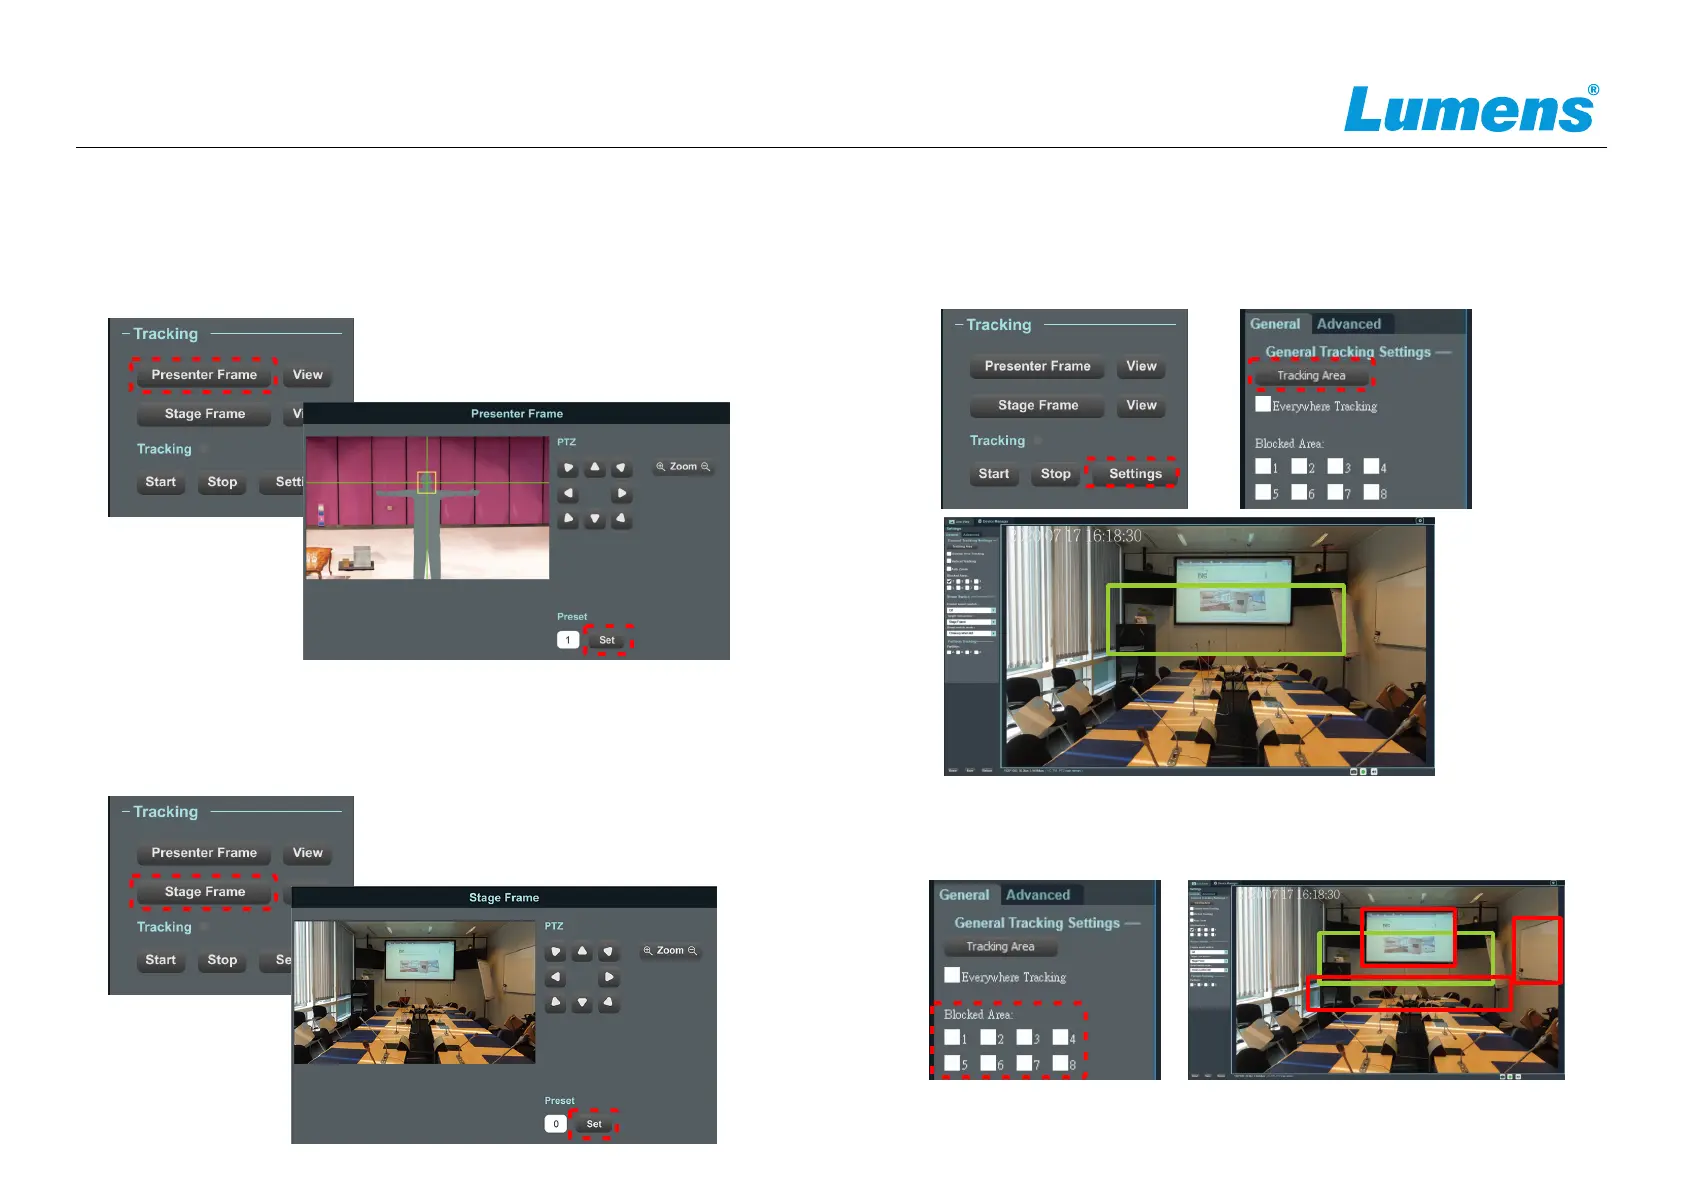
If you want more “close-up”view of your presenter, you need to set the
presenter frame.
Click [Presenter Frame] and adjust Pan-Tilt-Zoom, and set it to preset 1.
We advice the presenter's face shall be in the yellow auxiliary frame.
E
When there is no presenter to track, the view will automatically go back to
the stage frame.
Click [Stage Frame] and adjust Pan-Tilt-Zoom, and set it to preset 0.
We suggest users set the entire stage view.
E
This is the user-defined zone that represents the tracking enabled area.
Click [Settings] and then [Tracking area] -> Click and hold down the left
mouse button and drag to draw a tracking area -> Click [Save] -> Click
[Return] then back to Live view.
4.7 Blocked Area
This is used to shield a moving object that may have impacts on tracking accuracy.
Select one block area -> Click and hold the left mouse button and drag to draw
a tracking area -> Click [Save] -> Click [Return] then back to Live view.
4.8 Click [Start] to start auto-tracking.
V V V
1
2
3
 Loading...