K
Kerry GrayAug 6, 2025
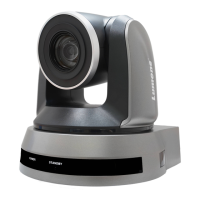
What to do if my Lumens Security Camera cannot be operated by remote control?
- SsandersmichaelAug 6, 2025
If your Lumens Security Camera cannot be operated by remote control, first ensure that the Camera Select on the remote is compatible with the IR Select on the VC-A50S. Also, prevent the VC-A50S from being in direct sunlight. Keep energy-saving bulbs and IR touch screens as far away as possible to avoid interference. If multiple VC-A50S units are in the same area, operating two remote controls simultaneously may cause signal interference; using only one remote control is recommended.