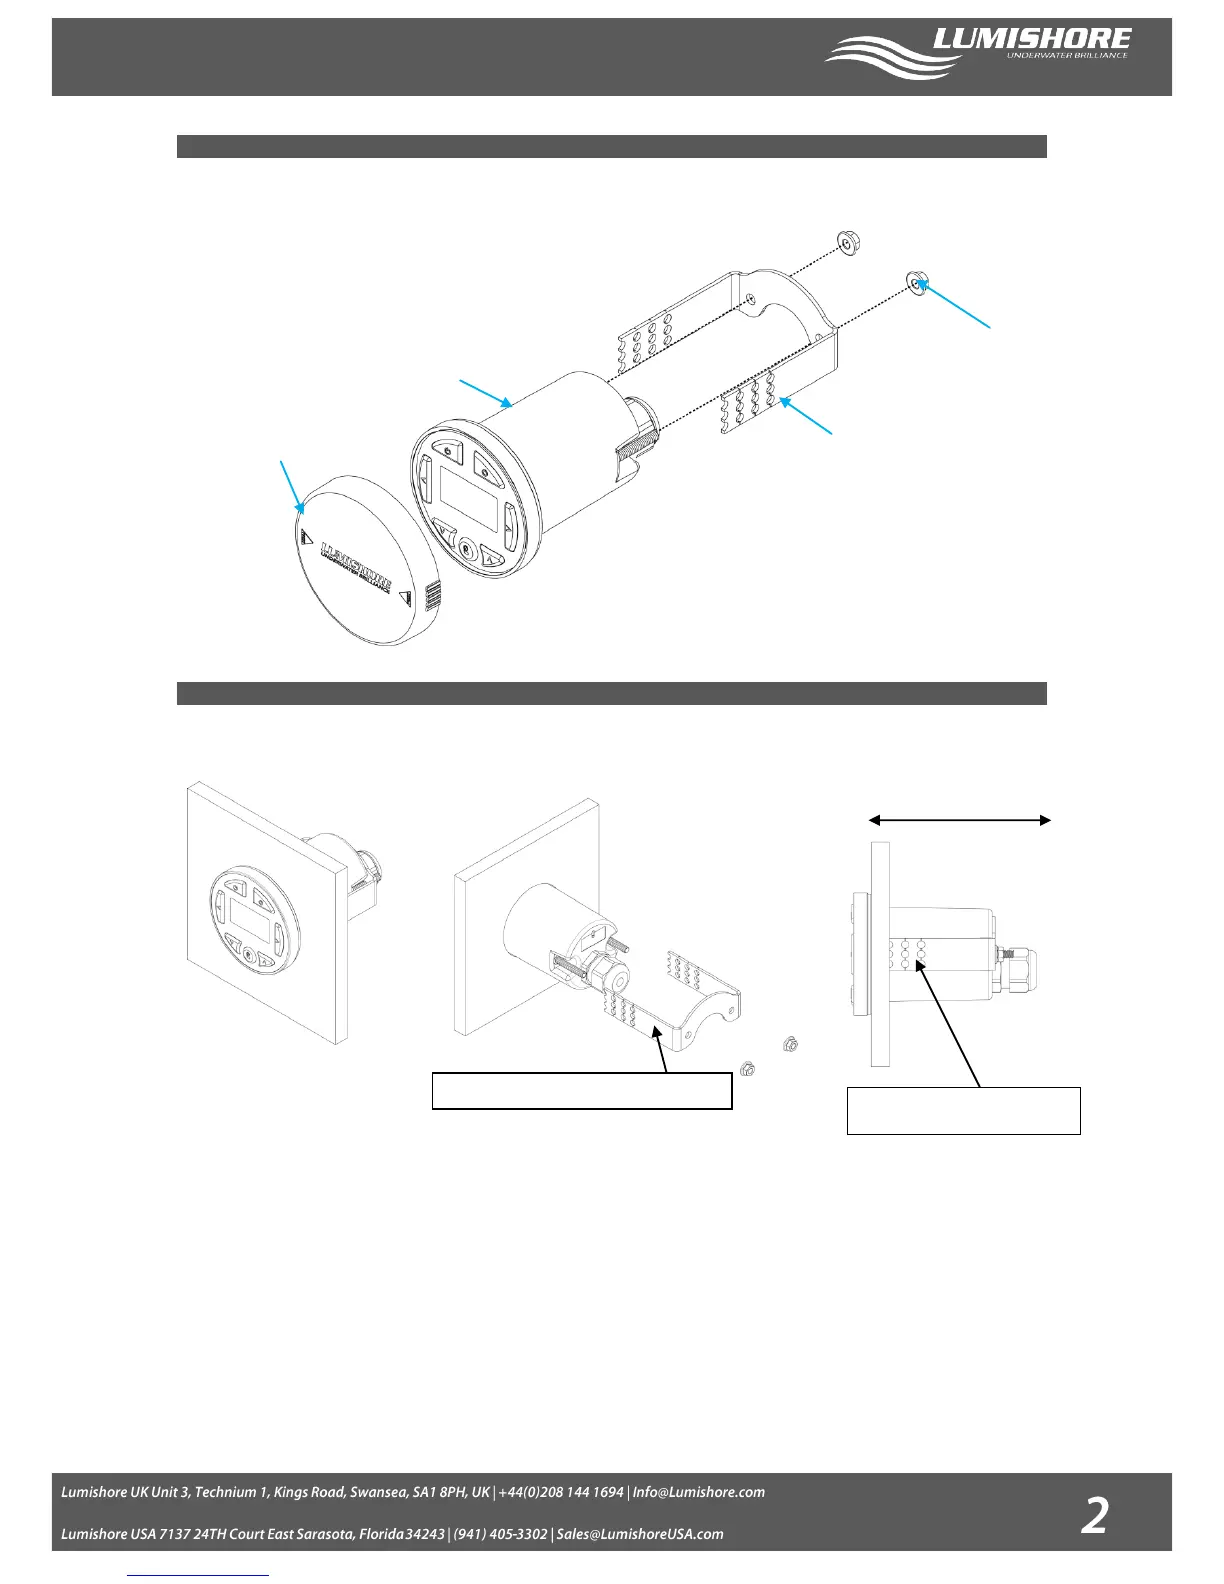
The Color Controller has been designed to be mounted inside or outside within the cockpit or dash board of the vessel.
Installation Considerations:
Select a suitable flat surface that is accessible from behind.
Ensure there are no obstructions and there is adequate clearance behind the surface to allow for the Colour Controller cable
entry and positioning. (Ensure the chosen position also has easy cable routing to the first Lumi-Hub in the series)
Installation Procedure:
1. Cut the hole to the correct size (60mm diameter), and ensure there is enough clearance behind the mounting panel for the
controller to fit into (123mm clearance required).
NB: Extreme care should be taken to cut the hole to the correct size. Always cut a smaller hole than necessary and file
outwards until it is the correct size.
2. Feed the Colour Controller through the hole and then using the clamp provided lock in place. Place the nuts onto the threaded
bar, and tighten. Do not exceed 1Nm torque force on each nut.
3. For thicker panels the mounting bracket can be shortened using the guide holes as cut points.