SOUND TO LIGHT CONNECTION
A 3.5mm Jack Socket is supplied as part of the combi cable. Use a “Jack to Jack cable” or “Jack to Phono cable” as required to plug the
“Line out” from a stereo or Ipad/Iphone.
For best results use a stereo output that has constant output irrespective of volume. i.e When using an iPad or iPhone use the line out
rather than the headphone socket. That way the sensitivity of the controller will not need continuous adjustment when changing volume.
3
rd
PARTY DMX CONTROLLER (OPTIONAL)
A 3rd Party DMX controller can be used to control the lights in place of the EOS controller. The DMX connection wires are provided as part
of the Combi-cable. (See above table for the colour key.)
Do not connect the external DMX wires to anything other than an external DMX module. If an external DMX module is not used then the
DMX wires should be cut back and insulated to prevent a short circuit on the wires.
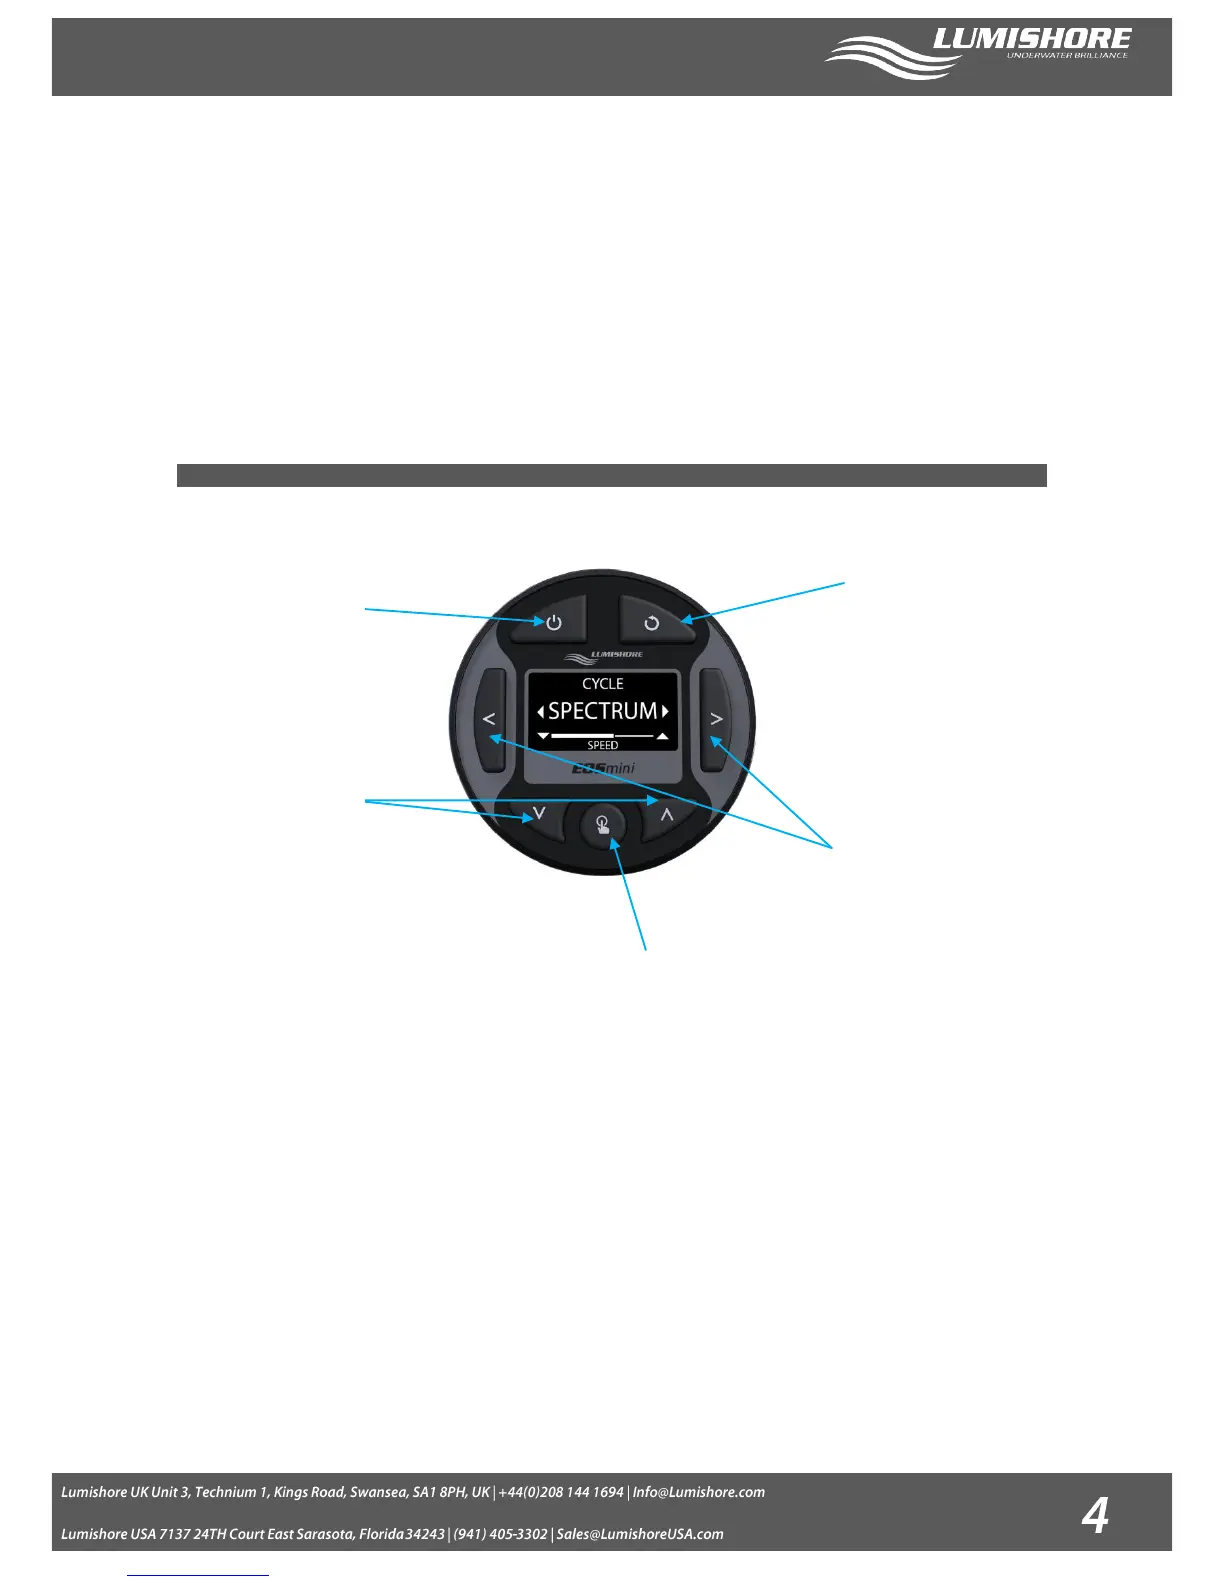
2.0 EOS MINI / EOS MINI WIFI Overview and Basic Operation
The EOS controller interface is very easy to use, use the arrow keys to navigate around menus, use the bottom middle
button to select the function desired.
Pressing the back button at any point will return to the previous mode or screen.
· Power/Standby Button – Press once to turn the Controller ON. Note: The lights will not turn on until a mode is
selected. Press again to turn controller and lights OFF (Standby mode).
· Back button – press the back button to return to the previous mode or page.
· Select Button – press the select button to enable the desired function, or to enter a menu (hold for 2 seconds to
enter an adjustment menu, for example to change settings Favorites, or Sound to Light)
· Left / Right Arrow Keys – move through the menus
· Up / Down Arrow Keys – Adjust settings (press and hold for 2 seconds to speed up adjustment)
Power Button
(Standby Power)
Back Button
(Return to
previous page)
Select Button
(Press to select an option. Press and HOLD for 2
seconds to enter an adjust settings screen)
Left / Right Arrow
Keys (Navigate through
menus)
Up / Down Arrow Keys
(Change settings, e.g.
speed or intensity.
Hold for 2 seconds for
quick change to
settings)