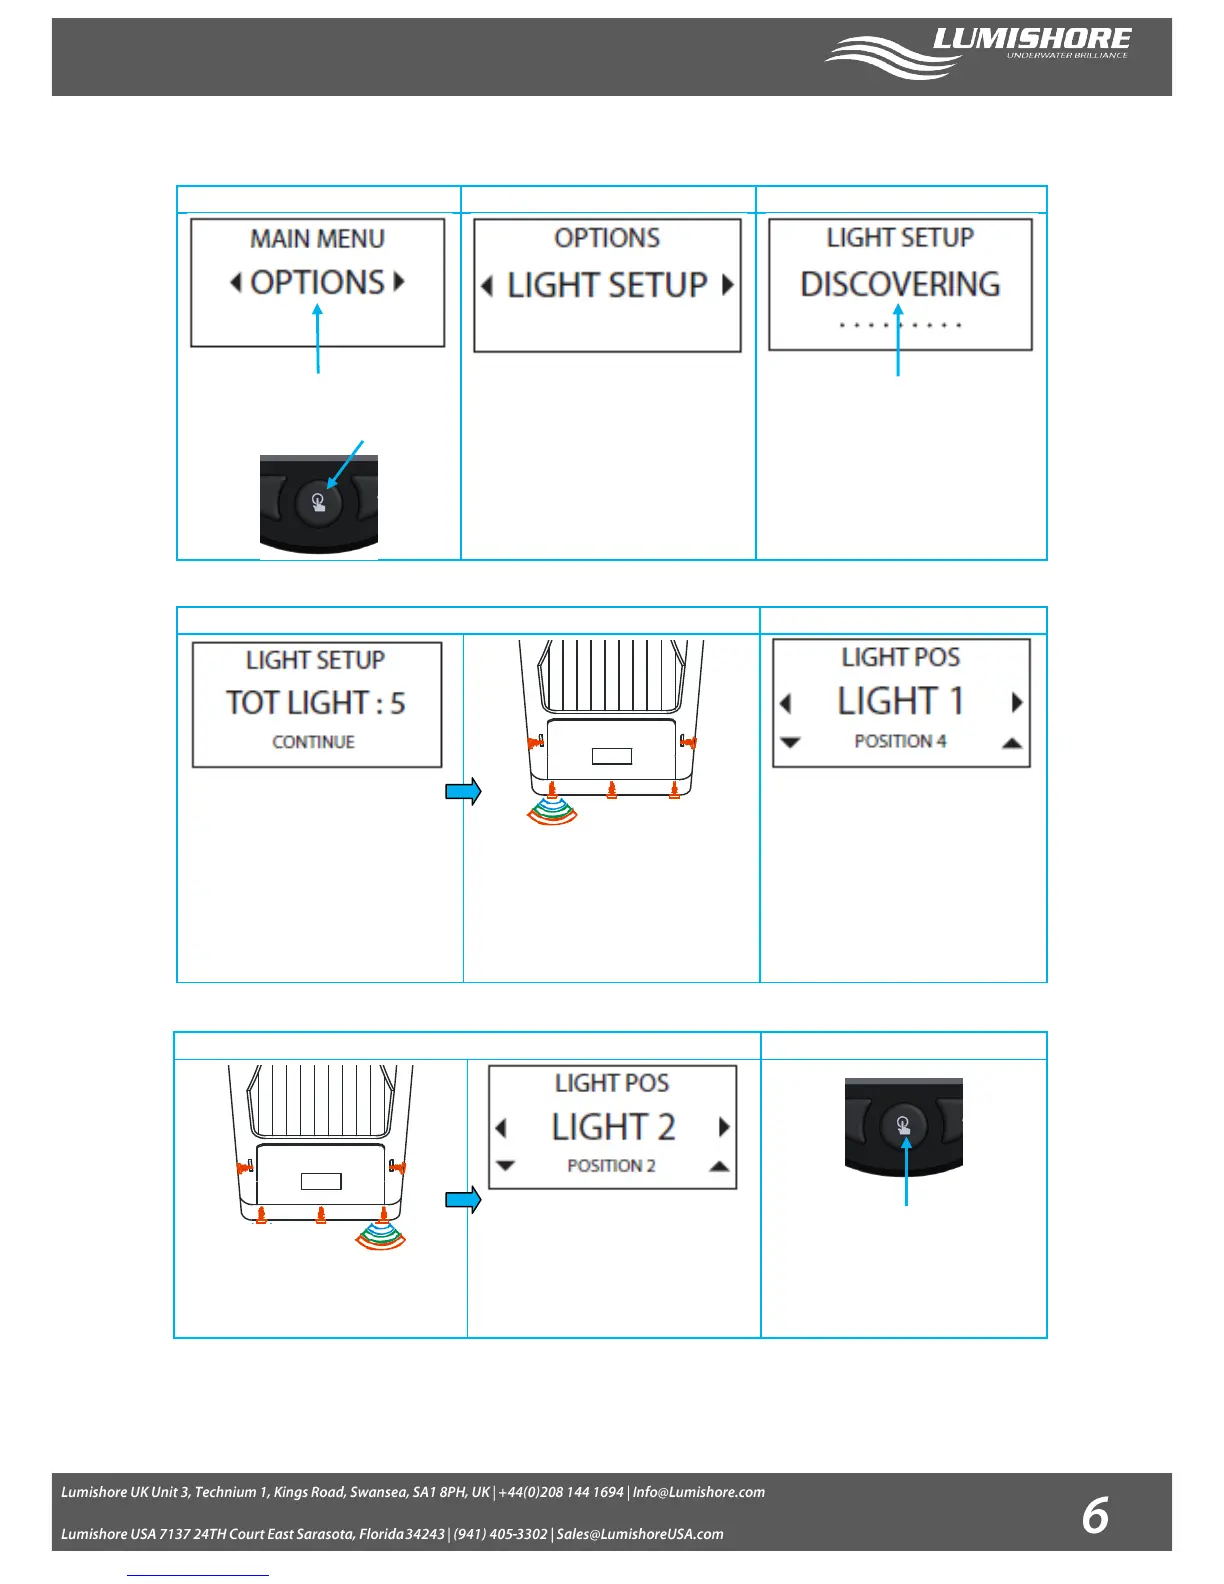
Entering Light setup mode on the EOS controller:
Switch the controller on and scroll through
using the left / right arrows until you reach
Options. Press the select button.
Select Light setup Mode. Make sure all
lights have power before starting the
discovery. Press the select button to start
the discovery process.
The controller will detect how many lights
are connected and then display the result
on the screen.
The number of lights detected by the
controller will be shown once the discovery
is complete. Check that the number of
lights detected matches the number of
lights installed. Press the select button to
continue.
The first light detected will then start to flash
a color sequence of “Blue, Green, Red”.
Note: The position of the light is not yet
assigned so it may be at any installation
point on the vessel.
Use the up / down buttons to adjust the
position of the light to the desired number.
Use the right button to move to the next
light.
The next light will start to flash a color
sequence of “Blue , Green and Red”
Use the up / down arrow to change the light
position of this light to match its position on
the vessel.
Repeat these steps until all lights have been
assigned the correct position.
Once each light has had a position
allocated press the Select button to save
the settings.
Light Setup is now Complete!