EasyManua.ls Logo

Lund AVS Bugflector User Manual

Lund AVS Bugflector
9 pages
To Next Page IconTo Next Page
Page #1 background imageLoading...
Page #1 background image
Page 1 of 3
Bugector
®
- Bugector II
®
- Carector
®
- Chrome Hood Shield
Preparation Before Painting / Installation
• A trial fit is recommended to ensure proper positioning and fit.
• Check fit of parts before painting as we will not accept the return of modified or painted parts.
• Wash and dry your vehicle to remove any debris and/or dirt from the installation area.
Installation Steps
NOTE: Actual application may vary slightly from illustrations.
Open hood.
Locate (3) square holes on underside of hood.
Clean TowelCar Wash Supplies Phillips Screwdriver Tape
Bump Ons x4
Hood shield
Tools Required
Hood Insert x3 Washer x3Screws x3
Machine Screw x2 Black Plastic Washer x2 Protective Film x2Bracket x2
Important Safety Information
• CAUTION - Before driving, ensure that the hood shield is properly secured to vehicle.
• Do not use automatic “brush-style” car washes.
• Do not use cleaning solvents of any kind.
• Periodically check all components for tightness.
NOTE: Actual product may vary from illustration.
Contents
Installation Instructions
I - Sheet Number BF126 Rev.A
For proper installation and best possible fit, please read all instructions BEFORE you begin.
For technical assistance or to obtain missing parts, please call Customer Relations at 1-800-241-7219.
Grease pencil
1
2
Question and Answer IconNeed help?

Do you have a question about the Lund AVS Bugflector and is the answer not in the manual?

Lund AVS Bugflector Specifications

General IconGeneral
MaterialAcrylic
ColorSmoke
CompatibilityVehicle Specific
FunctionProtects hood from bugs and debris
InstallationNo Drilling Required (most models)

Summary

Important Safety Information

Safety Precautions

Key safety warnings and cautions for vehicle operation and product use.

Tools Required

Preparation Before Painting / Installation

Installation Steps

Hood Preparation and Insert Installation

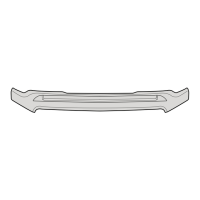
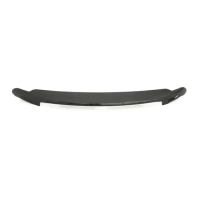
Prepare the hood by opening it and locating mounting holes for initial component fitting.

Hood Shield Alignment and Marking

Align hood shield, mark locations for protective film, and prepare for bracket attachment.

Bracket and Protective Film Installation

Attach brackets to the hood shield and apply protective film to the hood for precise placement.

Securing Hood Shield and Final Fastening

Position and secure the hood shield with screws, ensuring proper alignment and avoiding over-tightening.

Final Component Attachment

Slide brackets over the hood edge and install bump ons on the painted hood surface.

Care and Cleaning

Related product manuals