Application Note #489
7 Technical Support — 800.523.9466
Dual-Circuit Sensing Switch Programming
Important note before programming:
All programming modes except for "Timeout" will require that you remove the faceplate before programming, to gain
access to the programming buttons.
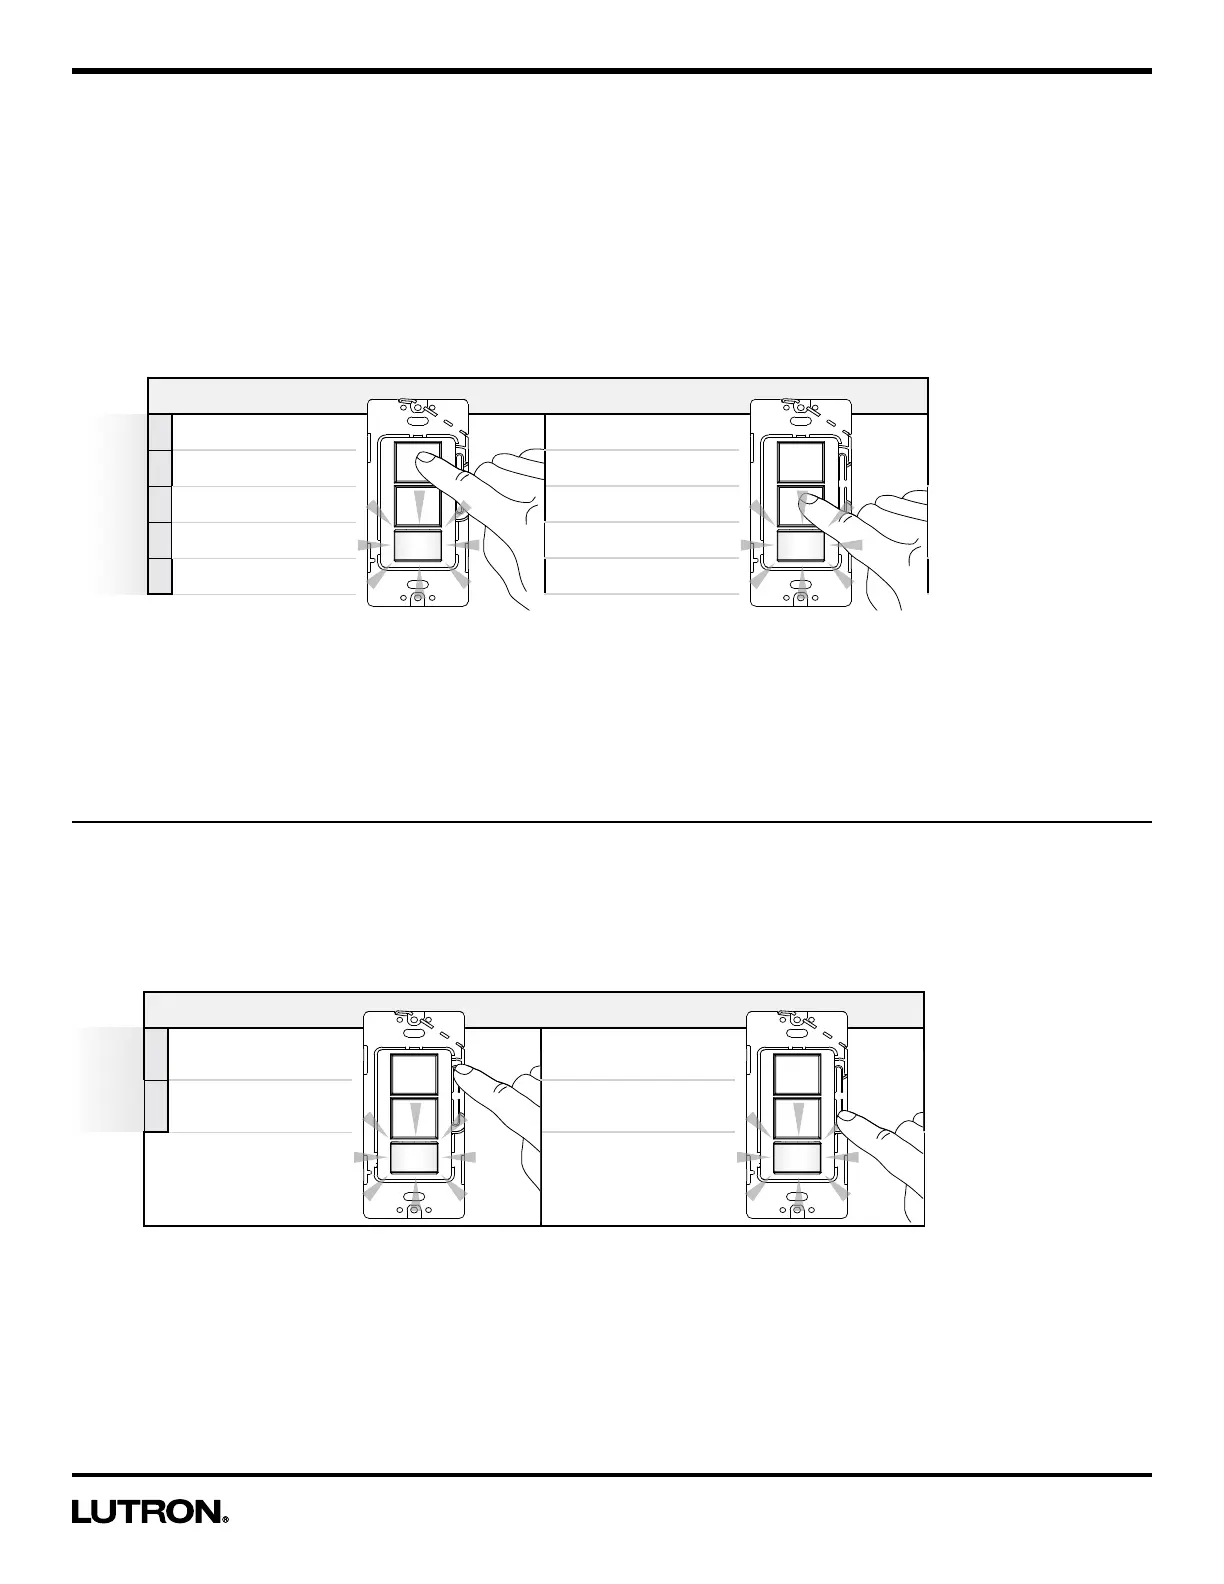
Selecting a Timeout Duration
1. Hold the Tap button of the desired circuit to adjust the Timeout for that circuit.
2. Count the number of times the lens flashes and release the button after the desired Timeout setting has been reached.
Note on Shortcut: If the desired Timeout for both circuits is identical, both Tap buttons may be held to program the
Timeout on both circuits simultaneously.
*
Test Mode is a temporary, short Timeout (less than 15-seconds) that can be used to test the sensor’s coverage. After
entering test mode, the device will exit test mode automatically after 5 minutes, or when any button is pressed. If no
motion is detected, the light will turn off. If motion is detected, the light will turn on and continue to stay on for as long
as motion is detected. The lens will flash periodically, indicating that motion has been detected.
Timeout
Total
number
of
flashes
1
Test Mode * Test Mode *
2
1 minute
1 minute
3 5 minutes 5 minutes
4 15 minutes 15 minutes
5
30 minutes 30 minutes
Circuit 1 Circuit 2
Selecting a Sensor Mode
1. Hold the programming button that corresponds with the appropriate circuit (top programming button corresponds with
Circuit 1, bottom programming button corresponds to Circuit 2).
2. Count the number of times the lens flashes and release the button after the desired sensor mode has been selected.
Note: Holding both programming buttons simultaneously will NOT speed up programming. This is the method for
programming "Advanced Auto-ON Modes" (see page 8).
Default Settings: Auto-ON / Auto-OFF for Circuit 1; Manual-ON / Auto-OFF for Circuit 2. If you have purchased an
MS-PPS6-DDV-XX model ("Partial-ON"), your sensor modes are locked. If you wish to change lighting zone assignments,
please see "Swapping Zone Assignments" on page 9.
Sensor Mode
Total
number
of
flashes
1
Auto-ON/Auto-OFF
(Occupancy mode)
Auto-ON/Auto-OFF
(Occupancy mode)
2
Manual-ON/Auto-OFF
(Vacancy mode)
Manual-ON/Auto-OFF
(Vacancy mode)
Circuit 1 Circuit 2