Colibri II – Flight recorder and navigation instrument Page 24
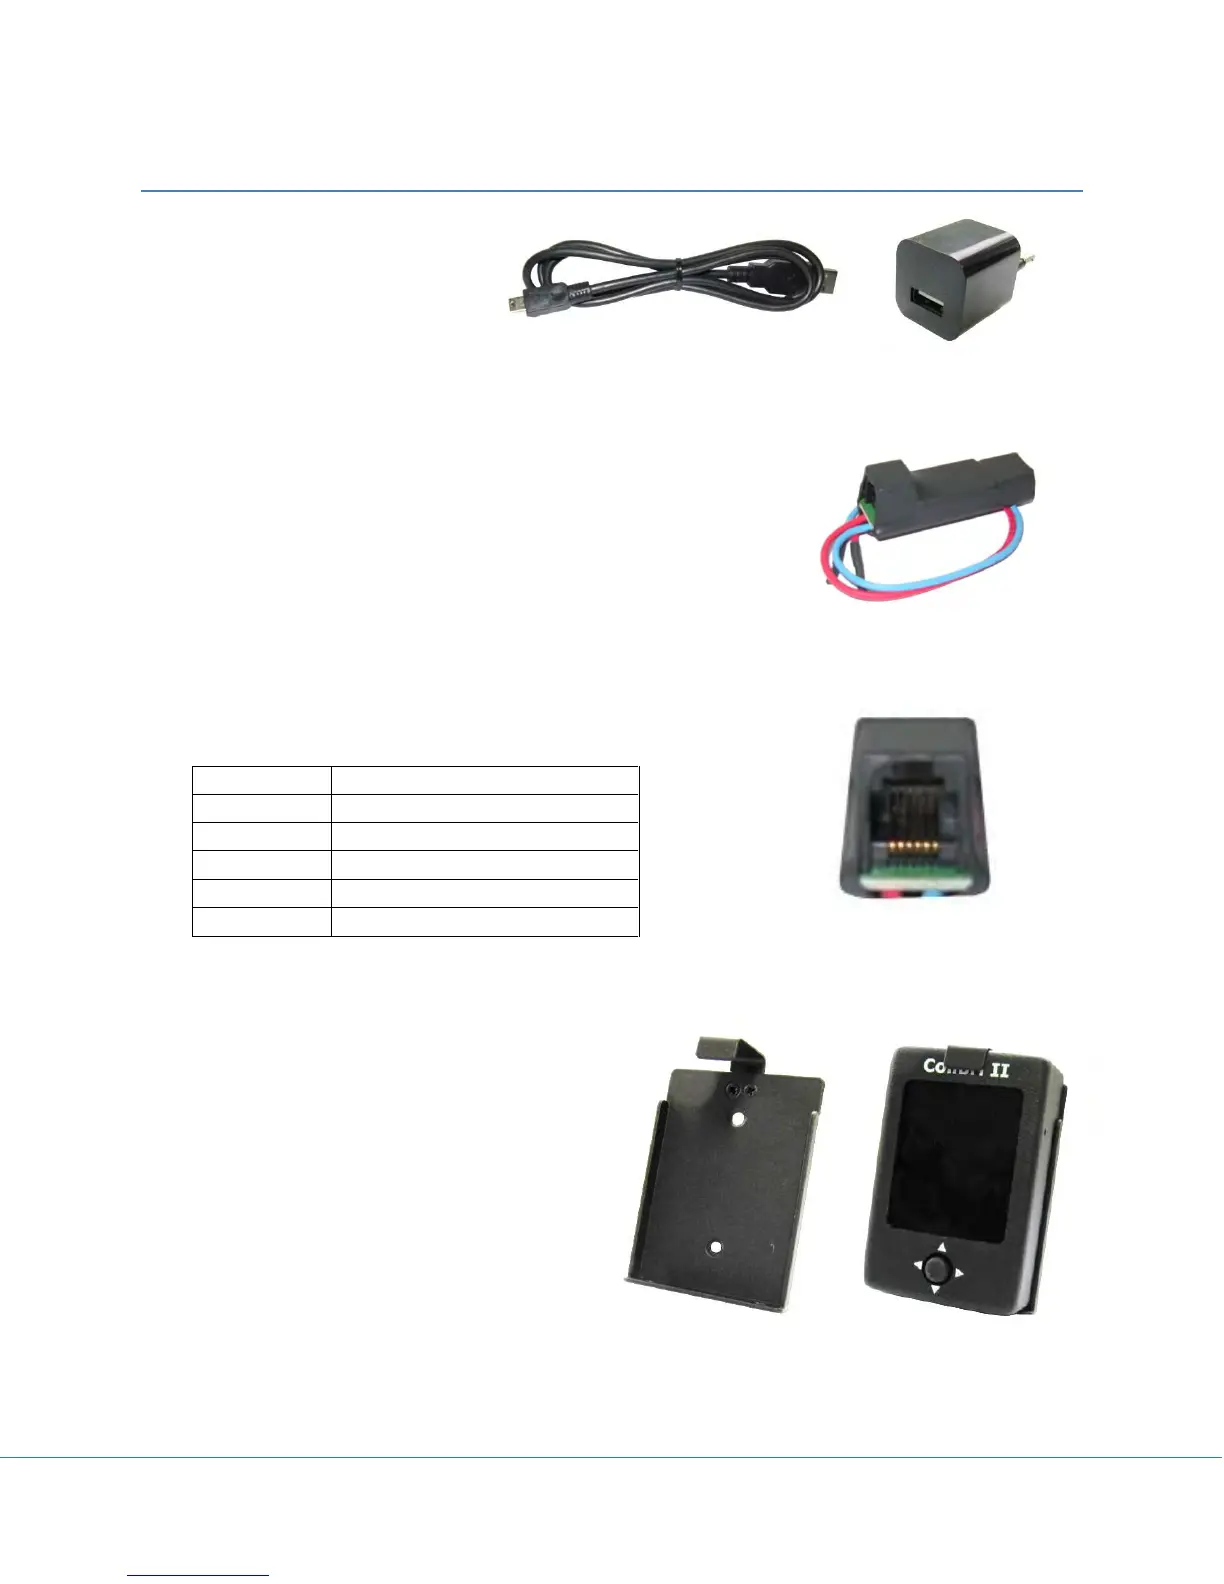
List of standard parts and options
-Colibri II unit with built in battery
-USB Mini B to USB A cable
-Wall charger (220V to 5V)
-Manual
Options
Colibri II power and data interface
Colibri II power and data interface is a special unit that coverts 12V to
5V power supply for the Colibri II. It also converts TTL levels of serial
communication to RS232 levels. Maximum input voltage is 24V.
The unit has two plugs. On one side there is a standard USB A
connector. Use the included USB cable to connect the Colibri II on this side. On the other side is an RJ45
plug. This plug is a standard IGC 6-pin connector.
Pin out of RJ45 6-pin connector:
Pin number: 1 2 3 4 5 6
Optional mounting frame
A suitable mounting frame with snap in effect
can be delivered as an option; use of this option
makes installation of the Colibri II easy.
Data out – output (RS232)
 Loading...