Page 10
2.1.5. Lighting Procedure (Total Control)
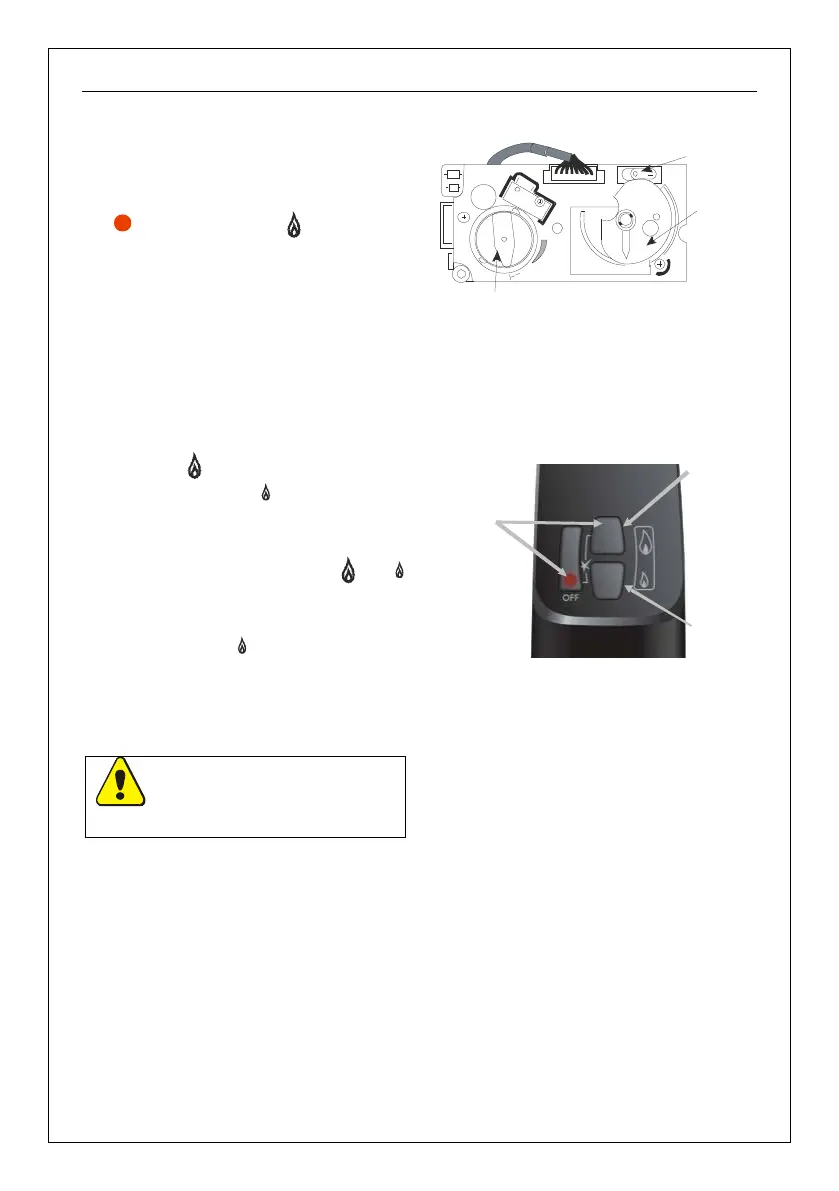
1. Ensure that gas is available at the valve
and the ON/OFF switch in the ON
position (–). (See Figure 14).
2. Simultaneously press and hold the
(red circle) and (large flame)
buttons until a short acoustic signal
confirms the start sequence has begun,
then release the buttons (see Figure
15).
3. Continuing signals confirm the ignition is
in process. Once the pilot is lit the gas
rate adjusting knob automatically
turns to high gas rate. The main
burner cross-lights from the pilot.
4. To adjust the gas rate to desired setting
press the (large flame) to increase the
flame height or (small flame) to
decrease the flame height on the
handset (see Figure 15).
5. For fine adjustment tap the or
buttons.
6. To leave the burner in the standby
mode press the (small flame) until the
main burner goes out. In the standby
mode the pilot stays alight.
7. To turn off the main burner and the pilot
press the ‘OFF’ button on the hand set.
WARNING: Ensure that the fire
is operated only whilst present
in the room where it is fitted.
Manual
Knob
Gas Rate
Adjusting
ON/OFF Switch
N
O
MAN
O
N
O
F
F
Figure 14
Press
these two
buttons
together to
light the
burner
use this
button to
increase
gas rate
Once lit
use this
button to
decrease
gas rate
Figure 15