Operation Manual
touchTymp MI 26
and
MI 36
Version
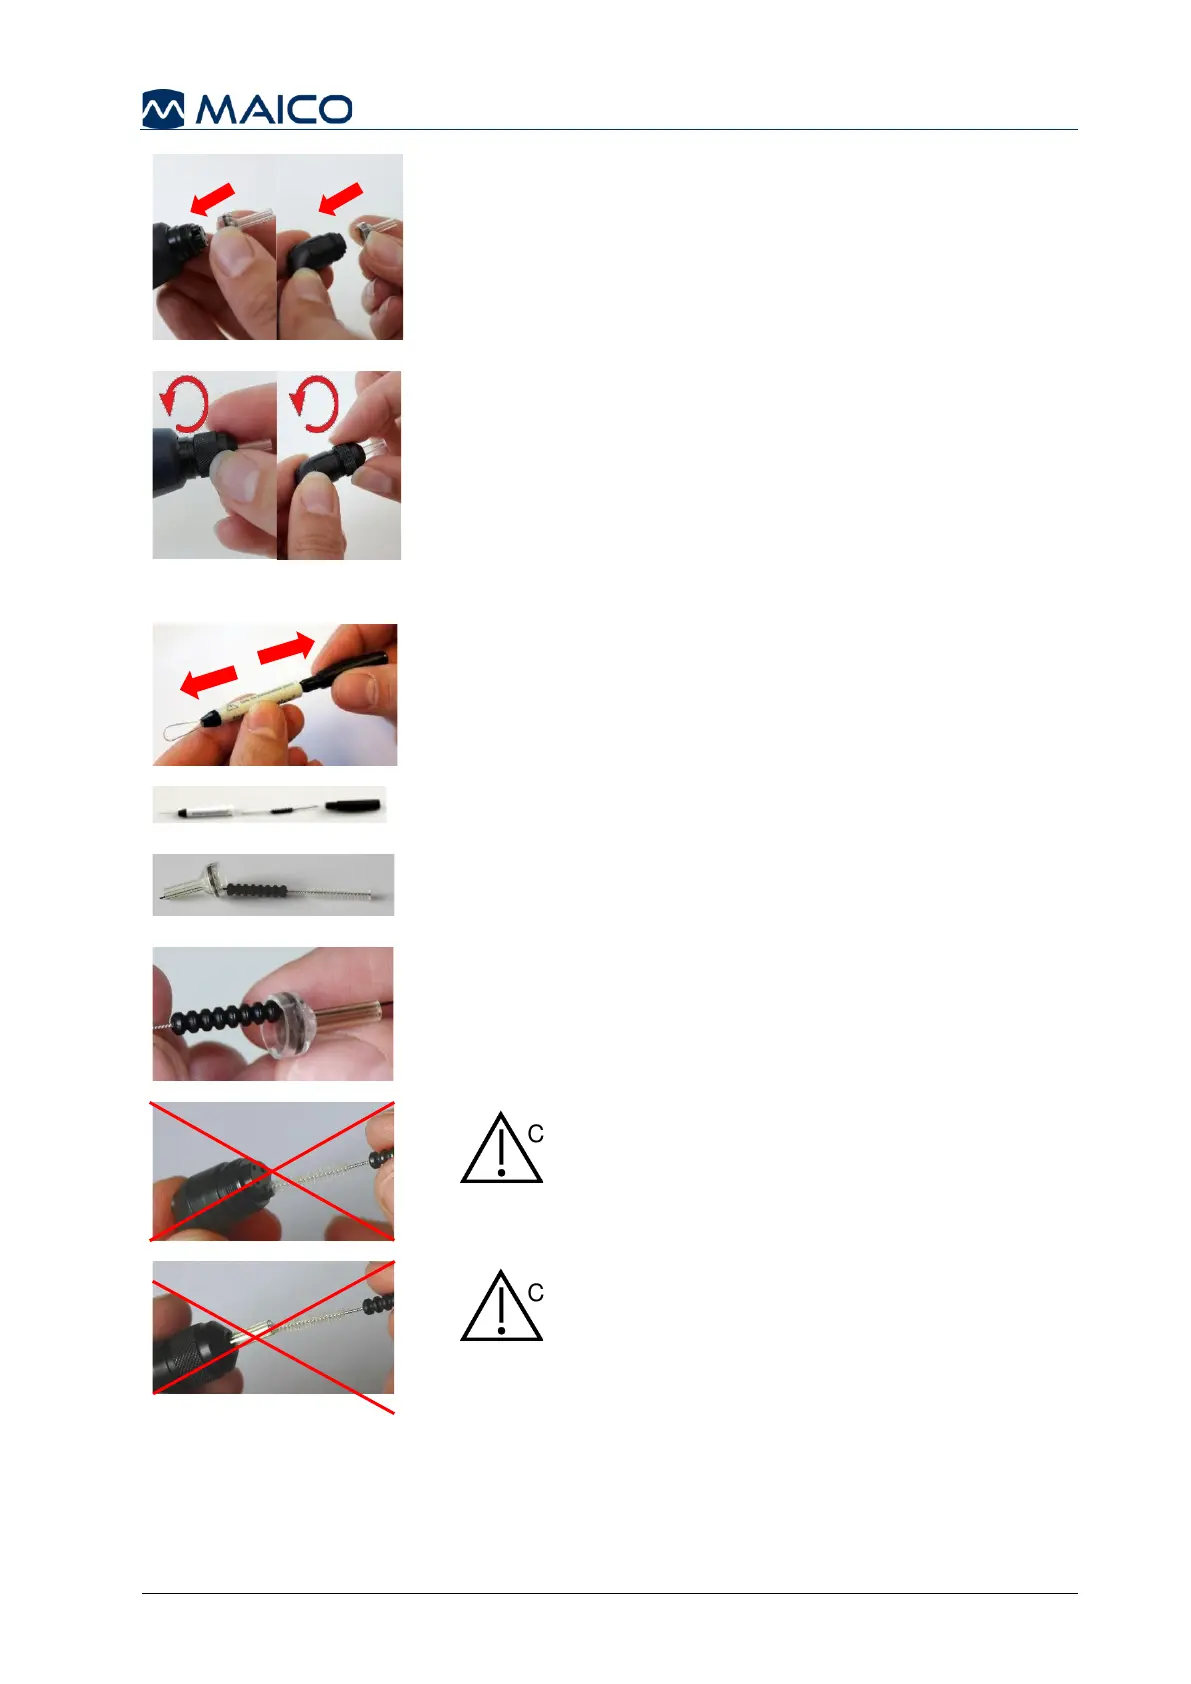
Place the probe tip back onto the probe. Make sure that
the plastic pegs are inserted into the appropriate
corresponding cavities (Figure 6).
Screw the probe cap back on the probe (Figure 7). The
force of tightening the cap will tighten the screw
sufficiently. Never use tools to fix the probe cap!
If any blockage or damage occurs to the sealing gasket,
the probe system can only be serviced by MAICO.
Use the cleaning set from the eartip box (Figure 8): Take
the cleaning tool apart to find the thin brush and thin rigid
plastic cord (Figure 9).
Use the plastic cord or brush to push debris out of the
probe tip (Figure 10).
Always enter the probe tip from the rear to avoid
accumulation of debris inside the vents (Figure 11).
Never clean the probe itself with
the cleaning devices. The probe
will be damaged (Figure 12).
Never clean the probe tip while
the tip is still attached. The probe
will be damaged (Figure 13).
 Loading...