Operation Manual
touchTymp MI 26
and
MI 36
Version
5.5 Audiometry Testing
5.5.1 General – Audiometry
The following sections 5.5.2 to 5.5.5 offer information about testing with the Audiometry module.
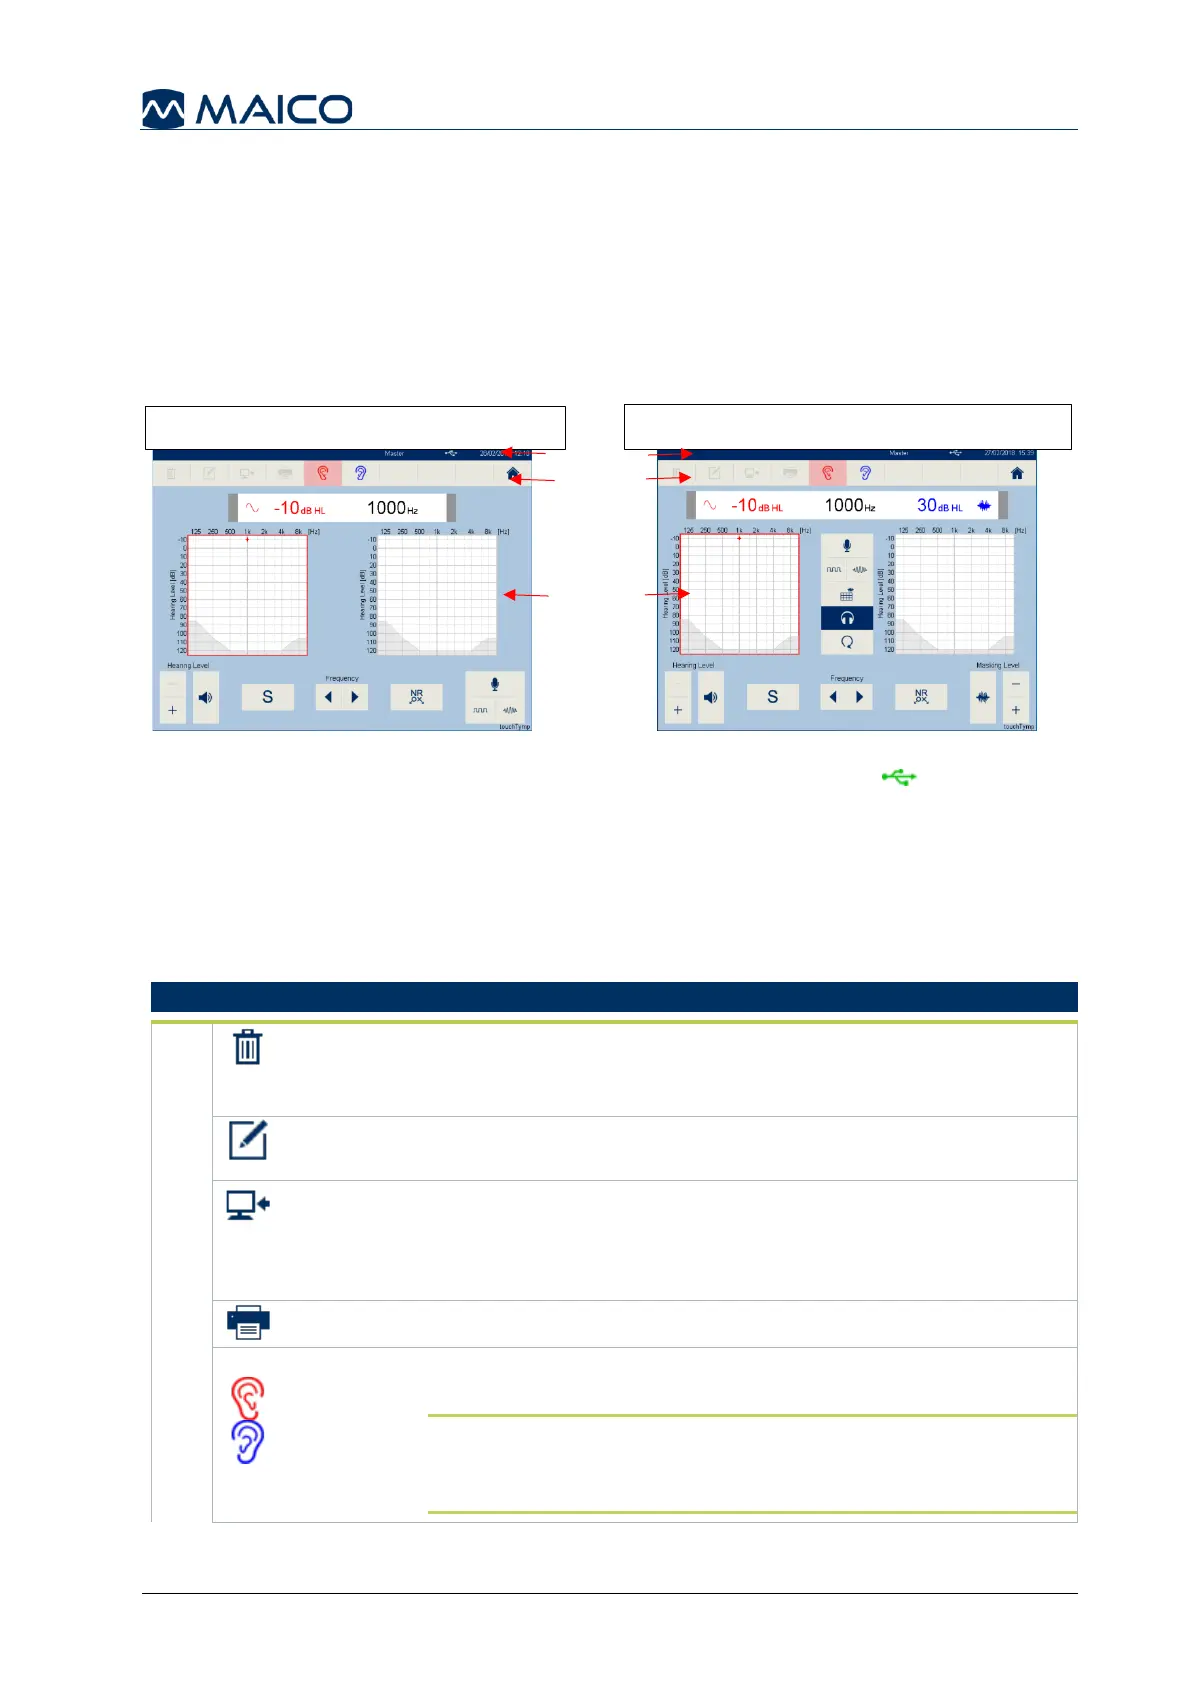
5.5.2 The Screen Format – Audiometry
The appearance of the Audiometry screen depends on the purchased device version
(MI 26 Air Conduction only – Figure 84, MI 26 with Bone Conduction and MI 26 – Figure
85). It includes the Status Bar, the Tool Bar and the Main Screen Display.
Status Bar: displays the Date/Time and the status of PC-connection (highlighted
green if connected to PC-software and Module is running).
Tool Bar: A row of buttons that activate key functions when selected. Some buttons in
the toolbar will be ghosted when not useable. These buttons will change based on test
or setting screen visible.
The available buttons for the Tool Bar include (Table 12):
Table 12 Icons in the Tool Bar
Delete: to delete the stored measurements. Select the button
and a message box will appear to confirm which test modules
to delete or select all.
Edit (only for Audiometry test screen): to edit Audiometry
results. See section 5.5.5.7 for more information.
Transfer to PC: to transfer the currently measured data.
Dependent on the measurement (right, left or both ears) all data
of the measurement completed will be transferred. Only the test
results of the currently selected probe tone will be transferred.
Print: to print the results of all completed tests and of all probe tones.
Ear: to select an ear for testing or repeating the measurement
on the same ear (Blue = Left Ear, Red = Right Ear).
NOTE: The ear can be selected in different ways. Use the
ear buttons on the screen or the Probe button to change the
ear. Also, you can touch the left or right diagram.
MI 26 with Bone Conduction and MI 36
MI 26 Air Conduction only
 Loading...