5.5.5.6 Transferring Test Results to PC
Before transferring data to a PC make sure that you have installed the PC software
properly according to the separately delivered operation manual. Before establishing
the PC connection you will have to consider the recommendations given in section
4.2.4 in case the touchTymp is connected to a non-medical device.
If the PC connection is properly established, the connection icon in the status bar will
be highlighted green. To transfer the data to the PC, touch the Transfer to PC button.
This will only transfer audiometry results as a separate PC module is required for immittance
results. Review section 5.7.6 for Transferring Test Results to PC for Immittance.
5.5.5.7 Editing Test Results
Stored results can be edited by the Edit button within the tool bar. When this button
is selected, the device is in edit mode with limited device operation.
To delete a stored response, select the ear, frequency and transducer before selecting
Delete point . The stored result will be deleted.
To return to standard device function, select the Edit button from the tool bar.
5.6 Settings
5.6.1 General
The touchTymp has an extensive setting menu to tailor the device to a user needs.
The review of all settings is discussed in this section. Some settings might not be
available based on the licenses activated in your system.
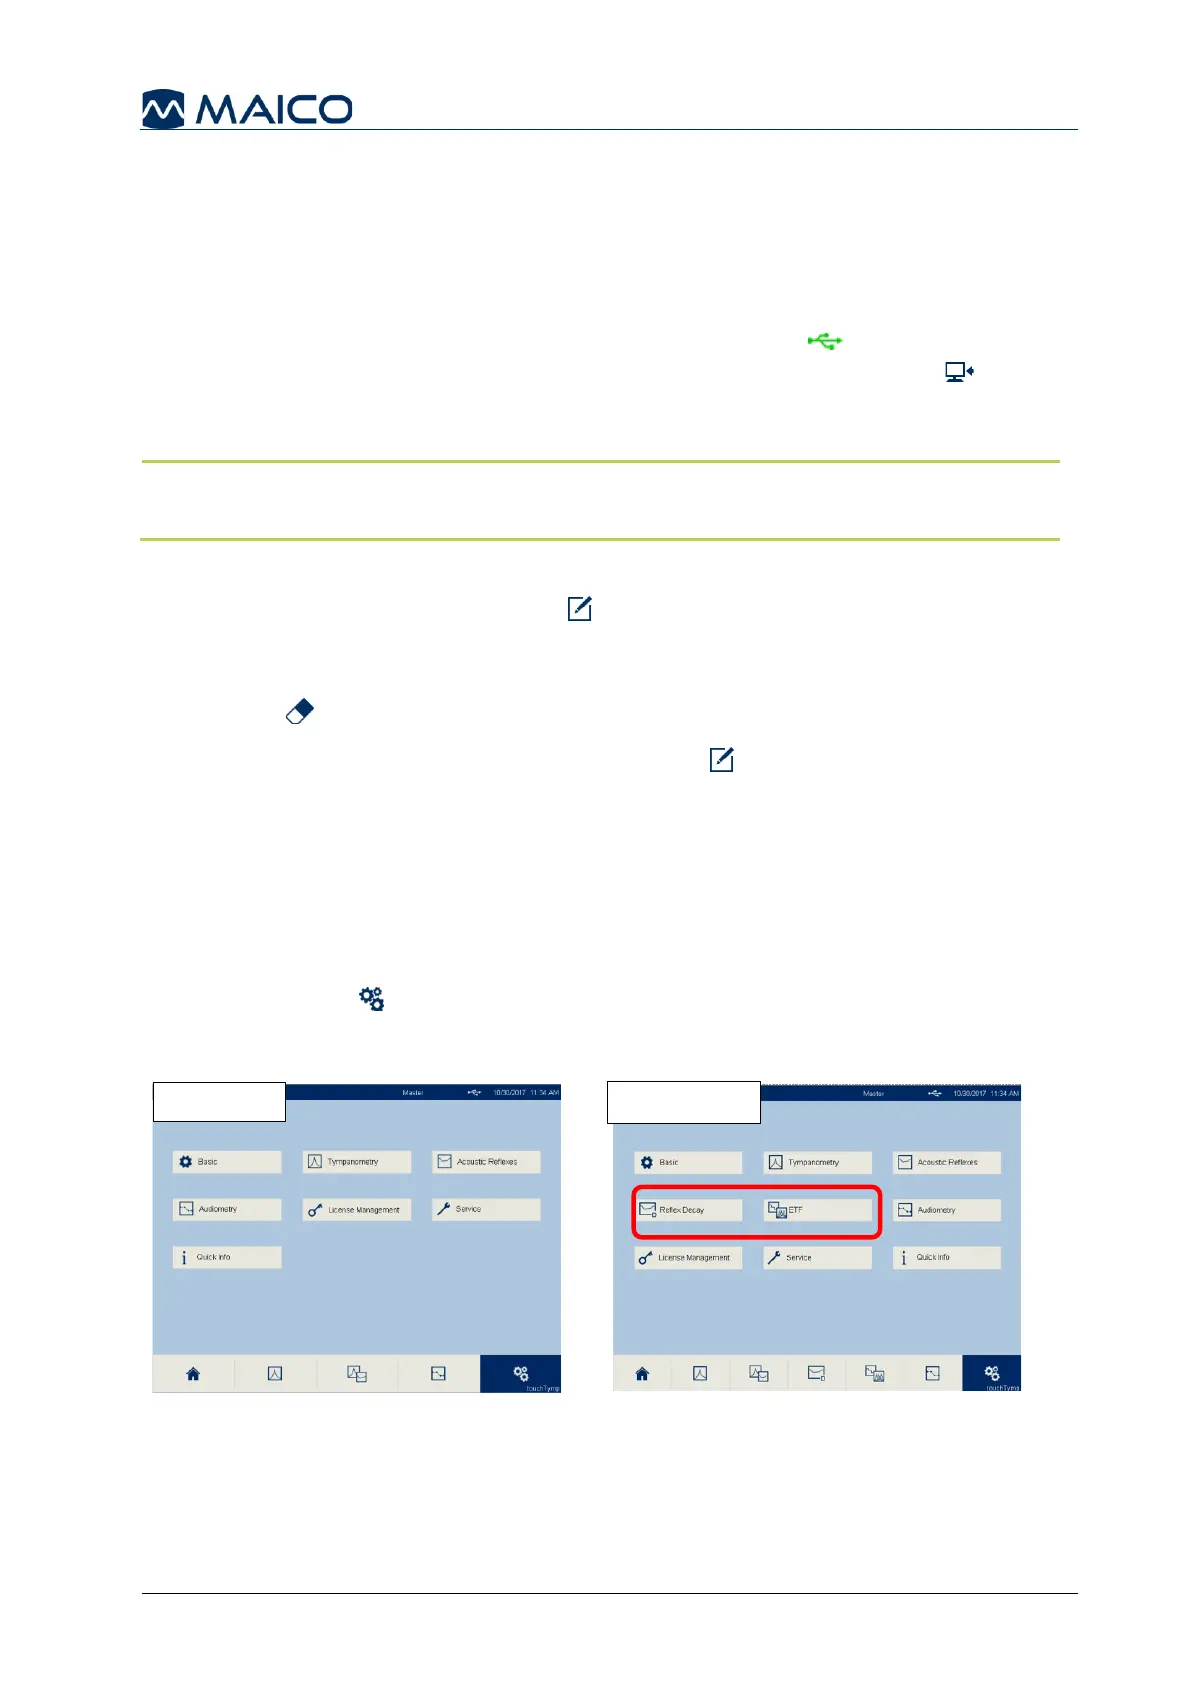
Select the Settings button in the Fixed Function Bar to access the list of setting
menus. MI 36 version offers two additional menus: Reflex Decay and ETF (MI 26 –
Figure 97, MI 36 – Figure 98).
 Loading...