P 5/ 12
Fig. 8
DISASSEMBLING
(1) Remove Drill chuck as drawn in Figs. 1 an 2.
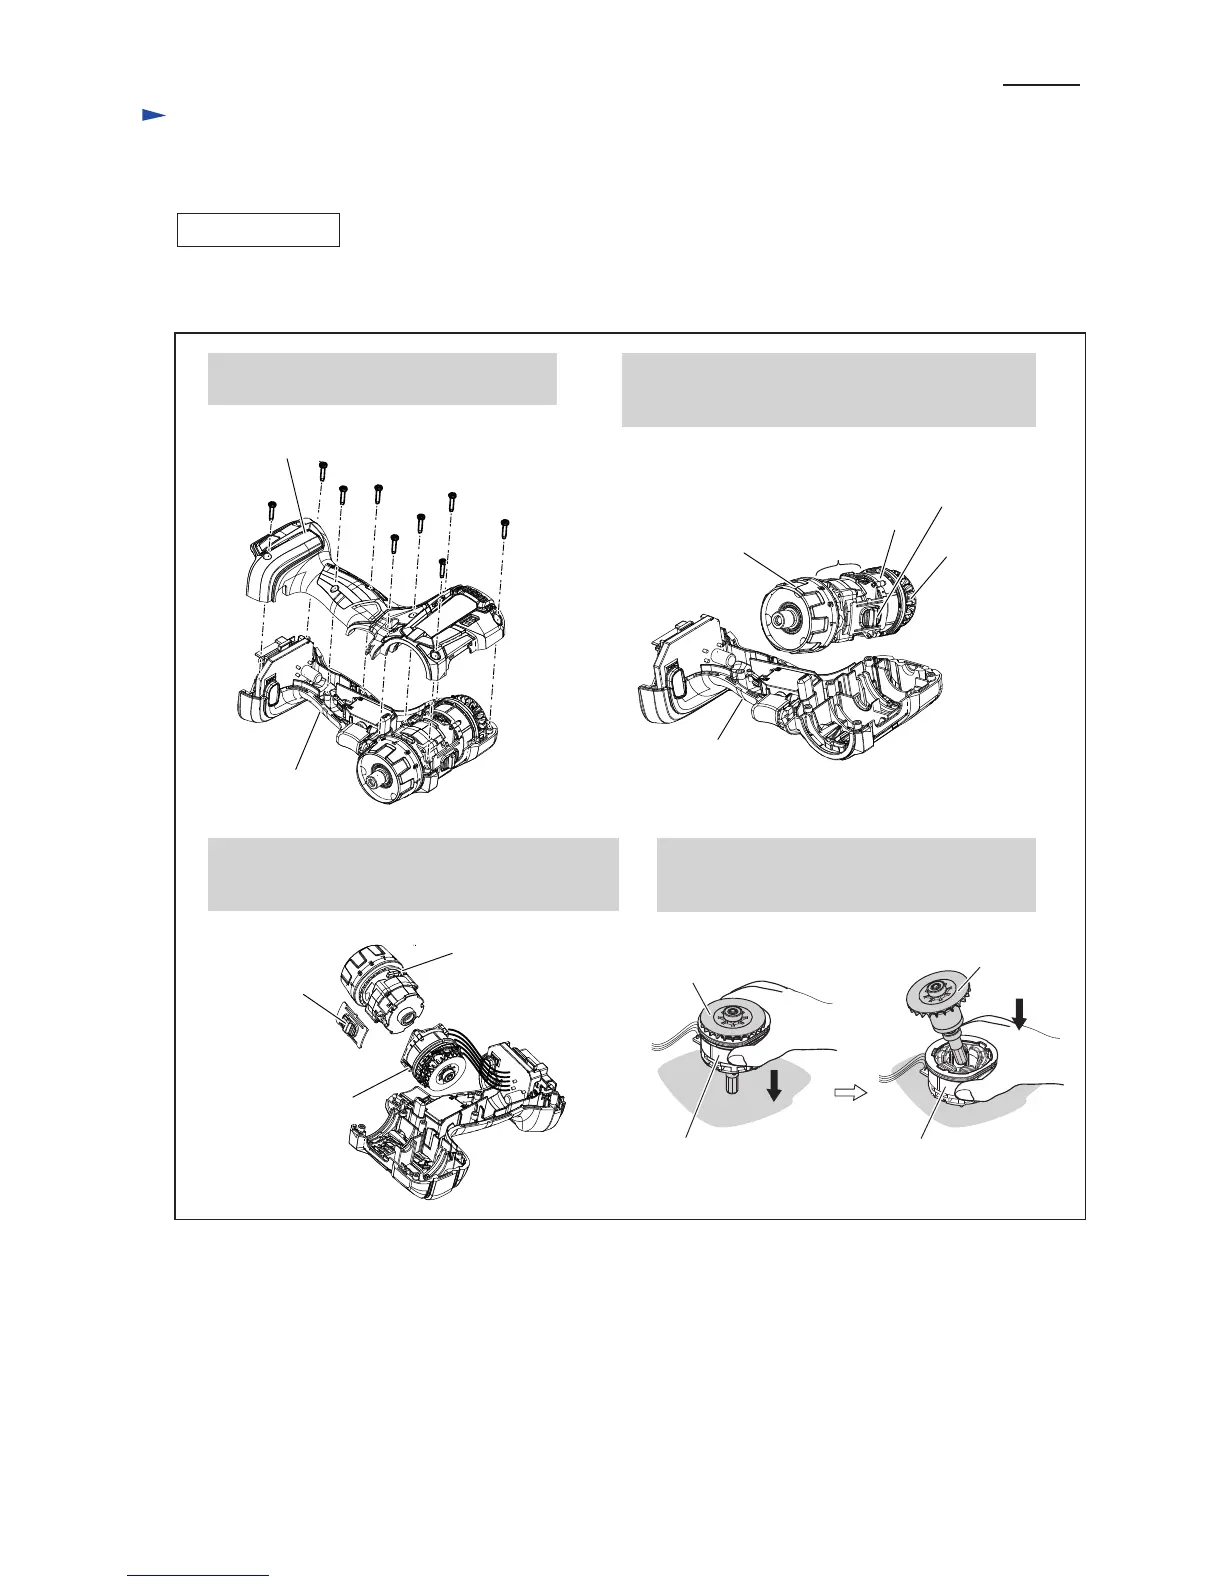
(2) Disassemble Gear assembly as drawn in Fig. 8.
1. By unscrewing nine 3x16 tapping screws,
remove Housing R from Housing L.
2. Remove Gear assembly section (Gear assembly,
Change ring, Speed change lever) and Motor
section (Rotor and Stator) from Housing L.
Housing R
3x16 Tapping screw
(9 pcs.)
Change ring
Stator
Rotor
Gear assembly
Speed
change lever
Housing L
Housing L
Repair
[3] DISASSEMBLY/ASSEMBLY
[3] -2. Rotor, Gear assembly
3. Remove Speed change lever from Gear assembly.
Note: Be careful not to lose Compression spring 4.
4. Separate Gear assembly from Motor section.
Gear
assembly
Motor section
Speed
change lever
5. Put Rotor section on a workbench so that
the drive end of Rotor touches the workbench.
Press Stator down to separate it from Rotor.
Stator Stator
Rotor
Rotor
 Loading...