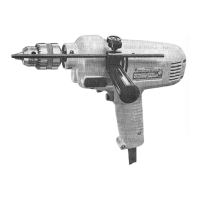
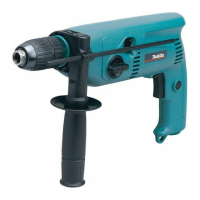
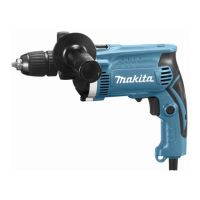
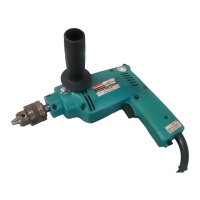
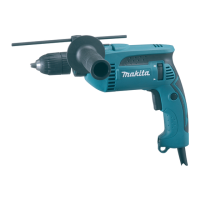
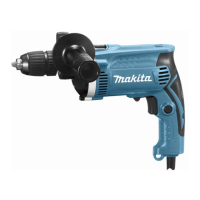
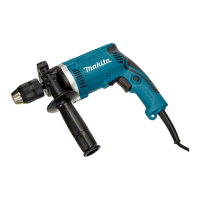
The Makita 2-Speed Hammer Drill, Model HP1310, is a versatile power tool designed for drilling in various materials, including concrete, granite, tile, wood, metal, and plastic. It features both rotation with hammering and rotation-only modes, making it suitable for a wide range of applications. The drill is equipped with variable speed and reversing capabilities, enhancing its adaptability and control during operation.
Function Description
The primary function of this device is drilling. It offers two main action modes:
- Rotation with hammering: This mode is specifically designed for drilling into hard materials such as concrete, granite, and tile. When operating in this mode, the drill bit not only rotates but also delivers rapid hammer blows, allowing it to penetrate tough surfaces more effectively. For optimal performance in this mode, a concrete and masonry drilling bit should be used.
- Rotation only: This mode is ideal for drilling in softer materials like wood, metal, and plastic. In this mode, the drill bit solely rotates without the hammering action. A conventional bit suitable for the specific material being drilled should be employed.
The drill's 2-speed gearbox allows users to select between "LO" (low speed) and "HI" (high speed) settings, providing greater control and torque depending on the task at hand. The variable speed trigger enables further fine-tuning of the rotation speed based on the pressure applied. A speed control screw is also provided to limit the maximum tool speed, offering an additional layer of control for precise work. The reversing switch lever allows for clockwise ("F") and counterclockwise ("R") rotation, which is useful for backing out stuck bits or driving/removing screws.
Usage Features
The Makita HP1310 incorporates several features to enhance user experience and safety:
- Side Grip (Auxiliary Handle): An auxiliary handle, or side grip, can be securely screwed onto the tool. This feature is crucial for maintaining a firm grip with both hands, especially during hammer drilling or when encountering resistance, thereby improving stability and control.
- Action Mode Selection: A knob on the tool allows for easy selection between the rotation with hammering mode (indicated by a small diamond marking) and the rotation-only mode (also indicated by a small diamond marking, but in a different position). Users must ensure the correct mode is selected for the material being drilled.
- Drill Bit Installation and Removal: Bits are installed by placing them into the chuck and tightening by hand, then further securing them with a chuck key inserted into each of the three holes. For removal, the chuck key is used counterclockwise in one hole, followed by loosening the chuck by hand. It is imperative to ensure the tool is switched off and unplugged before performing these actions.
- Adjusting Depth of Drilling: A depth gauge is included to control the drilling depth. Users can loosen a screw, adjust the gauge to the desired depth, and then tighten the screw to secure it.
- Speed Change Lever: A change lever allows users to switch between low ("LO") and high ("HI") speeds. If the lever does not slide easily, turning the chuck slightly in either direction can facilitate the change.
- Switch Action and Variable Speed: The tool is activated by pulling the trigger, and speed increases with trigger pressure. For continuous operation, the trigger can be pulled and then locked in place with a lock button. Releasing the trigger or pulling it fully from the locked position will stop the tool. A speed control screw allows for limiting the maximum speed.
- Hammer Drilling Operation: When hammer drilling, light pressure is recommended for best results. The tool should be kept in position to prevent slipping. If the hole becomes clogged, running the tool at idle and removing it several times can clear the debris.
- Drilling in Wood and Metal: For wood, drills with a guide screw are recommended. For metal, an indentation should be made with a center-punch and hammer before drilling to prevent the bit from slipping. A cutting lubricant is advised for most metals, except iron and brass, which should be drilled dry.
- Blow-out Bulb (Optional Accessory): An optional blow-out bulb can be used to clean out drilled holes, ensuring a clear path for the bit and removing debris.
- Sharpening Tungsten-Carbide Tip Bit: For dull tungsten-carbide bits, an optional wheel point accessory can be attached to the chuck. With the tool set to "rotation only" mode and the lock button engaged for continuous running, the tip can be ground. Users must maintain the original angles of the tip and avoid quenching the bit in water or oil, or grinding sides A and B, to prevent damage.
Maintenance Features
Proper maintenance is essential for the longevity and safe operation of the Makita HP1310:
- Pre-Maintenance Safety: Before any inspection or maintenance, the tool must always be switched off and unplugged to prevent accidental starting and electric shock.
- Carbon Brush Replacement: The tool will cease to operate when the carbon brushes wear down to a certain length. When this occurs, both carbon brushes must be replaced. This is a critical maintenance item for motor function.
- Authorized Service: For maintaining product safety and reliability, all repairs, carbon brush inspections, replacements, and any other maintenance or adjustments should be performed by Makita Authorized or Factory Service Centers. It is crucial to use only genuine Makita replacement parts to ensure compatibility and performance.
- Tool Cleanliness: Keeping the tool sharp and clean contributes to better and safer performance. Handles should be kept dry, clean, and free from oil and grease.
- Cord Inspection: Tool cords and extension cords should be inspected periodically. Any damaged cords should be repaired by an authorized service facility or replaced if necessary.