Do you have a question about the Makita HP1630K and is the answer not in the manual?
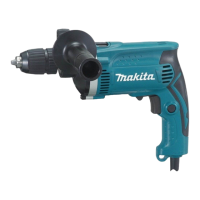
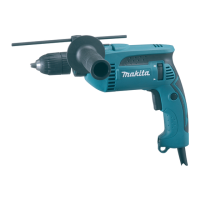
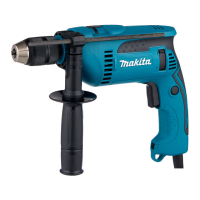
This document is an instruction manual for the Makita HP1630 and HP1631 Hammer Drills, providing essential information on their operation, maintenance, and safety.
The Makita Hammer Drill is a versatile power tool designed for both impact drilling and standard drilling operations. It is intended for impact drilling in materials such as brick, concrete, and stone, and for drilling without impact in wood, metal, ceramic, and plastic. The tool features a robust motor that delivers high rotational speed and blows per minute, making it suitable for a wide range of applications.
A key functional component is the reversing switch, which allows the user to change the direction of rotation. This is particularly useful for backing out stuck drill bits or for specific drilling tasks that require reverse rotation. The reversing switch has two positions: one for clockwise rotation (A side) and another for counterclockwise rotation (B side). It is crucial to ensure the tool comes to a complete stop before changing the direction of rotation to prevent damage.
The action mode change lever is another essential feature, enabling the user to select between two primary modes of operation: "rotation with hammering" and "rotation only." For impact drilling in hard materials like concrete, granite, and tile, the lever should be set to the "rotation with hammering" position. For drilling in softer materials such as wood, metal, or plastic, the "rotation only" mode is used. Proper selection of the action mode ensures optimal performance and prevents damage to the tool or workpiece. The lever must be fully engaged in the desired mode position; operating the tool with the lever halfway between modes can cause damage.
The tool is equipped with a switch trigger for controlling the power and speed. Pulling the switch trigger starts the tool, and the speed increases with greater pressure on the trigger. Releasing the trigger stops the tool. For continuous operation, the switch trigger can be locked in the "ON" position using the lock button, providing operator comfort during extended use. To stop the tool from the locked position, the trigger must be pulled fully and then released.
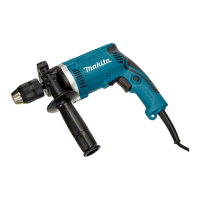
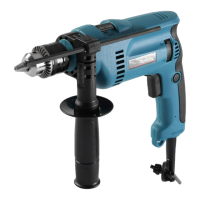
For safety and control, the hammer drill is designed for use with a side grip (auxiliary handle). This handle provides a firm grip, allowing the user to maintain control, especially during operations that involve significant torque or sudden twisting forces, such as when a drill bit breaks through a workpiece or encounters reinforcing rods. The side grip can be adjusted and secured at any desired position around the tool barrel.
The Makita Hammer Drill is designed for ease of use and adaptability to various drilling tasks.
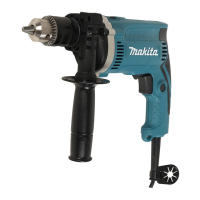
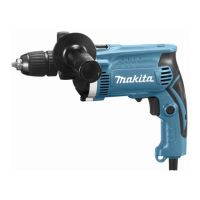
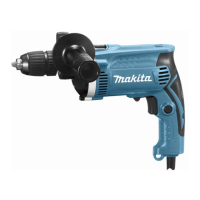
Installing and Removing Drill Bits: For models with a chuck key (HP1630), bits are installed by placing them into the chuck jaws, tightening the chuck by hand, and then securing it further using the chuck key in each of the three holes. Even tightening across all three holes is recommended. To remove a bit, the chuck key is used to loosen one hole counterclockwise, followed by hand-loosening the chuck. For models with a keyless chuck (HP1631), bit installation involves holding the ring and turning the sleeve counterclockwise to open the jaws. The bit is inserted as far as it will go, and then the ring is held firmly while turning the sleeve clockwise to tighten. Removal is the reverse process.
Depth Gauge: A depth gauge is provided for drilling holes of uniform depth. It is inserted into a hole in the side grip and adjusted to the desired depth, then secured by tightening the side grip. This feature helps achieve consistent drilling depths, which is particularly useful in repetitive tasks.
Hammer Drilling Operation: When performing hammer drilling, it is essential to use the side grip and hold the tool firmly with both hands (one on the side grip and one on the switch handle). The action mode change lever should be set to "rotation with hammering." A tungsten-carbide tipped bit is recommended for concrete, granite, and tile. Light pressure is advised for best results, and the tool should be kept steady to prevent slipping. If the hole becomes clogged with chips, the tool should be run at idle, and the bit partially removed to clear debris.
Drilling Operation (Rotation Only): For drilling in wood, metal, or plastic, the action mode change lever should be set to "rotation only." When drilling in wood, drills with a guide screw are beneficial as they pull the bit into the workpiece, making drilling easier. For metal drilling, a center-punch and hammer can be used to create an indentation to prevent the bit from slipping. A cutting lubricant is generally recommended for metals, with the exception of iron and brass, which should be drilled dry.
Preventing Accidents: Users are warned against excessive pressure during drilling, as it can damage the bit and shorten the tool's service life. The tool can exert tremendous twisting force upon breakthrough or when encountering obstructions, so a firm grip is crucial. If a bit gets stuck, the reversing switch can be used to back it out, but users should be prepared for abrupt movement. Small workpieces should always be secured in a vise or similar device.
Proper maintenance is crucial for ensuring the safety, reliability, and longevity of the Makita Hammer Drill.
General Maintenance: Before performing any inspection or maintenance, always ensure the tool is switched off and unplugged from the power source. This prevents accidental startup and potential injury. Regular maintenance, including repairs, carbon brush inspection and replacement, and any other adjustments, should be performed by Makita Authorized Service Centers. Only genuine Makita replacement parts should be used to maintain the tool's safety and performance standards. Handles should be kept dry, clean, and free from oil and grease to ensure a secure grip and prevent electrical hazards.
Accessories: The manual lists several recommended accessories that enhance the tool's functionality and safety:
Users are advised to only use accessories and attachments specified in the manual or recommended by Makita Service Centers. Using unauthorized accessories may pose a risk of injury or damage to the tool. For detailed information or assistance with accessories, users should contact their local Makita Service Center.
| No Load Speed | 0 - 3, 200 RPM |
|---|---|
| Max Torque | 40 Nm |
| Weight | 2.1 kg |
| Chuck Capacity | 1.5 - 13 mm |
| Max. Drilling Capacity in Steel | 13 mm |
| Max. Drilling Capacity in Wood | 30 mm |
| Max. Drilling Capacity in Masonry | 16 mm |
| Power Source | Corded Electric |
| Chuck Size | 1/2" (13mm) |
| Impact Rate | 0-44800 bpm |
| Impacts per Minute | 0-44800 bpm |