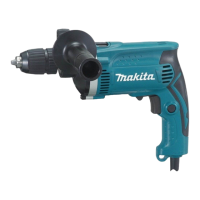
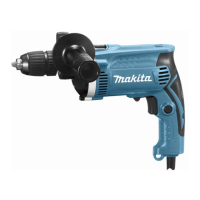
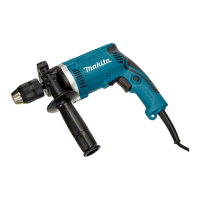
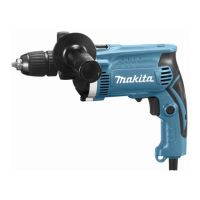
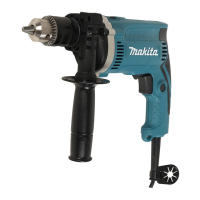
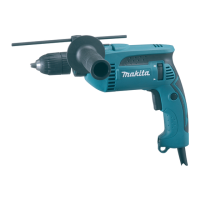
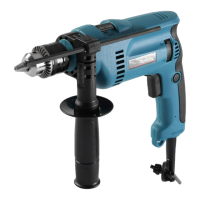
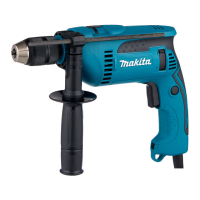
The Makita HP1630 and HP1631 are hammer drills designed for impact drilling in brick, concrete, and stone, as well as for drilling without impact in wood, metal, ceramic, and plastic. These tools are double-insulated, ensuring safety and allowing operation from sockets without an earth wire.
Technical Specifications:
Both models share many specifications, with minor differences primarily in overall length and net weight.
- Capacities:
- Concrete: 16 mm
- Steel: 13 mm
- Wood: 30 mm
- No load speed (min⁻¹): 0 - 3,200
- Blows per minute: 0 - 48,000
- Overall length:
- HP1630: 296 mm
- HP1631: 295 mm
- Net weight:
- HP1630: 2.1 kg
- HP1631: 2.0 kg
- Safety class: /II (Double Insulation)
- Noise Levels (A-weighted, determined according to EN60745):
- Sound pressure level (LPA): 97 dB (A)
- Sound power level (LWA): 108 dB (A)
- Uncertainty (K): 3 dB (A)
- Recommendation: Wear ear protection during operation.
- Vibration Total Value (tri-axial vector sum, determined according to EN60745):
- Work mode: impact drilling into concrete
- Vibration emission (aħ,ID): 17.0 m/s²
- Uncertainty (K): 1.5 m/s²
- Work mode: drilling into metal
- Vibration emission (aħ,D): 2.5 m/s²
- Uncertainty (K): 1.5 m/s²
The declared vibration emission values are measured according to standard test methods and can be used for comparing tools and for preliminary exposure assessment. However, actual vibration emission during use may vary depending on how the tool is used. It is crucial to identify safety measures based on an estimation of exposure in actual conditions, considering all parts of the operating cycle.
Function Description and Usage Features:
-
Switch Action:
- The tool is started by pulling the switch trigger. Speed increases with pressure on the trigger. Releasing the trigger stops the tool.
- For continuous operation, the switch trigger can be pulled and then locked into the "ON" position using the lock button. To stop from the locked position, pull the trigger fully and release it.
- Caution: Always ensure the switch trigger actuates properly and returns to "OFF" before plugging in the tool. Maintain a firm grasp when the tool is locked in "ON."
-
Reversing Switch Action:
- A reversing switch lever allows changing the direction of rotation.
- Move the lever to the ⇨ position (A side) for clockwise rotation or the ⇦ position (B side) for counterclockwise rotation.
- Caution: Always check the direction of rotation before operation. Only use the reversing switch after the tool has come to a complete stop to prevent damage.
-
Selecting the Action Mode:
- An action mode change lever allows switching between "rotation with hammering" (symbol) and "rotation only" (symbol).
- Slide the lever to the right for hammering and to the left for rotation only.
- Caution: Always slide the lever fully to the desired mode position. Operating the tool with the lever halfway between modes may cause damage.
-
Installing Side Grip (Auxiliary Handle):
- The side grip is essential for operating safety and must always be used.
- Install the side grip on the tool barrel and tighten it clockwise at the desired position. It can be swung 360° for optimal positioning.
- Note: The side grip cannot swing 360° when the depth gauge is installed.
-
Installing/Removing Drill Bit:
- For Model HP1630 (Chuck Key type): Insert the bit as far as it goes into the chuck. Tighten the chuck by hand, then use the chuck key in each of the three holes, tightening clockwise and ensuring all three are evenly secured. To remove, turn the chuck key counterclockwise in one hole, then loosen by hand.
- For Model HP1631 (Keyless Chuck type): Hold the ring and turn the sleeve counterclockwise to open the jaws. Insert the bit as far as it goes. Hold the ring firmly and turn the sleeve clockwise to tighten. To remove, hold the ring and turn the sleeve counterclockwise.
-
Depth Gauge (Optional Accessory):
- Useful for drilling holes of uniform depth. Loosen the side grip, insert the depth gauge into the hole in the side grip, adjust to the desired depth, and tighten the side grip.
- Note: The depth gauge cannot be used if it strikes against the tool body.
-
Hammer Drilling Operation:
- Caution: Always use the side grip and firmly hold the tool with both hands (side grip and switch handle) during operation. A sudden twisting force can occur during hole break-through, when clogged with chips, or when striking reinforcing rods. Loss of control can lead to severe injury.
- For concrete, granite, tile, etc., set the action mode lever to "rotation with hammering."
- Use a tungsten-carbide tipped bit.
- Position the bit, pull the trigger, and apply light pressure for best results. Keep the tool steady to prevent slipping.
- If the hole clogs, run the tool at idle and partially remove the bit. Repeat until the hole is clear.
-
Drilling Operation (Rotation Only):
- For wood, metal, or plastic, set the action mode lever to "rotation only."
- Drilling in wood: Wood drills with a guide screw are recommended as they pull the bit into the workpiece, making drilling easier.
- Drilling in metal: Use a center-punch and hammer to make an indentation before drilling to prevent the bit from slipping. Use a cutting lubricant for metals, except iron and brass which should be drilled dry.
- Caution: Excessive pressure will not speed up drilling; it will damage the bit, decrease performance, and shorten tool life. Hold the tool firmly when the bit begins to break through.
- A stuck bit can be removed by setting the reversing switch to reverse rotation, but hold the tool firmly as it may back out abruptly.
- Always secure small workpieces in a vise or similar hold-down device.
-
Blow-out Bulb (Optional Accessory):
- Used to clean dust out of drilled holes.
Maintenance Features:
- Caution: Always ensure the tool is switched off and unplugged before any inspection or maintenance.
- Never use gasoline, benzine, thinner, alcohol, or similar substances, as they can cause discoloration, deformation, or cracks.
- For product safety and reliability, all repairs, carbon brush inspection and replacement, and any other maintenance or adjustment should be performed by Makita Authorized Service Centers, using only genuine Makita replacement parts.
- Follow instructions for lubricating and changing accessories.
- Keep handles dry, clean, and free from oil and grease.
Optional Accessories:
Makita recommends using specific accessories or attachments with this tool to avoid injury. These include:
- Tungsten-carbide tipped hammer bit
- Blow-out bulb
- Safety goggles
- Keyless drill chuck 13
- Chuck key
- Grip assembly
- Depth gauge
Some of these items may be included as standard accessories, varying by country. For assistance or more details, contact your local Makita Service Center.