[3] DISASSEMBLY/ASSEMBLY
[3]-2. DC motor
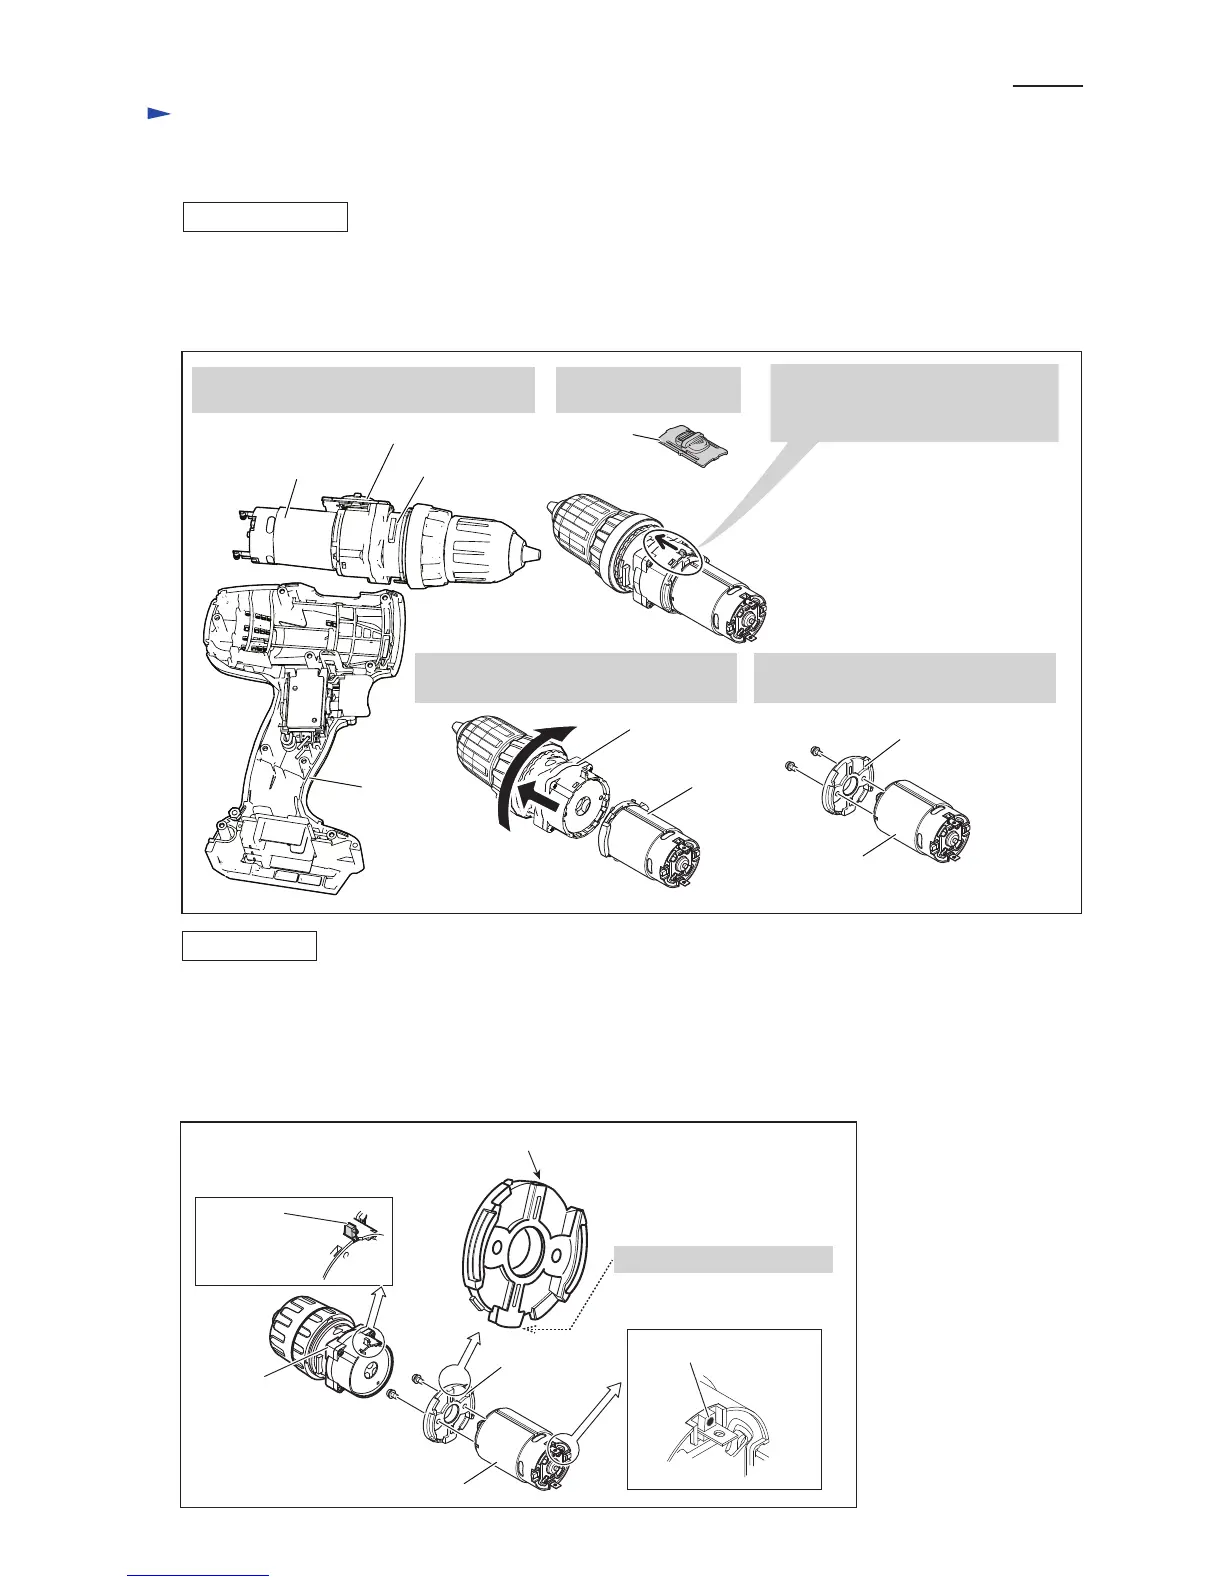
DISASSEMBLING
ASSEMBLING
It is not necessary to remove Drill chuck from Gear assembly when replacing DC motor.
(1) Remove nine 3x16 Tapping screws and Housing R from Housing L.
(2) DC motor can be replaced as drawn in Fig. 3.
Fig. 3
Fig. 4
1. Disassemble DC motor, Gear assembly
with Speed change lever from Housing L.
2. Disassemble Speed
change lever.
3. Slide the lever of Gear assembly
to Drill chuck side.
(Set the hook to low gear mode.)
DC motor
Gear assembly
Speed change lever
Housing L
Speed change
lever
4. Pull off Gear assembly while turning it
clockwise viewed from DC motor side.
5. Remove Motor bracket and two Pan
head screws from DC motor.
Gear assembly
DC motor
Motor bracket
DC motor
Motor bracket
DC motor
Do not face this projection.
red mark on DC motor
Gear assembly
Flat side (No projection side)
lever of
Gear assembly
Do the reverse of the disassembling steps.
The following portions of DC motor, Motor bracket and Gear assembly have to face the same side. (Fig. 4)
• red mark (designated as plus terminal) on DC motor
• flat side (No projection side) of Motor bracket
• lever of Gear assembly
Repair
P 3/ 6

 Loading...