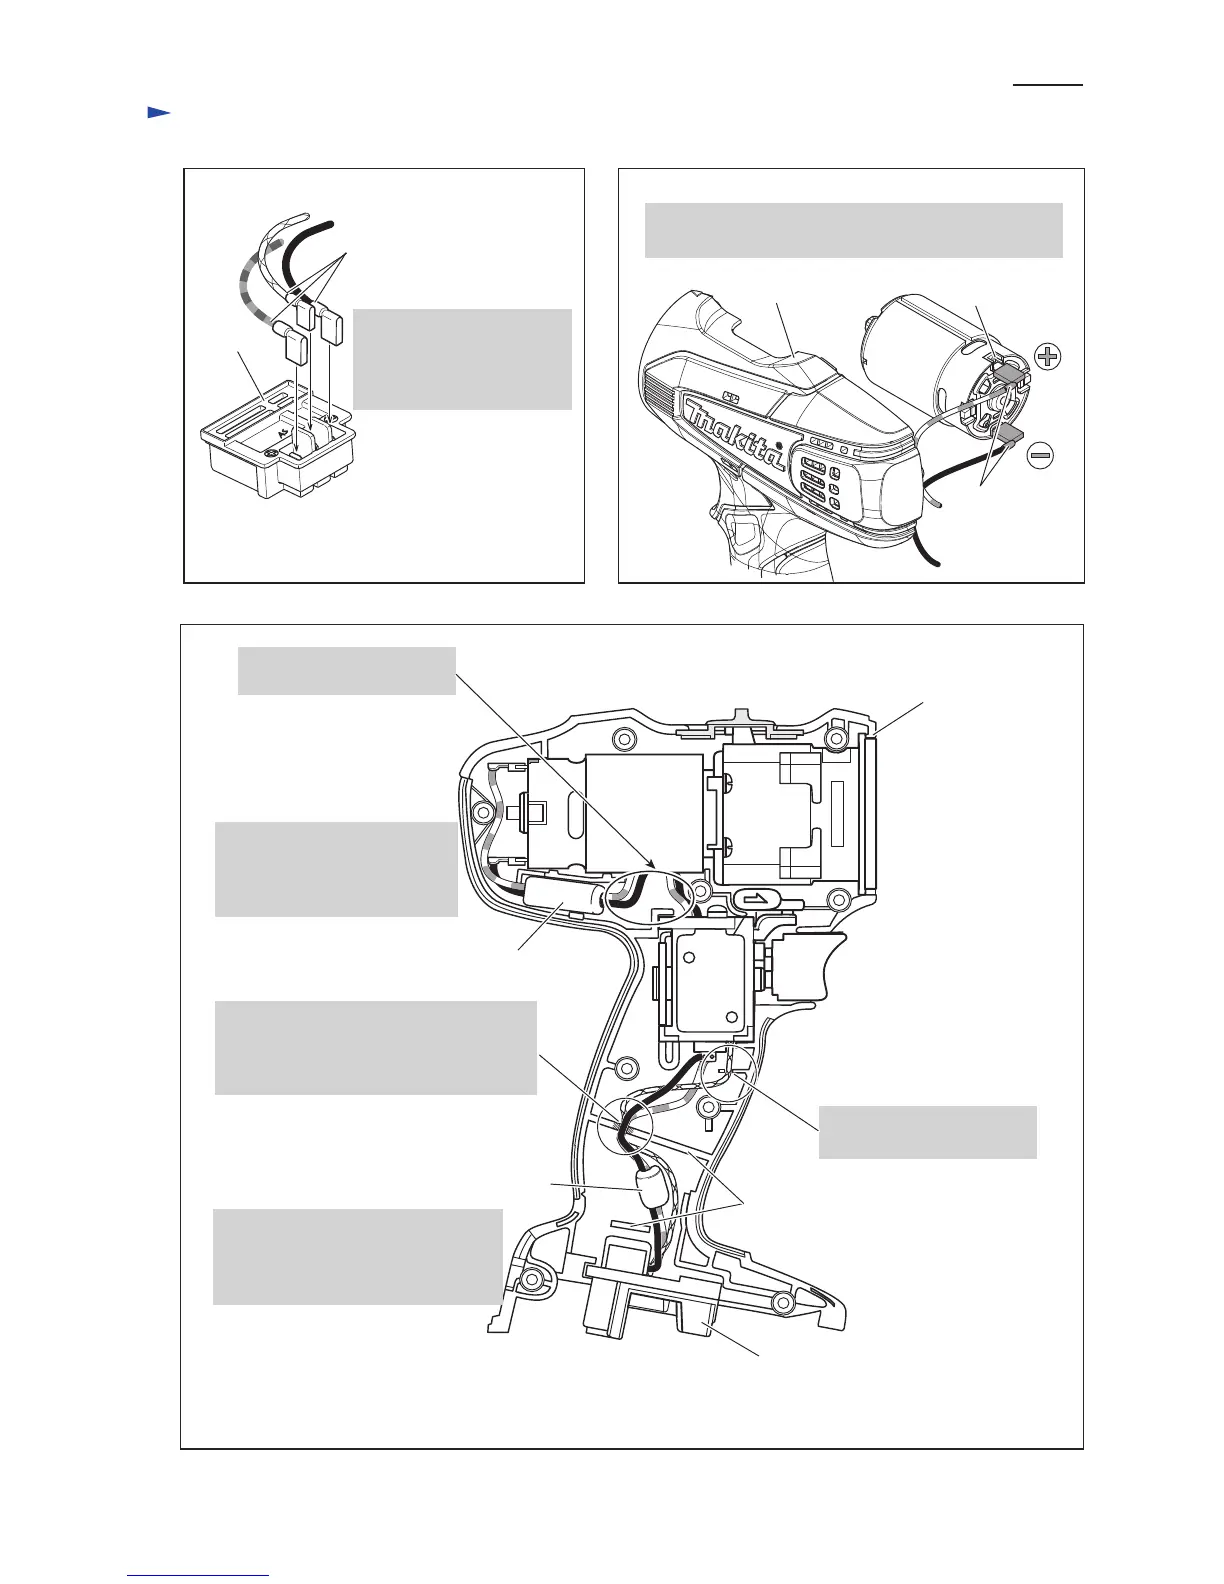
Wire connecting portions
of Flag receptacles
Connect Flag receptacles so that the wire connecting
portions face Housing L side.
Terminal
Connect Flag receptacles
so that the wire connecting
portions face +, - and AS
marks on Terminal.
Red markHousing L
Wire connecting
portions of
Flag receptacles
DC motor
Switch
Housing L
Ribs
Put the slacks of Lead wires
in this space.
Pass Lead wires (black, red)
through ø10-30mm Line filter,
and put the line filter as drawn
right.
Pass Lead wires (black, red) through
ø10-11 mm Line filter, and put
the line filter in the place between
Ribs.
Terminal
Line filter
(Diameter ø10-30 mm)
Line filter
(Diameter ø10-11 mm)
Fig. D-2
Fig. D-3
Fix Lead wires in Lead wire holder here.
Be sure to put Lead wire (yellow) to
the bottom and pile Lead wires (black,.
red) on it.
Fix the Lead wire (yellow)
in Lead wire holder here.
Note: Line fiters are not used for some countries.
Fig. D-4
Wiring diagram
P 6/ 6

 Loading...