12
arbor hole you intend to use is installed
between the inner and the outer flanges.
Use of
the incorrect arbor hole ring may result in the
improper mounting of the blade causing blade
movement and severe vibration resulting in
possible loss of control during operation and in
serious personal injury.
For European countries
CAUTION:
•
The ring 30 mm in outer diameter is factory-installed
between the inner and outer flanges.
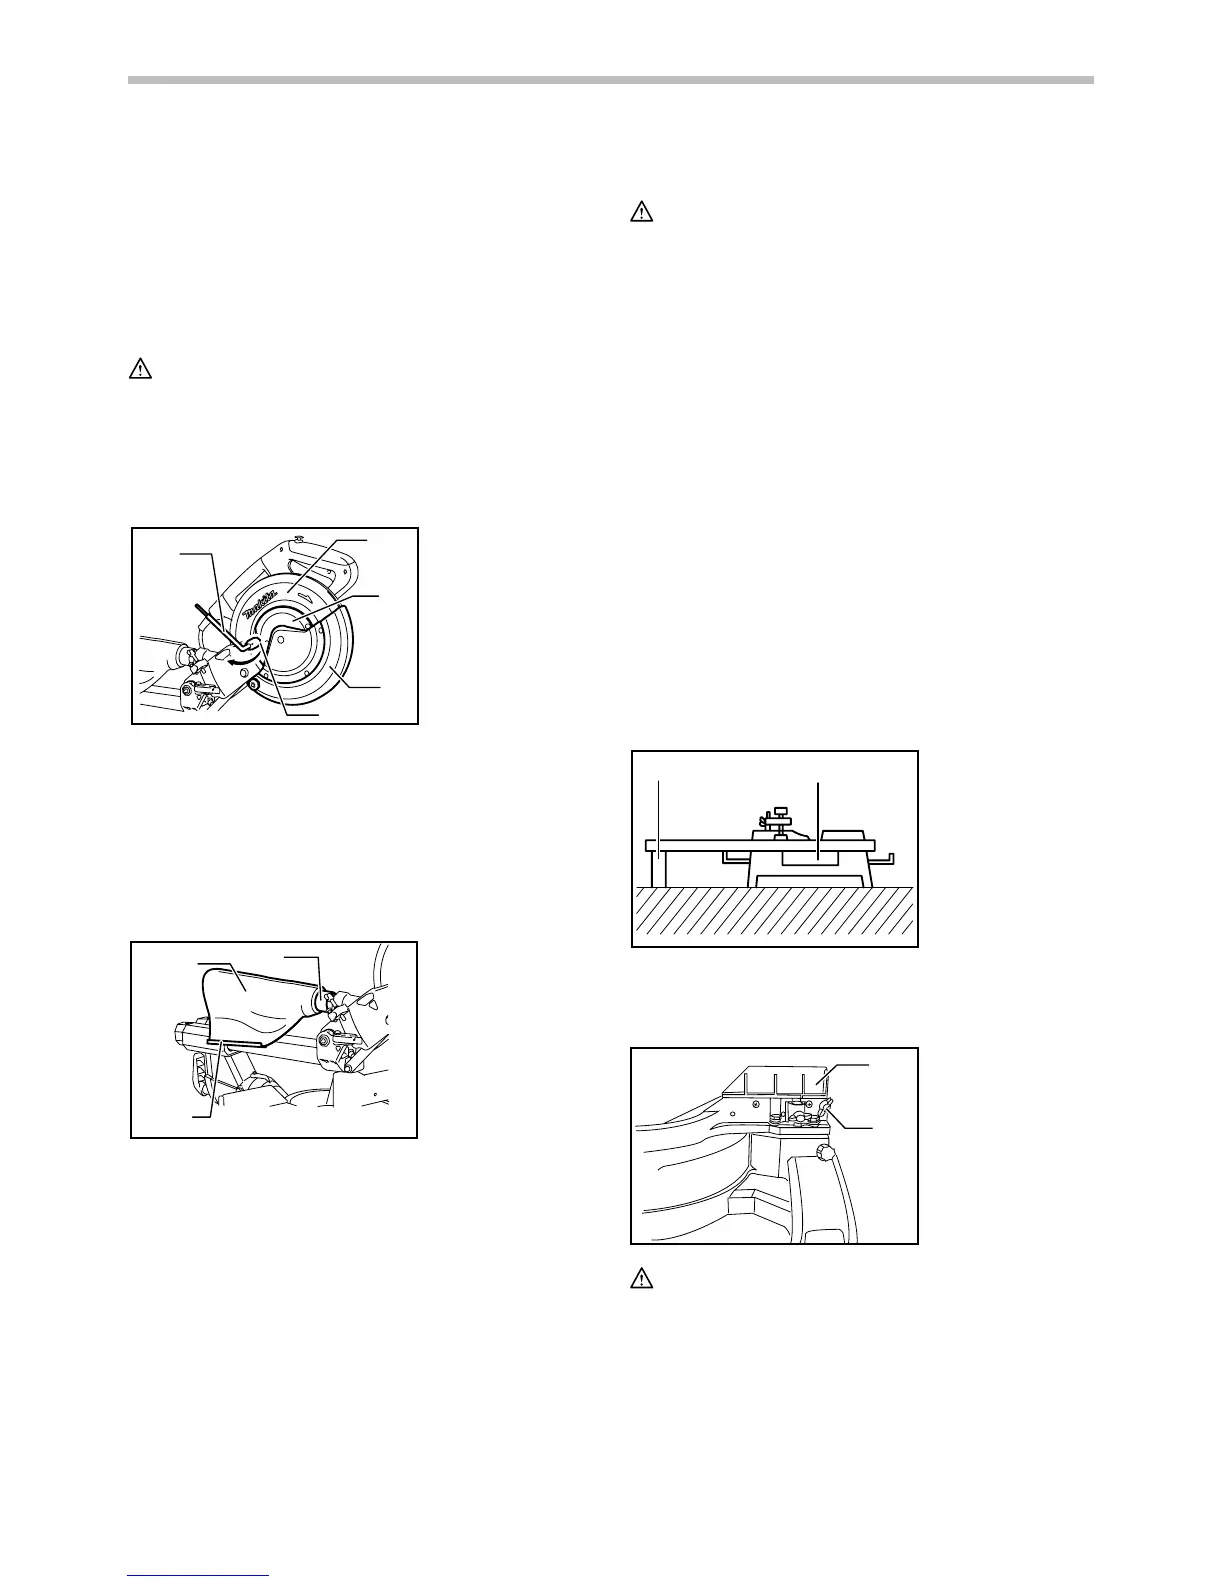
Install the outer flange and hex bolt, and then use the
socket wrench to tighten the hex bolt securely
counterclockwise while pressing the shaft lock.
1
2
3
4
5
010560
Return the blade guard and center cover to its original
position. Then tighten the hex bolt clockwise to secure the
center cover. Release the handle from the raised position
by pulling the stopper pin. Lower the handle to make sure
that the blade guard moves properly. Make sure the shaft
lock has released spindle before making cut.
Dust bag (accessory)
1
2
3
011339
The use of the dust bag makes cutting operations
cleaner and dust collection easier. To attach the dust bag,
fit it onto the dust nozzle.
When the dust bag is about half full, remove the dust bag
from the tool and pull the fastener out. Empty the dust
bag of its contents, tapping it lightly so as to remove
particles adhering to the insides which might hamper
further collection.
NOTE:
If you connect a vacuum cleaner to your saw, cleaner
operations can be performed.
Securing workpiece
WARNING:
• It is extremely important to always secure the
workpiece correctly with the proper type of vise
or crown molding stoppers. Failure to do so may
result in serious personal injury and cause damage
to the tool and/or the workpiece.
• After a cutting operation do not raise the blade
until it has come to a complete stop. The raising
of a coasting blade may result in serious personal
injury and damage to the workpiece.
•
When cutting a workpiece that is longer than
the support base of the saw, the material
should be supported the entire length beyond
the support base and at the same height to
keep the material level.
Proper workpiece
support will help avoid blade pinch and possible
kickback which may result in serious personal
injury. Do not rely solely on the vertical vise and/or
horizontal vise to secure the workpiece. Thin
material tends to sag. Support workpiece over its
entire length to avoid blade pinch and possible
KICKBACK.
1
2
001549
Guide fence (SLIDING FENCES which are
upper and lower fences) adjustment
1
2
010480
WARNING:
• Before operating the tool, make sure that the sliding
fence is secured firmly.
• Before bevel-cutting, make sure that no part of
the tool, especially the blade, contacts the
upper and lower fences when fully lowering
and raising the handle in any position and while
moving the carriage through its full range of
1. Sliding fence
2. Clamping screw
1. Support
2. Turn base
1. Dust nozzle
2. Dust bag
3. Fastener
1. Socket wrench
2. Blade case
3. Center cover
4. Hex bolt
5. Blade guard

 Loading...