28
3
MHT 10120 L M
Series
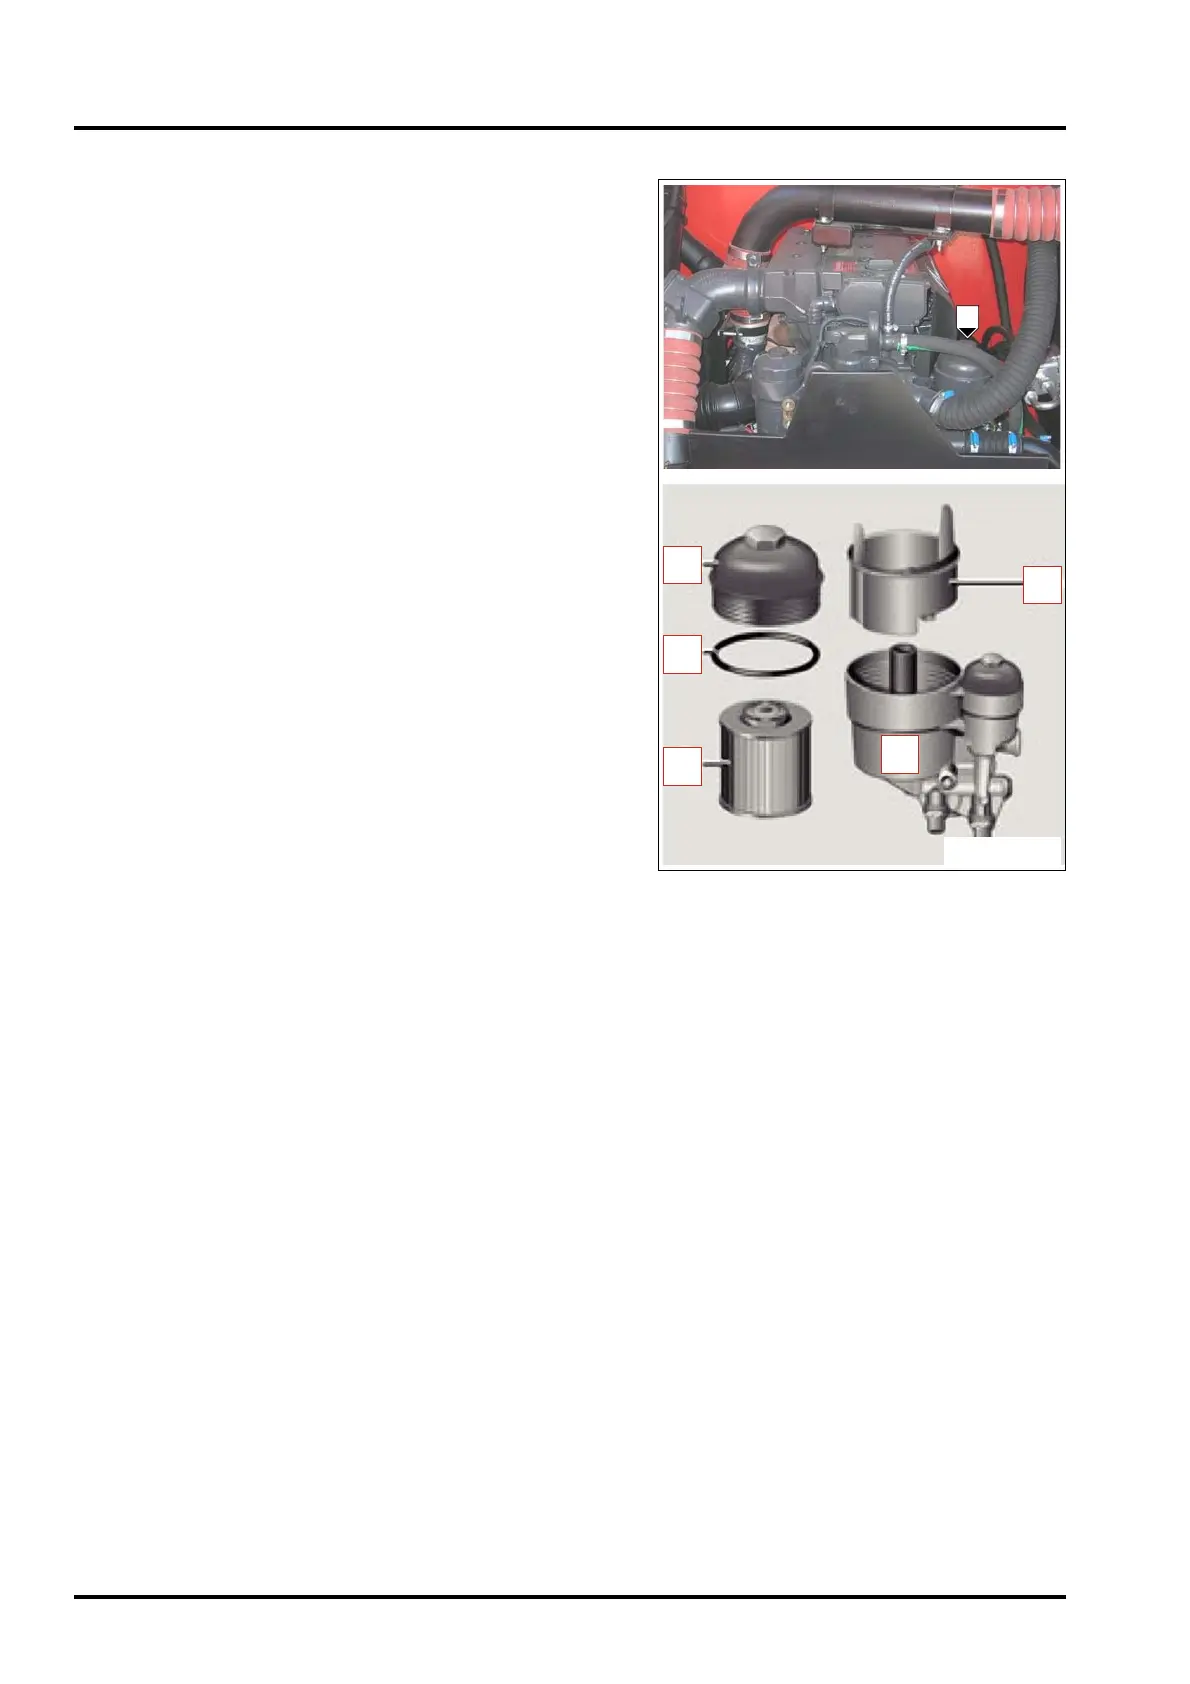
- REPLACE THE FUEL FILTER CARTRIDGE
Open the tank cap to prevent overpressure from building up insi-
de.
Unscrew threaded cap “1” (Fig. F3) of the fuel filter using a pipe
wrench.
Remove threaded cap “1” (Fig. F3) together with cartridge “3”
(Fig. F3) of the filter from filter casing “5” (Fig. F3).
Drain out the fuel.
Remove the threaded cap “1” (Fig. F3) with filter cartridge “3”
(Fig. F3).
Release filter cartridge “3” (Fig. F3) from the retainer by pressing
on the sides of the lower edge.
Remove the cup containing the impurities “4” (fig. F3) from filter
casing “5” (fig. F3) holding it by the tabs.
The filter casing must never contain water or impurities.
Clean the threaded cap “1” (Fig. F3) and cup for collecting impu-
rities “4” (Fig. F3).
Replace sealing ring “2” (Fig. F3).
Fit the new filter cartridge “3” (Fig. F3) back in place in threaded
cap “1” (Fig. F3).
Grease sealing ring “2” (Fig. F3) and the filter cartridge gaskets
slightly.
Insert the cup containing the impurities “4” (fig. F3) in filter casing
“5” (Fig. F3) ensuring it is fitted in the correct position.
Screw and tighten the threaded cap with the filter cartridge.
Tightening torque: 18 ft.lb.
Start up the engine and run it for about one minute to bleed the
supply system.
With the engine switched on, check the fuel filter seal.
FIG. F3
1
2
3
4
5
1

 Loading...