BOOM MAINTENANCE SERVICE MANUAL 1400A
4-14 1-21-2019 Control # 104-07
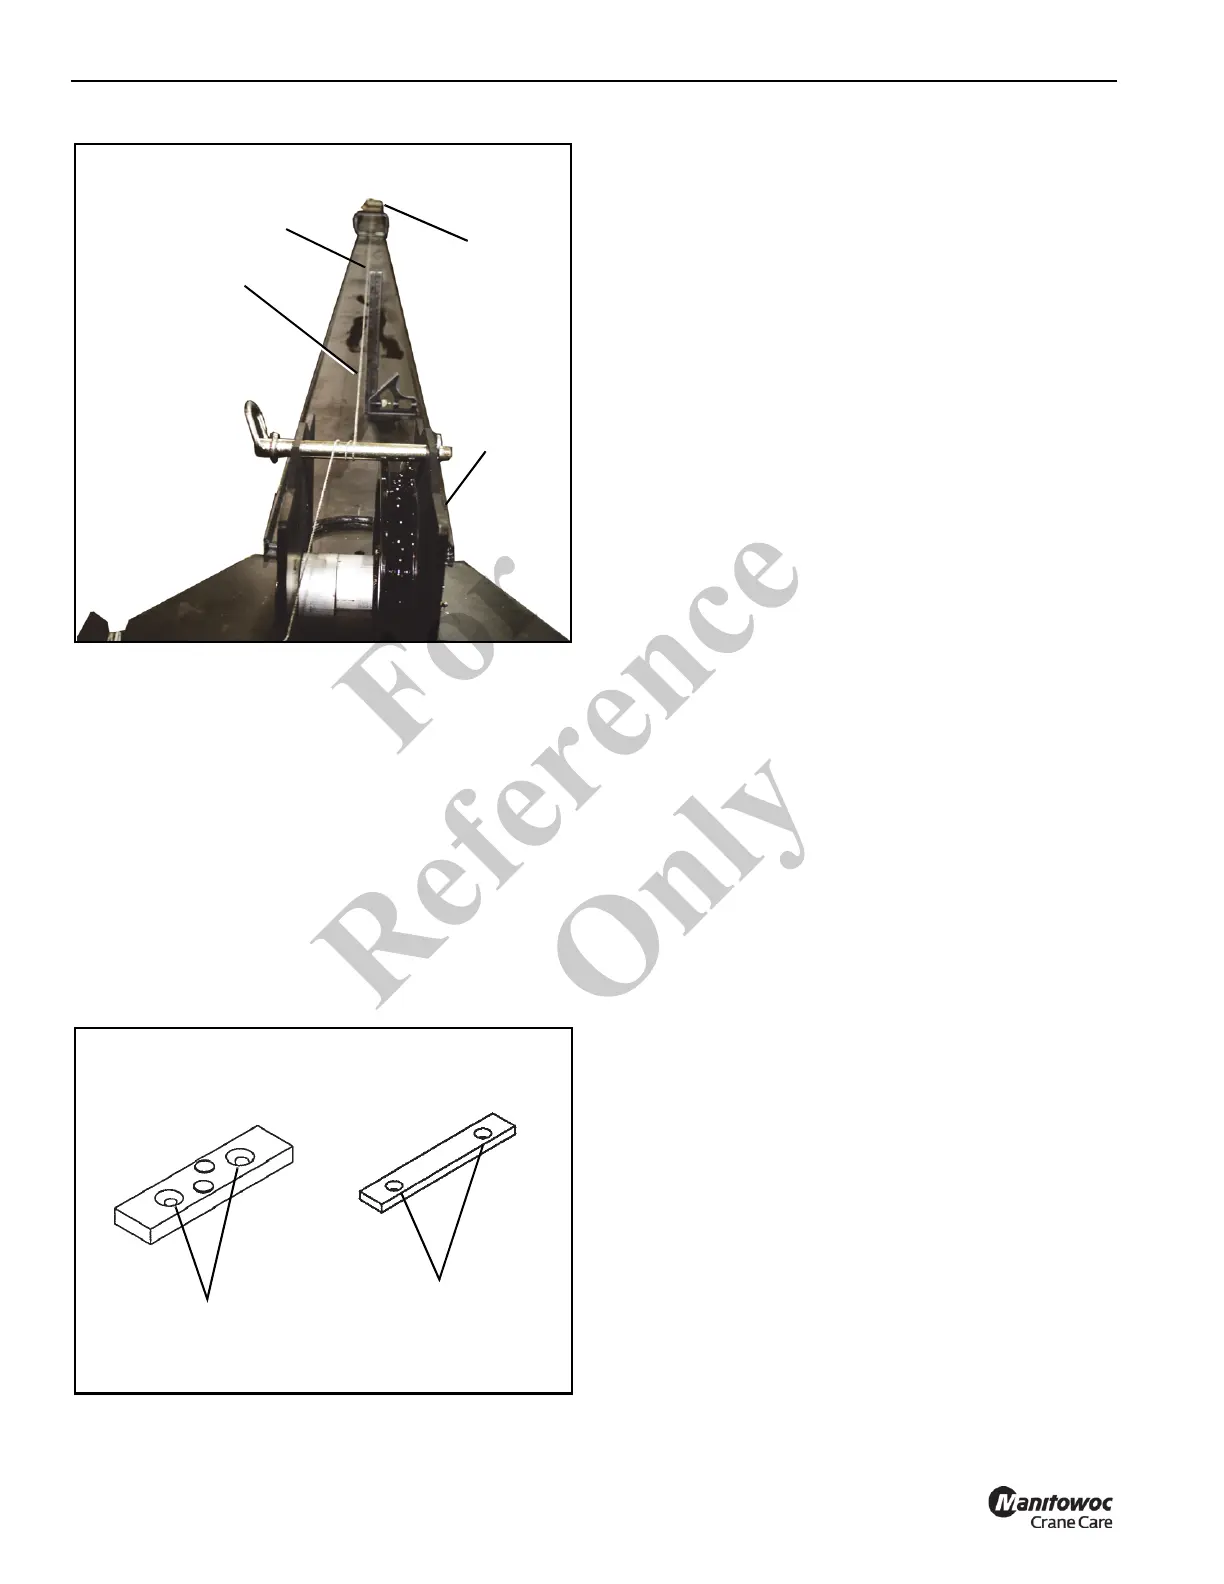
Top/Rear Wear Pad Adjustment
The top/rear wear pads are adjustable so that the rear of
each boom section can be adjusted to the horizontal center
of each successive section.
1. Fully retract the boom.
2. Center each successive boom section horizontally with
a pry bar.
3. The mounting holes for the top/rear wear pads are off
center which allows the wear pads to be adjusted
horizontally. Rotate the pad and plate or each one
independently to get the proper adjustment.
Wear Pad Inspection
Inspect the top and bottom wear pads periodically for signs
of abrasion or excessive wear. Excessive is defined as 4.8
mm (3/16 inch) less than the original pad thickness. Original
pad thicknesses are:
• top rear pad 19 mm (0.75 inch).
• bottom front sections 13 mm (0.44 inch).
Uneven pad wear of 2 mm (3/32 inch) from side to side on
the wear pad would be considered excessive as well. If any
of these conditions exist, the top and bottom pads can be
replaced without complete disassembly of the boom.
Top Rear Pad Replacement
Pad maintenance on the four or five section can be made
easier by removal of the hoist and or removal of the hoist
mounting bar spanning the end of the 1
ST
section. Additional
clearance can be achieved on the four section by loosening
the large extend cables and removing the extend cable
anchor located in the 2
ND
section.
1. Retract boom completely.
2. Remove the capscrews through access holes on top
rear of sections.
3. Remove wear pads, and shim plates from the rear of the
boom through open hoist mount end.
4. Note all pad locations and tag accordingly.
5. Inspect pads as described in wear pad inspection. See
“Wear Pad Inspection” on page 4-14.
6. Install the new pads through hoist mount end of boom.
See “Top/Rear Wear Pad Adjustment” on page 4-14 for
pad adjustment.
Front Bottom Pad Replacement
1. Extend boom about 120 cm (4 ft).
2. Remove the cable guides and upper spacer bars from
front of boom sections.
3. Loosen and remove hex nuts on retract cables on the
front of the 1
ST
and 2
ND
sections.
4. Using an appropriate lifting device, sling around the 4
TH
or 5
TH
depending on configuration section boom and lift it
up until weight is removed from the bottom pads in the
front of the interior sections.
5. Loosen and remove the capscrews holding the pad
doubler plates in the front of the sections. Remove
plates. Remove pads from these plates. Note all pad
locations and tag accordingly.
6. Inspect pads for wear.See “Wear Pad Inspection” on
page 4-14.
Centerline of Boom
Hoist
Boom Nose
String
FIGURE 4-5
Wear Pad
Mounting Holes
Wear Pad Plate
Mounting Holes
FIGURE 4-6
Fo
r
Reference
Only