5
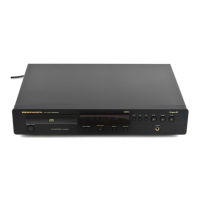
UD9004
DISASSEMBLY
• Disassemble in order of the arrow of the figure of following flow.
• In the case of the re-assembling, assemble it in order of the reverse of the following flow.
• In the case of the re-assembling, observe "attention of assembling" it.
• When reattaching the BOTTOM COVER after removing it, be careful that it does not run against the REAR
PANEL.
TOP COVER
SIDE COVER (L) and (R) SUB ASSY
AUDIO SUR/BACK/S_W UNIT
FRONT PANEL ASS
Refer to "DISASSEMBLY
VIDEO/MAIN UNIT SUB ASSY
Refer to "DISASSEMBLY
2.AUDIO SUR/BACK/S_W UNIT" Refer to "DISASSEMBLY 1.FRONT PANEL ASSY"
and "EXPLODED VIEW" 6.VIDEO/MAIN UNIT SUB ASSY" and "EXPLODED VIEW"
AUDIO SUR/BACK/S_W UNIT and "EXPLODED VIEW" FRONT UNIT
(Ref. No. of EXPLODED VIEW : A-3) VIDEO UNIT (Ref. No. of EXPLODED VIEW : B-1)
(Ref. No. of EXPLODED VIEW : D) KEY UNIT
AUDIO SUR/CENTER UNIT
MAIN UNIT (Ref. No. of EXPLODED VIEW : B-3)
Refer to "DISASSEMBLY (Ref. No. of EXPLODED VIEW : E) STANDBY LED UNIT
3.AUDIO SUR/CENTER UNIT" (Ref. No. of EXPLODED VIEW : B-4)
and "EXPLODED VIEW"
AUDIO SUR/CENTER UNIT
DIGITAL CHASSIS SUB ASSY
(Ref. No. of EXPLODED VIEW : B-5) Refer to "DISASSEMBLY
7.DIGITAL CHASSIS SUB ASSY"
AUDIO FRONT L/R UNIT
and "EXPLODED VIEW"
Refer to "DISASSEMBLY
4.AUDIO FRONT L/R UNIT"
and "EXPLODED VIEW"
POWER UNIT
AUDIO FRONT L/R UNIT Refer to "DISASSEMBLY
(Ref. No. of EXPLODED VIEW : A-1) 8.POWER UNIT"
and "EXPLODED VIEW"
AUDIO XLR UNIT
POWER UNIT
Refer to "DISASSEMBLY (Ref. No. of EXPLODED VIEW : C)
5.AUDIO XLR UNIT"
and "EXPLODED VIEW"
MECHA ASS
AUDIO XLR UNIT Refer to "DISASSEMBLY
(Ref. No. of EXPLODED VIEW : A-2) 9.MECHA ASSY"
and "EXPLODED VIEW"
MECHA ASSY
(Ref. No. of EXPLODED VIEW : F)