90-824052R3 JUNE 2002 MID-SECTION - 5B-19
6. Reinstall fill plug.
7. Disengage tilt lock lever.
CAUTION
Failure to install spare tilt pin (or hardened bolts
and nuts) in hole shown could result in transom
bracket failure and possible injury.
8. Move outboard “IN” until hole in swivel bracket
“ear” aligns with the 3rd tilt hole in transom
bracket. Lock engine in trim range by installing a
3/8 in. (9.5 mm) diameter tilt pin or two 3/8 in. (9.5
mm) hardened bolts and nuts thru the transom
brackets and swivel bracket in the hole shown.
a
54460
a - Tilt Pin Hole (Install Spare Tilt Pin or Hardened Bolts and
Nuts)
9. Open valve (a) and close valve (b).
51374
a
b
10. Run trim “UP”. The minimum pressure should be
1300 P.S.I. (91 kg/cm
2
).
11. Run trim “DOWN” to release pressure and
remove spare tilt pin or bolts and nuts.
12. Tilt outboard full “UP” and engage tilt lock lever.
13. Slowly remove “Fill” plug to bleed pressure.
14. Remove test gauge hose and adapter.
15. Reinstall Manual Release Valve and secure
valve with circlip.
16. Retighten “Fill” plug.
NOTE: If pressure is less than 1300 PSI (91 kg/cm
2
),
troubleshoot system per instructions on page 5B-11.
“DOWN” Pressure Check
IMPORTANT: Insure battery is fully charged be-
fore performing tests.
1. Tilt outboard to full “Up” position and engage tilt
lock lever.
2. Slowly remove “Fill” plug to bleed pressure from
reservoir.
3. Remove circlip securing manual release valve
and unscrew release valve from trim assembly.
NOTE: A small amount of trim fluid may drip from
manual release valve hole. Place a suitable
container under trim assembly to collect any leakage.
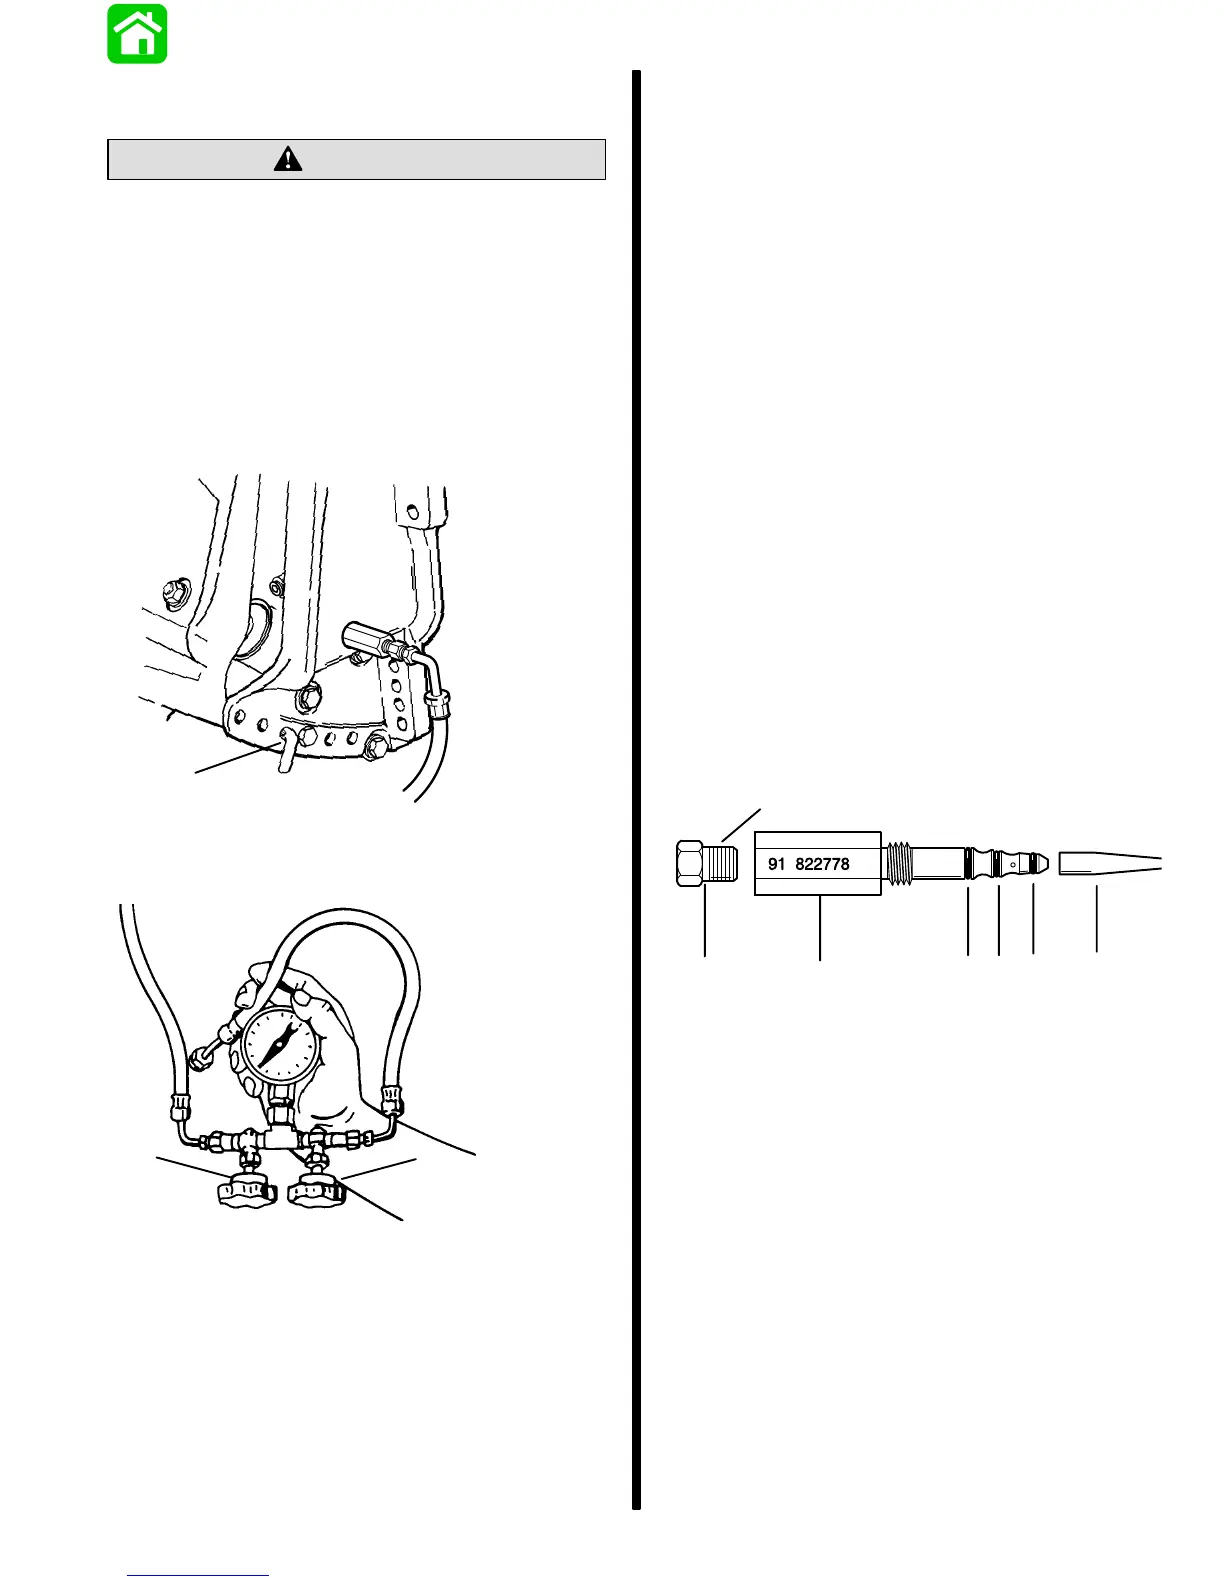
NOTE: Assemble test adaptor by using O-ring instal-
lation tool to position small O-ring onto adaptor 1st,
then install medium O-ring and lastly large O-ring.
Thread brass fitting into test adaptor securely using
teflon tape on threads.
54457
3
f
a
e
d
c
b
g
a - Test Adaptor (91-822778A3)
b - O-ring Installation Tool
c - Small O-ring (Install 1st)
d - Medium O-ring (Install 2nd)
e - Large O-ring (Install Last)
f - Brass Fitting
g - Apply Teflon Tape
 Loading...