Masport Inbuilt Gas Fires - 13 - 19/11/04
20. Assemble the appropriate number of flue lengths
and fix flue shield spacers as required. (See the
flue instructions).
21. Lower the assembled flue down through the heat
shield in the usual manner and ensure that it
engages with the flue socket of the heater. Fit the
flue cowl.
22. Slide in the top front panel of the firebox cabinet
and secure it at each side with a screw.
23. Install the insulating blanket on top of the firebox
cabinet (not the outer cabinet).
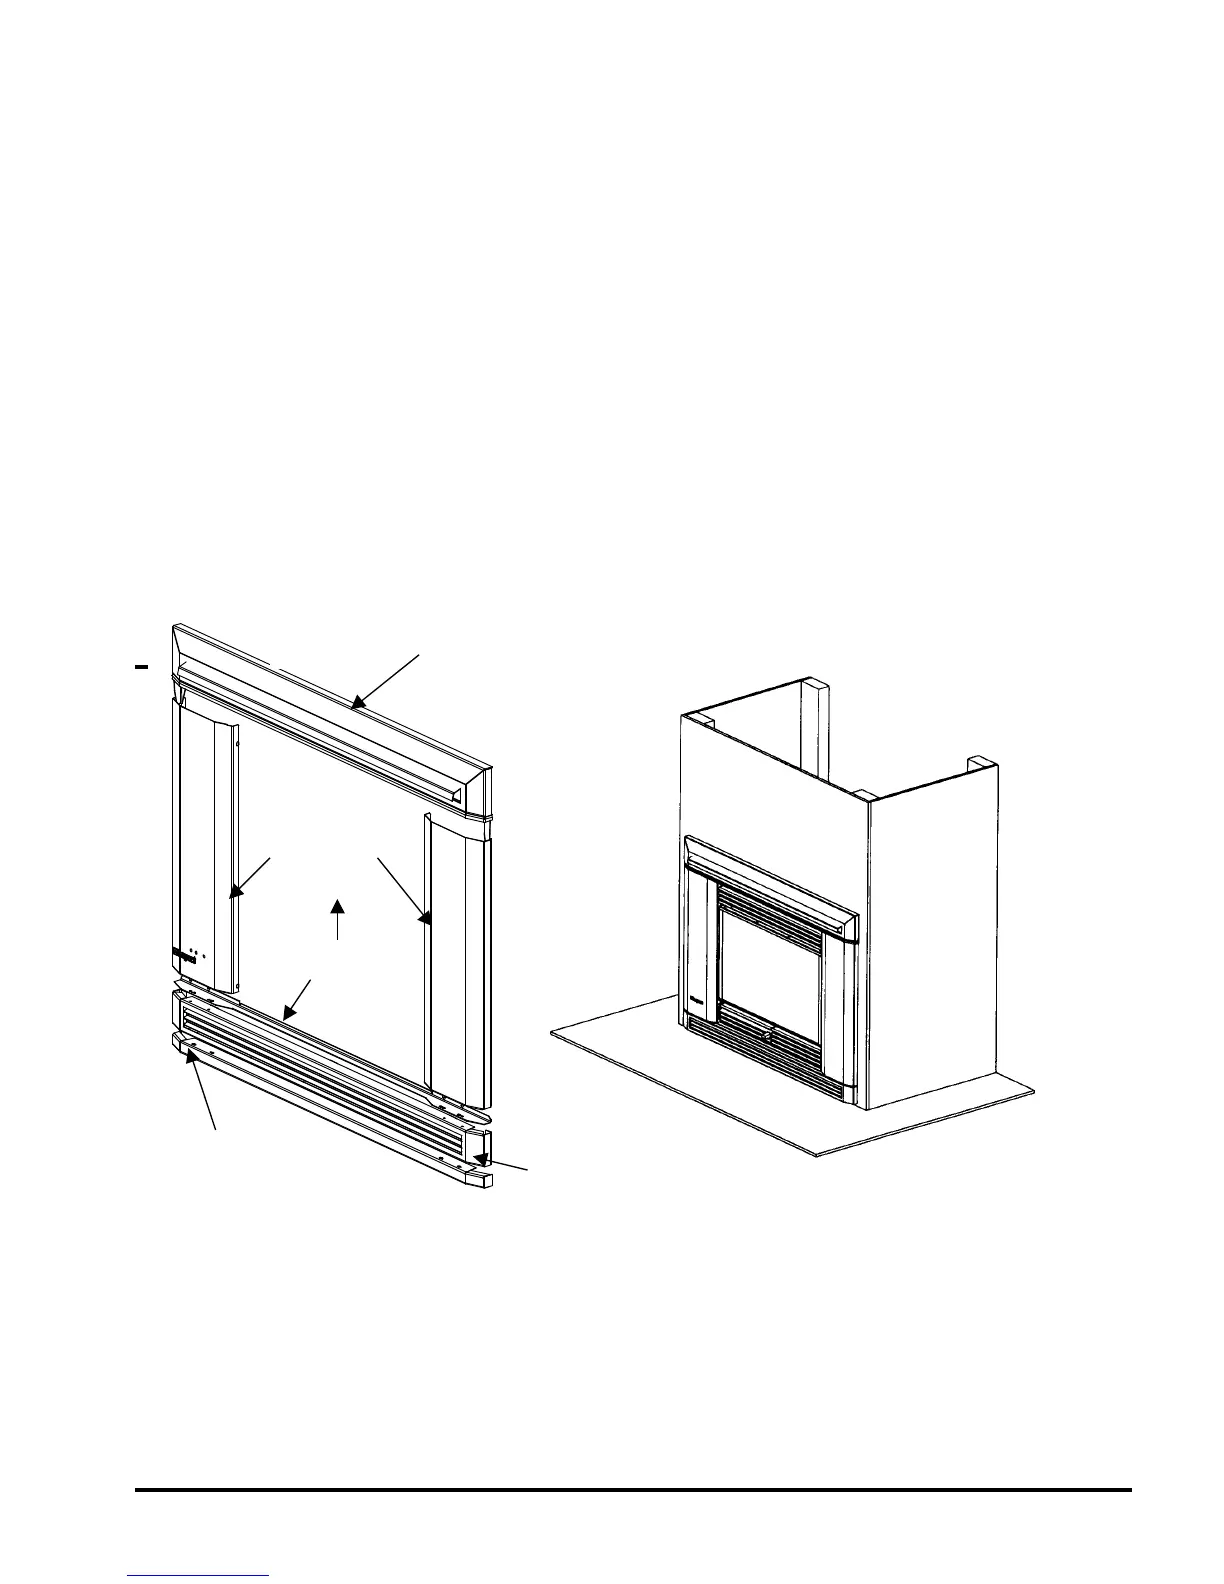
24. Assemble the bottom louvred panel of the fascia
to the fascia upright panels, sandwiching the
stiffener plate between them as shown in Fig. 6,
using four screws. Piccolo zero clearance fascias
have new upright panels, while the other models
use the same upright panels as fires installed in
masonry enclosures. All fascias use a new top
panel.
25. Offer this assembly into approximately its final
position and attach the wiring looms as detailed on
Page 8.
26. Fit the fascia, using two screws each side, into the
firebox cabinet.
27. Lower the top fascia rail prongs into the fascia
uprights, ensuring the assembly is firmly in position
and confirming that the top rail engages in the
channel (formed in step 11) at the top front of the
outer cabinet. (See fig. 3)
28. Fit two screws through the bottom of the top
fascia rail into the front upstand of the firebox
cabinet.
29. Remove the glass and install the embers. See
pages 8 & 9. Re-fit the glass.
30. Carry out the usual test firing procedure.
USED FROM
EXISTING FIRE
(SUPPLIED WITH
ZC FASCIA)
TOP FASCIA RAIL
(SUPPLIED WITH ZC FASCIA)
TOP FASCIA RAIL
(SUPPLIED WITH ZC FASCIA)
FASCIA
UPRIGHT
PANELS
(USED FROM
EXISTING
FIRE)
STIFFENER
PLATE
BOTTOM LOUVRED PANEL
SUPPLIED WITH ZC FASCIA
HEARTH TRIM (OPTION.)
(SUPPLIED WITH ZC FASCIA)
FASCIA ASSEMBLY Fig. 6 FINISHED INSTALLATION Fig. 7