4 5
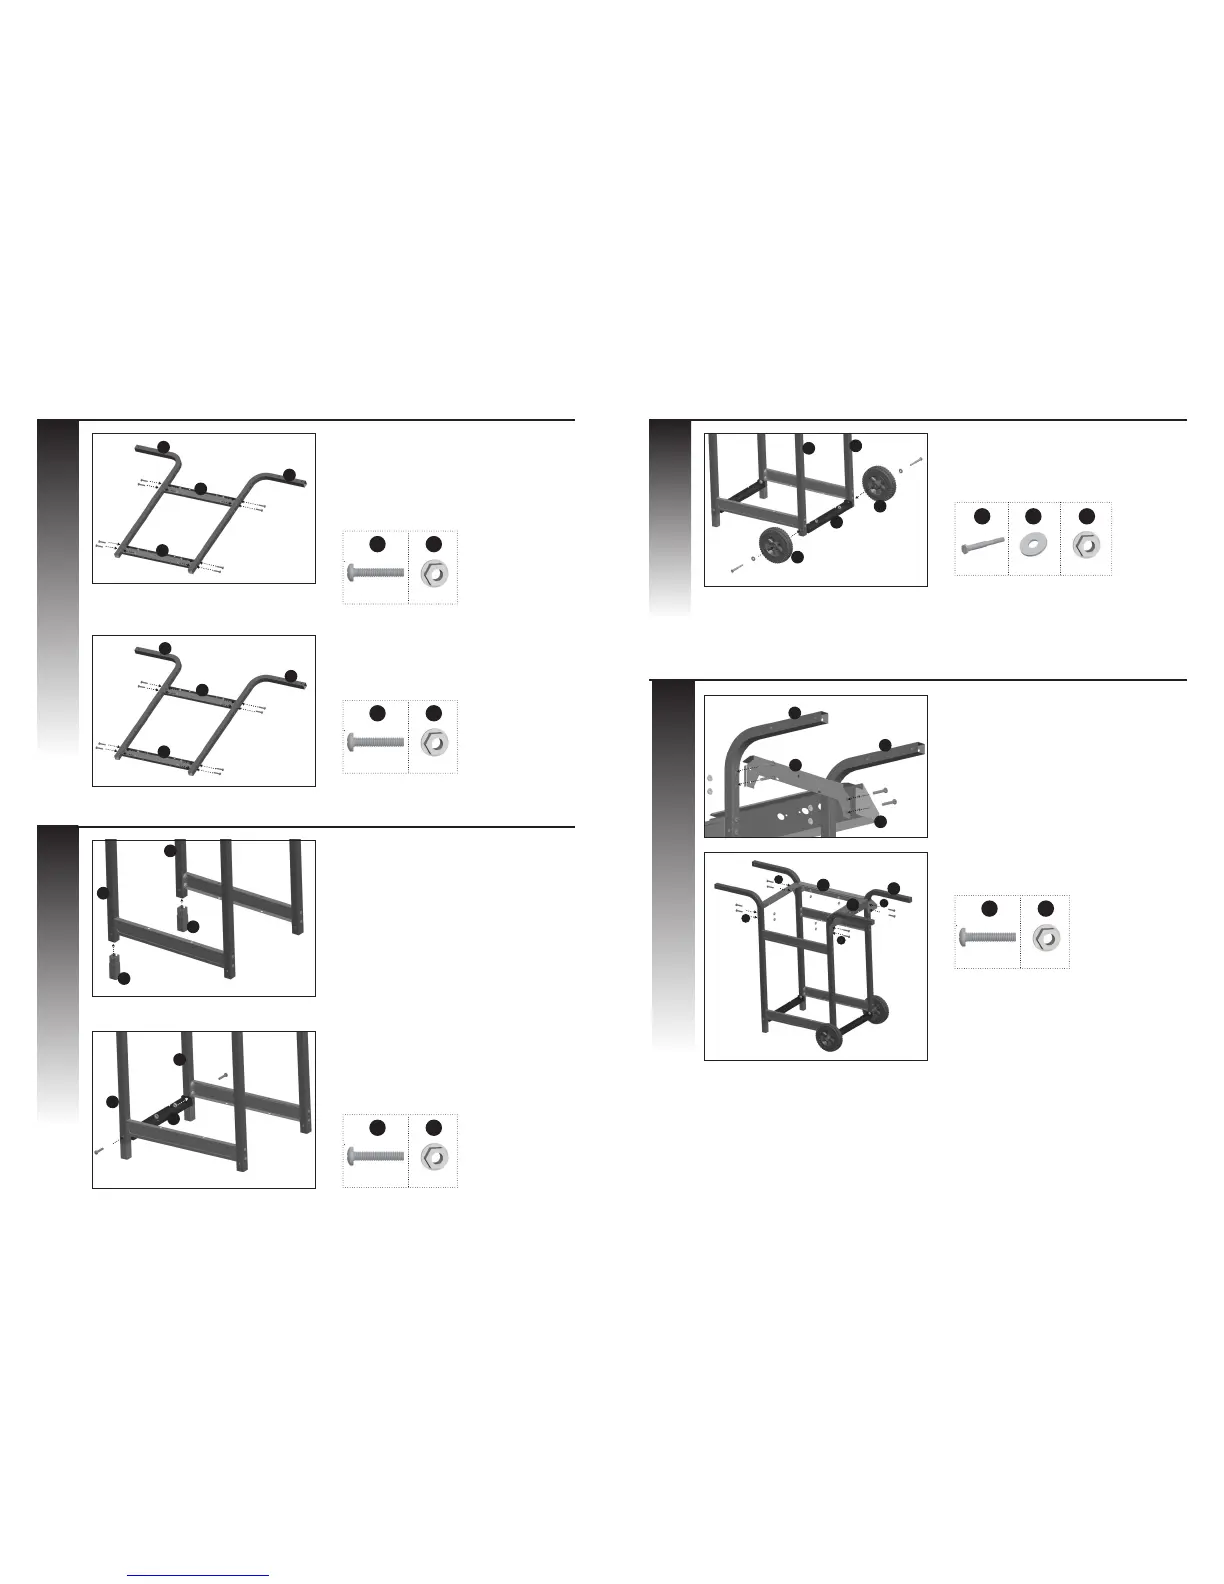
a. Assemble the rear left burner box support
bracket (DB) and rear right burner box support
bracket rst (DB)
Tip: One person should align the burner box
support brace and control panel, while the sec-
ond person assembles the hardware
TWO PEOPLE REQUIRED FOR ALL
ASSEMBLY STEPS.
a. Front cart assembly: assemble two support
braces (DE) to two cart legs (DA) as shown.
a. Assemble the end caps (DJ), to the bottom of
the right side cart legs (DA).
b. Assemble the right bottom brace (DH) to the
front and back cart legs (DA), as shown.
Tip: Bottom brace grooves should be facing
upward. Tighten all hardware securely.
c. Assemble the wheels (DI) and the left bottom
brace (DH) to the left cart legs (DA), at the
same time, as shown.
1 2
2
3
ASSEMBLY INSTRUCTIONS ASSEMBLY INSTRUCTIONS
YOU WILL NEED:
YOU WILL NEED:
1 3
X 8 X 8
7
4
X 2
b. Assemble the control panel (CA) together with
the front left and right burner box support (DB)
Only tighten all hardware once correct
assembly has been veried.
FRONT CART ASSEMBLY
VIEW FROM THE BACK OF THE CART ASSEMBLY
BACK CART ASSEMBLY
VIEW FROM THE BACK OF THE CART ASSEMBLY
b. Back cart assembly: assemble two support
braces (DE) to the remaining two cart legs (DA),
as shown.
VIEW OF CONTROL PANEL AND BURNER BOX
SUPPORT BRACKET FROM THE BACK OF CART
ASSEMBLY
6
3
X 2
YOU WILL NEED:
YOU WILL NEED:
1
1
3
3
X 8
X 8
X 8
X 8
YOU WILL NEED:
1 3
X 2 X 2
8
5
X 2
DE
DE
DA
DA
DE
DE
DA
DA
DA
DA
DJ
DJ
DH
DA
DA
DI
DI
DA
DA
DH
DA
DA
CA
DB
DA
DB
CA
a.
a.
b.
b.