41
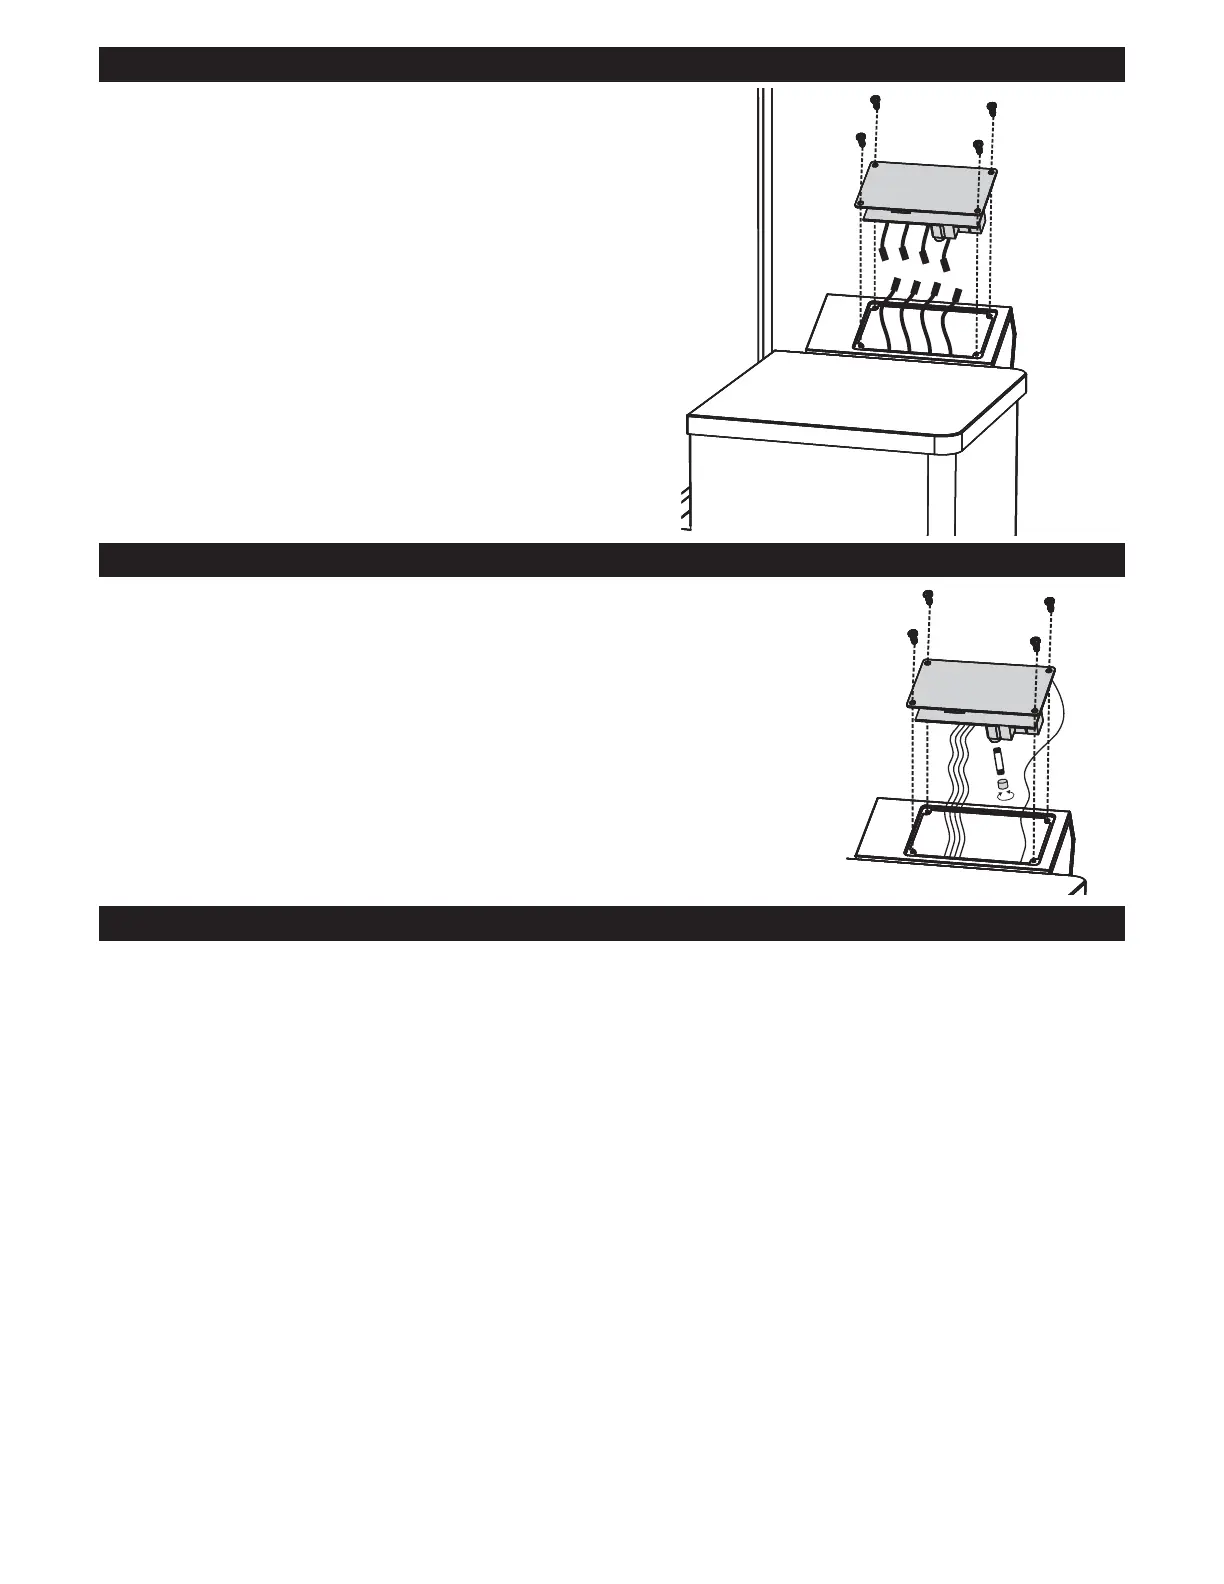
CONTROLLER ACCESS / REPLACEMENT
CONTROLLER FUSE REPLACEMENT
ELEMENT ACCESS / REPLACEMENT
7XUQRႇVPRNHUDQGDOORZWRFRROWRWRXFK
2. Unplug from wall.
3. Remove pellets from hopper.
4. Remove four screws holding pellet hopper to auger housing (Fig. 1) on page 42.
5. Disconnect element from controller (Fig. 2) on page 42.
Tip:7LHDSLHFHRIVWULQJWRROGSOXJDWWKLVVWHS7KLVZLOOPDNHIHHGLQJQHZHOHPHQWSOXJWKUXDXJHU
housing easier in future steps.
5HPRYHFRRNLQJUDFNVZDWHUERZOJUHDVHGHÀHFWRUDQGKHDWGLႇXVHU
7. Remove crucible from auger housing (Fig. 3) on page 42.
• Rotate and lift crucible latch.
• Lift crucible out of auger housing.
8. Remove two screws from element access panel and remove panel.
9. Loosen element mounting screw.
10. Remove element from auger housing and pull plug and string thru auger housing.
11. Tie string to new element plug and pull plug thru auger housing.
12. Untie string and discard.
13. Connect new element plug to controller.
14. Install pellet hopper on auger housing.
15. Install new element in crucible and tighten mounting screw.
16. Install element access panel and tighten screws.
17. Install crucible into auger housing.
,QVWDOOWKHFRRNLQJUDFNVZDWHUERZOJUHDVHGHÀHFWRUDQGKHDWGLႇXVHU
Installation is complete.
7XUQRႇWKHVPRNHUDQGDOORZWRFRROWRWRXFK
2. Unplug from wall.
3. Remove four screws from controller faceplate.
4. Remove controller from housing.
5. Disconnect all connections.
• Main power connection
• Auger motor connection
,QWDNHIDQFRQQHFWLRQ
• Temp probe connection
6. Connect all connections to new controller.
• Main power connection
• Auger motor connection
,QWDNHIDQFRQQHFWLRQ
• Temp probe connection
7. Place controller in housing.
8. Install four screws in controller faceplate.
Installation is complete.
7XUQRႇVPRNHUDQGDOORZWRFRROWRWRXFK
2. Unplug from wall.
3. Remove four screws from controller faceplate.
4. Remove controller from housing.
5. Locate fuse housing and remove fuse.
2SHQIXVHKRXVLQJE\SUHVVLQJGRZQDQGURWDWLQJFRXQWHUFORFNZLVH
• Pull fuse out of housing.
6. Install new 5 amp, 5mmx11mm fuse in fuse housing.
7. Place controller in controller housing.
8. Install four screws in controller faceplate.
Fuse replacement is complete.