CHANGING THE DRIVE BELT – cont’d
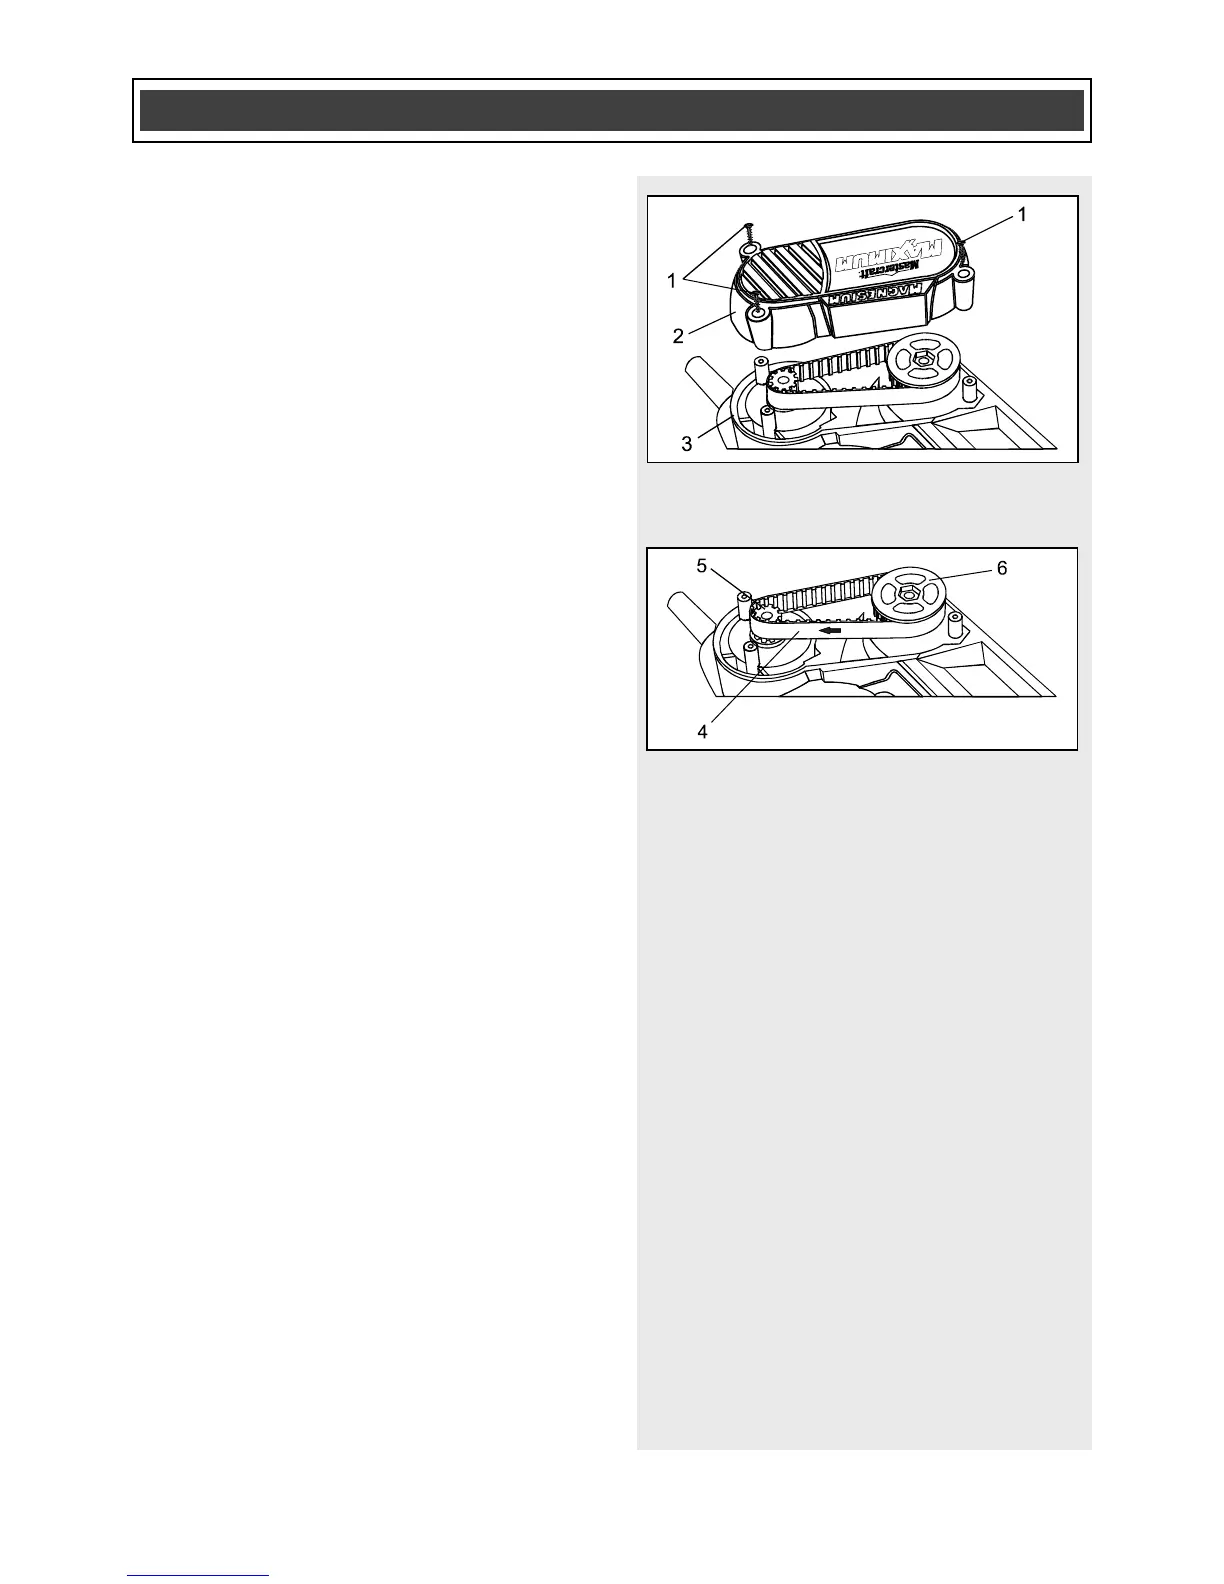
2. Remove the three belt cover screws
(1) from the belt cover (2) using a #2
Phillips
®
screwdriver (Fig 8).
3. Pull the belt cover away from the
sander housing (3).
4. If the belt is broken, remove it from the
pulley area. If the belt is NOT broken,
insert one finger under the belt (4)
approximately 1” (2.5 cm) away from
the small drive pulley (5) and pull
upward on the belt (Fig. 9).
5. While pulling upward on the belt, pull it
toward the small pulley. The belt will
climb upward on the pulley as the
pulley rotates.
6. Repeat steps #4 & #5 until the belt is
completely removed from both pulleys.
7. Remove all loose debris from the belt
housing and belt housing cover.
NOTES:
a) Use a clean DRY soft brush. Never use
any solvent or water as you will damage
the tool.
b) Installation of the new drive belt is
exactly the reverse of removing the drive
belt.
8. To install a new drive belt, place the
drive belt on the large pulley (6).
NOTE: Make sure the belt fits fully into all
the grooves in the large pulley.
 Loading...