INSTALLATION
10 February 2011 / MasterShunt / EN
5 INSTALLATION
WARNING
During installation and commissioning of
the MasterShunt, the Safety Guidelines
and Measures are applicable at all times. See
chapter 2 of this manual.
CAREFUL!
Wrong connections may cause damage to
the MasterShunt and other equipment as
well, which is not covered by warranty!
NOTE:
For correct measurements the
MasterShunt must be placed closest possible to the
batteries.
5.1 THINGS YOU NEED FOR INSTALLATION
Tools:
A cross-head screw driver
2 mm and 5 mm flat blade screwdrivers.
Hexagonal socket wrench size 6 mm
A complete set of spanners, pliers and wrenches
may be helpful during the installation of the
MasterShunt.
CAREFUL!
Use isolated tools!
Materials needed:
; MasterShunt
; MasterBus cable, 6 metres
; Terminator for MasterBus network
; Temperature sensor to fasten on top of the
battery
; Two translucent end pieces
; Four DC cones
; One translucent mid piece for connection to
another MasterConnect device.
; Four M8 bolts with washer to fasten the DC
wiring.
Two heavy duty battery cables shortest possible,
finished with cable lugs. Mastervolt advises to
use 70 mm
2
cables on both the battery side and
load side of the MasterShunt. In an extended
system with long cable runs the cable size can
be increased to 95 mm
2
. In systems with lower
maximum currents (<300A) the cable cross
section can be smaller, yet at least 25 mm
2
.
Cable thickness must be in accordance with the
electrical installation.
5.2 INSTALLATION STEP BY STEP
Disconnect the electrical power:
• Switch off all consumers,
• Switch off all charging systems.
• Disconnect the battery poles, first the positive
pole.
• Check with a suitable voltmeter whether the
entire DC installation is voltage free.
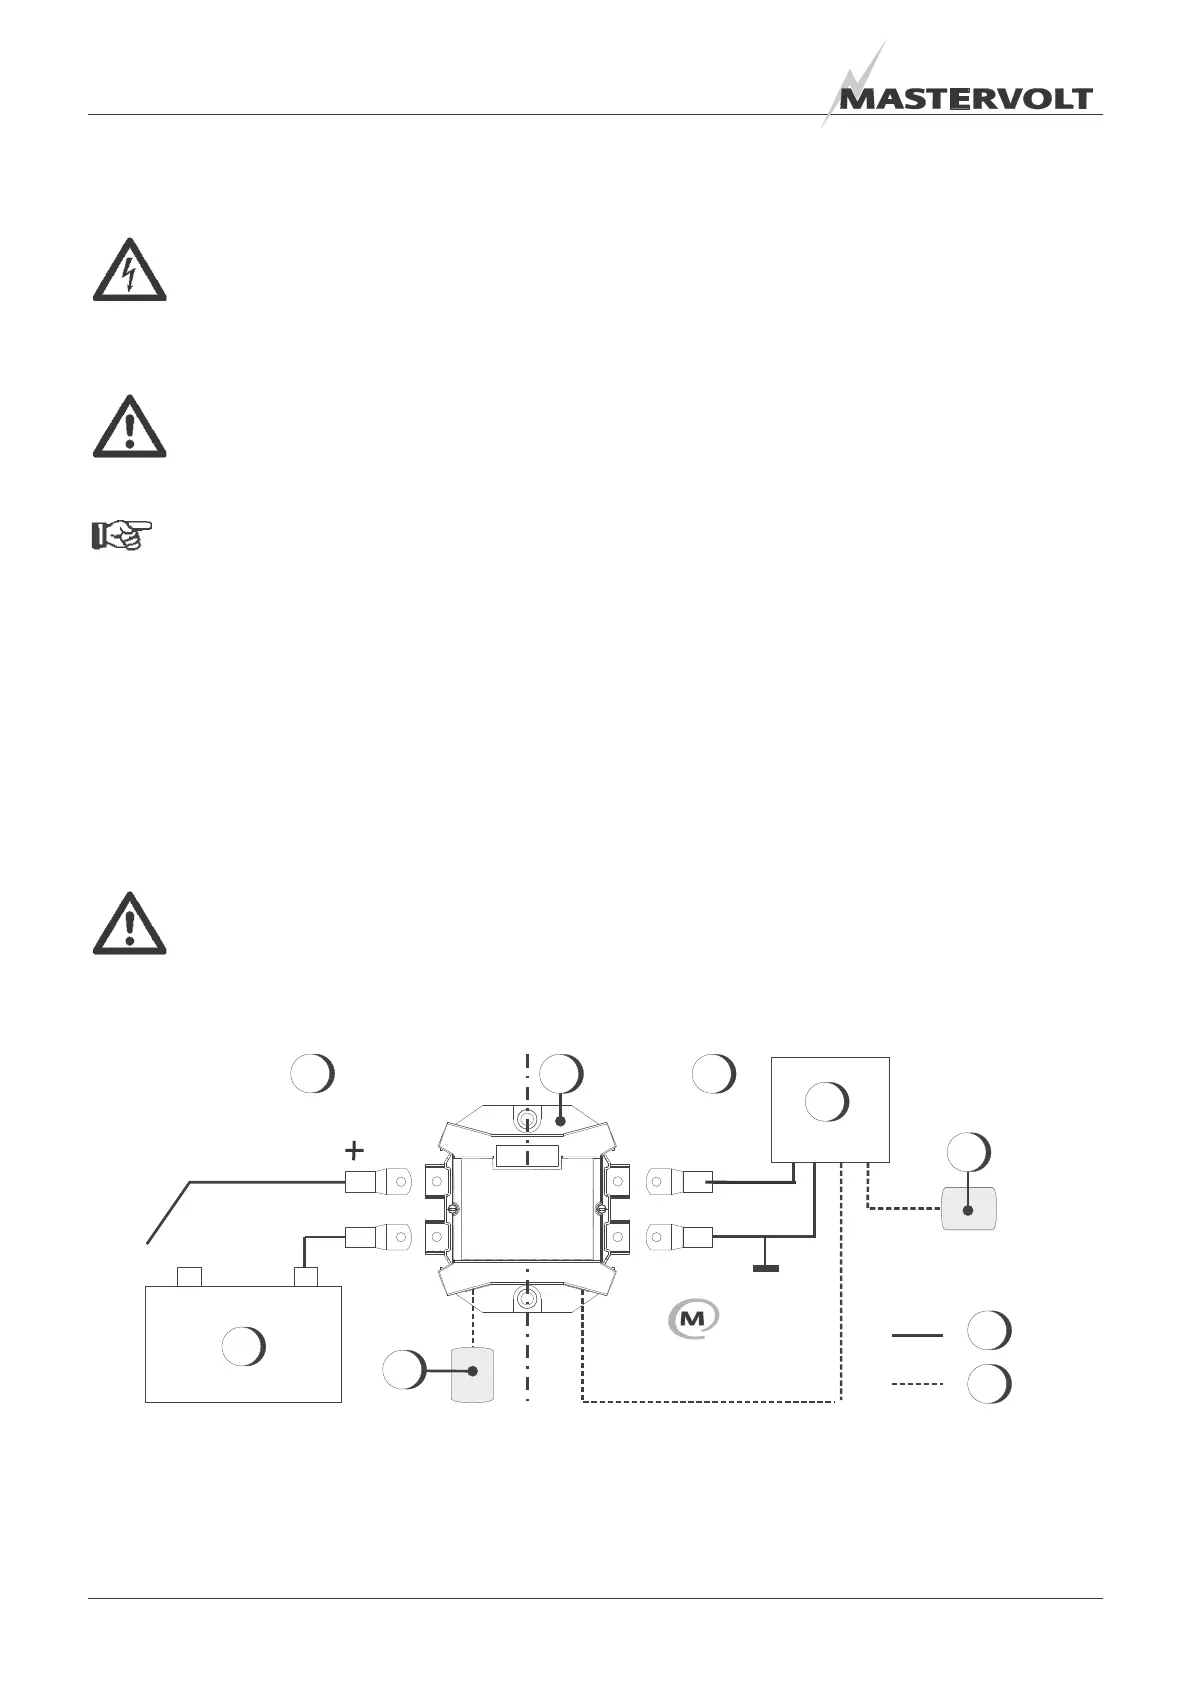
Figure 9: Installation of the MasterShunt
1 Battery side
2 MasterShunt
3 Load side
4 Charger and battery load
5 Battery bank
6 Terminator for MasterBus
7 Terminator for MasterBus
8 DC wiring
9 MasterBus wiring
_
+
_
MasterBus
2
3
6
1
5
7
9
8
AB
DC
4