INSTALLATION
8 September 2010 / MasterView Easy MkII / EN
4 INSTALLATION
WARNING
During installation and commissioning of
the Masterview Easy, the Safety
Guidelines and Measures are applicable
at all times. See chapter 2 of this manual.
4.1 FLUSH MOUNTING AND PANEL
MOUNTING
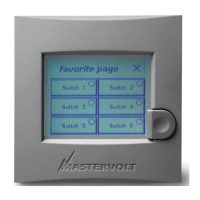
The Masterview Easy can be flush mounted or panel
mounted on a wall or board. For flush mounting the
outer housing can be removed easily. The
connections are at the back of the panel and space
for the two MasterBus connectors is provided when
for panel mounting is opted.
4.2 THINGS YOU NEED
Tools:
A drill for the mounting holes
A saw to make a cut-out for flush mounting the
panel
A cross-head screw driver
Materials:
; The MasterView Easy panel (included)
; 4 screws for mounting (included)
; MasterBus connection cable (MasterBus cable)
(6 meter / 20ft included)
; MasterBus terminating devices (1 pc included)
4.3 INSTALLATION STEP BY STEP
Panel mounting the MasterView Easy
Display
• Remove the outer housing and remove
the front.
• Drill the holes using the dimensions
inside the outer housing and fasten the
outer housing (1).
• Insert the MasterBus connection cables
into the MasterBus data ports and click
the panel into the outer housing (2).
• Reattach the front (3), see figure 8.
2
Figure 8
1
2
3
Flush mounting the MasterView Display.
• Remove the outer housing and remove the
front from the panel.
• Make a cut out in the mounting wall and drill
the holes using the saw template in the box or
using the dimensions on the panel.
• Insert the MasterBus connection cables into
the MasterBus data ports.
• Mount the MasterView Easy onto the panel (1)
and then reattach the front (2), see figure 7.
1
Figure 7
1
2

 Loading...