Live Data Mode
CUSTOMIZING LIVE DATA (PIDs)
23
If communication with the vehicle is lost while viewing Live Data,
an “advisory” message displays.
5. Press and release ENTER
to view the currently selected PID in
“graph” mode. Press and release ENTER
again to return to the PID
list.
You can display a maximum of two
PIDs in "graph" mode at any given
time.
With two PID shown in "graph"
mode, press and hold LD to
superimpose one graph on the other.
Release LD to separate the graphs.
6. Press and hold ENTER
to view the “expanded” definition for the
currently selected PID. Release ENTER
to return to the PID list.
7. If you experience vehicle problems, view and/or compare the Live
Data (PID) information displayed on the Scan Tool to specifications
in the vehicle's repair manual.
If desired, you can "customize" the Live Data display to show only
those PIDs you are interested in viewing. See Customizing Live
Data (PIDs) below for details. You may also choose to "capture"
(record) Live Data for later viewing. See RECORDING
(CAPTURING) LIVE DATA on page 24 for details.
CUSTOMIZING LIVE DATA (PIDs)
You can customize the Live Data display by placing the Scan Tool in
"Custom Live Data" mode and selecting only the PIDs that you wish to
display.
1. With the Scan Tool in Live Data mode
(see VIEWING LIVE DATA on page 22),
press and hold LD to access the Live
Data Menu, then release.
2. Select Custom Live Data, then press
ENTER
.
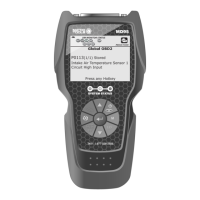
If the Scan Tool fails to establish
communication with the vehicle, a
“Communication Error” message displays.
- Ensure your vehicle is OBD2 compliant.
- Verify the connection at the DLC, and verify the ignition is ON.
- Turn the ignition OFF, wait 5 seconds, then back ON to reset
the computer.
- Press POWER/LINK
to continue.