- 11 -
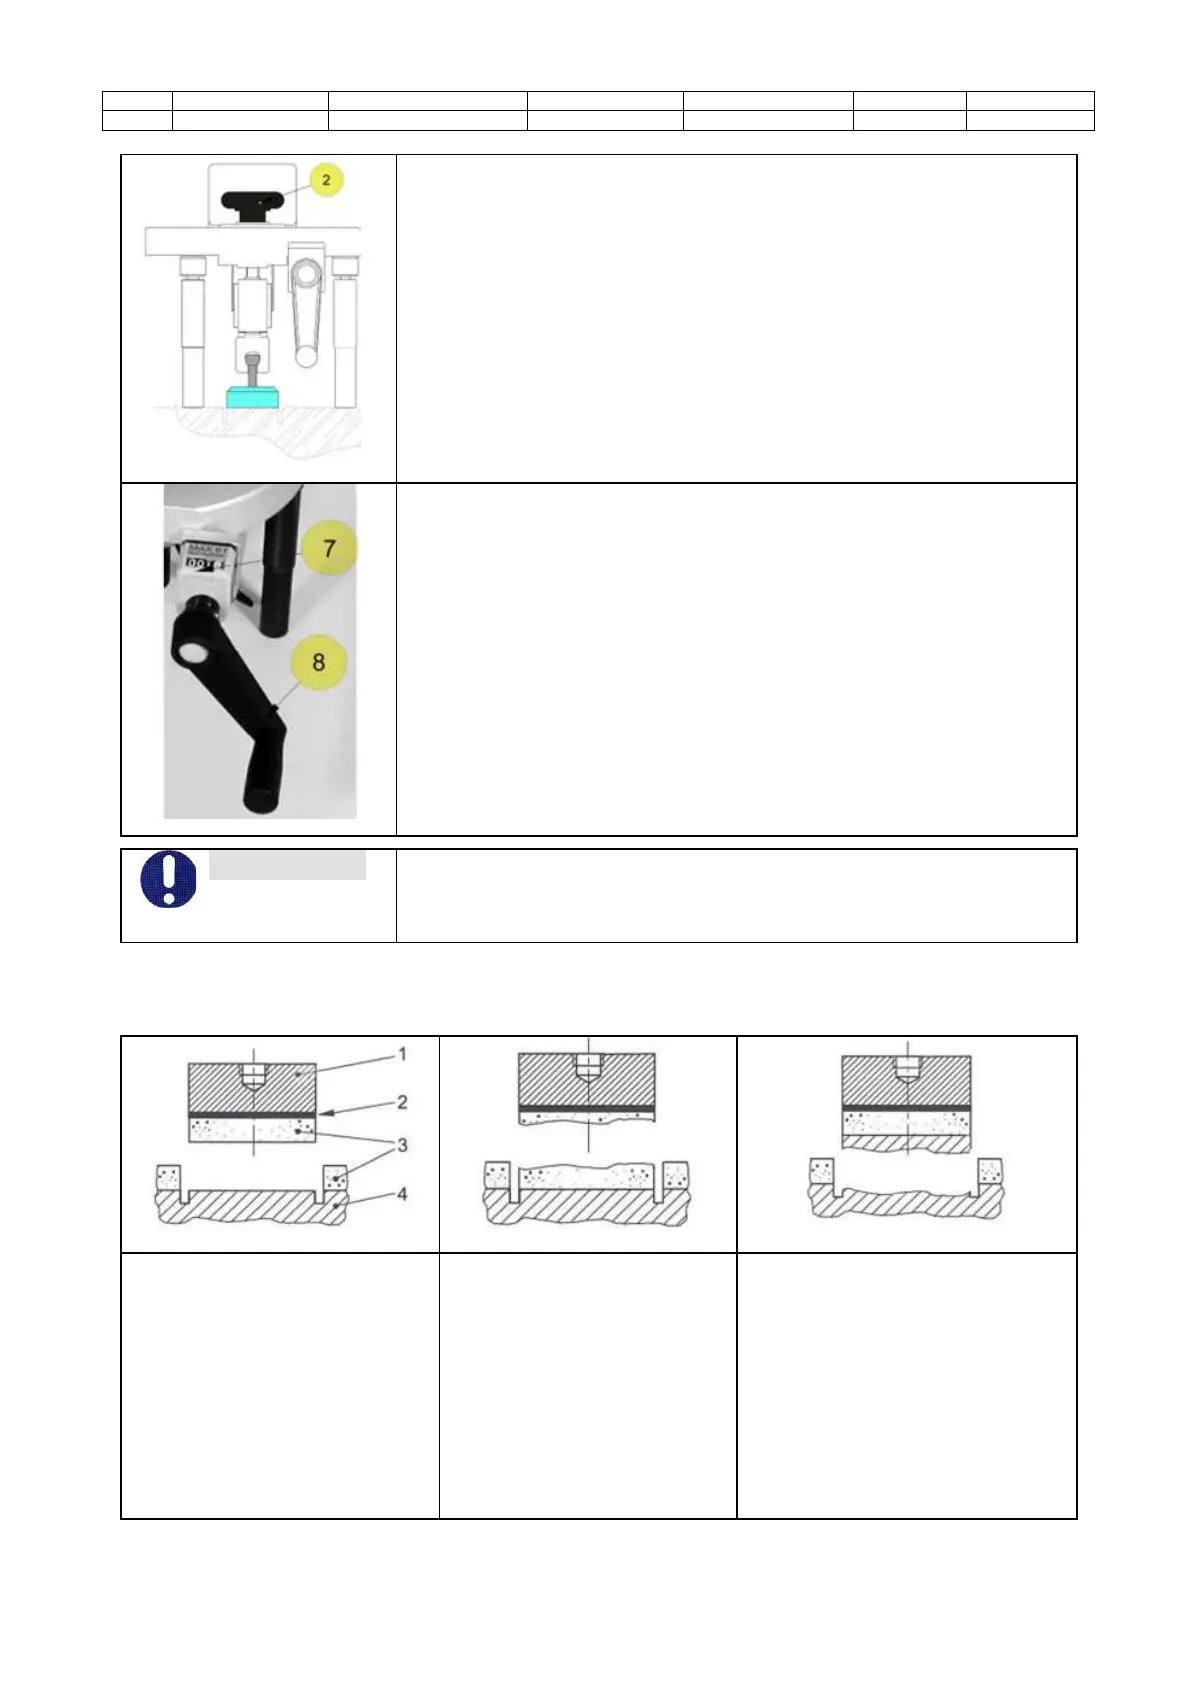
Slightly rotate the upper handwheel (2) clockwise until the digital display
starts recording a little increase. This procedure is useful to eliminate any
clearance between the tie rod and the tensile head.
Start the test by rotating the Hand wheel for force application (8) clockwise.
Increase the force continuously and equally - as specified by the
International Standard followed by the operator - up to the breakage. Record
the force displayed on the digital unit when the breakage occurs. The round
counter (7) shows the rounds number performed by the hand wheel during
the test.
The maximum number of rounds that can be performed is 61.
WARNING
If the breakage does not occur before the 61st round, the test is not valid.
Do not consider any tests as valid if the fracture of the adhesion layer occurs
between the adhesion disc and the mortar. Repeat the procedure from the
beginning of section “B” of this helpsheet when starting a new test.
The possible types of fracture that lead to valid results are shown in the following pictures. If the fracture is
produced without an interface yielding between mortar and the support (as shown in the second and third
pictures), the results obtained have to be considered as lower limit values.
FRACTURE TYPE A:
Adhesion fracture; fracture that
occurs at the interface between
mortar and the support. The test
value corresponds to the
adhesion strength.
Legend:
1- adhesition test discs
2- adhesive surface
3- mortar
4- support
FRACTURE TYPE B:
Cohesion fracture. This fracture
occurs within the mortar itself. In
this case the adhesion strength
is higher than the test strength
FRACTURE TYPE C:
Cohesion fracture. This fracture
occurs within the mortar itself. In this
case the adhesion strength is higher
than the test strength