- 9 -
6. IN FUNCTION - USE
6.1 MACHINE CALIBRATION – METERS – INDICATORS
The machine is checked in the factory, using sample equipment periodically checked by officially recognised
institutes. These checks cannot guarantee that the machine, meters and indicators will provide accurate values
and results conforming to the standards in force in the countries the machine has been installed and used in.
Normally such norms envisage calibration check after every movement. In order to obtain correct values and
results it is therefore VITAL that the operator, once the machine has been installed and set up and before
official tests, has an officially recognised body check the machine characteristics, its calibration and
results/values reliability. The manufacturer is exempt from all responsibility in the case of direct and indirect
damage from use of the machine without officially approval by the relevant bodies.
6.2 EQUIPPING – SAMPLE POSITIONING
The operating procedure is described in this paragraph to allow an inexperienced operator to perform the test
correctly. It is strongly suggested to consult the relevant International Standard to execute the test correctly.
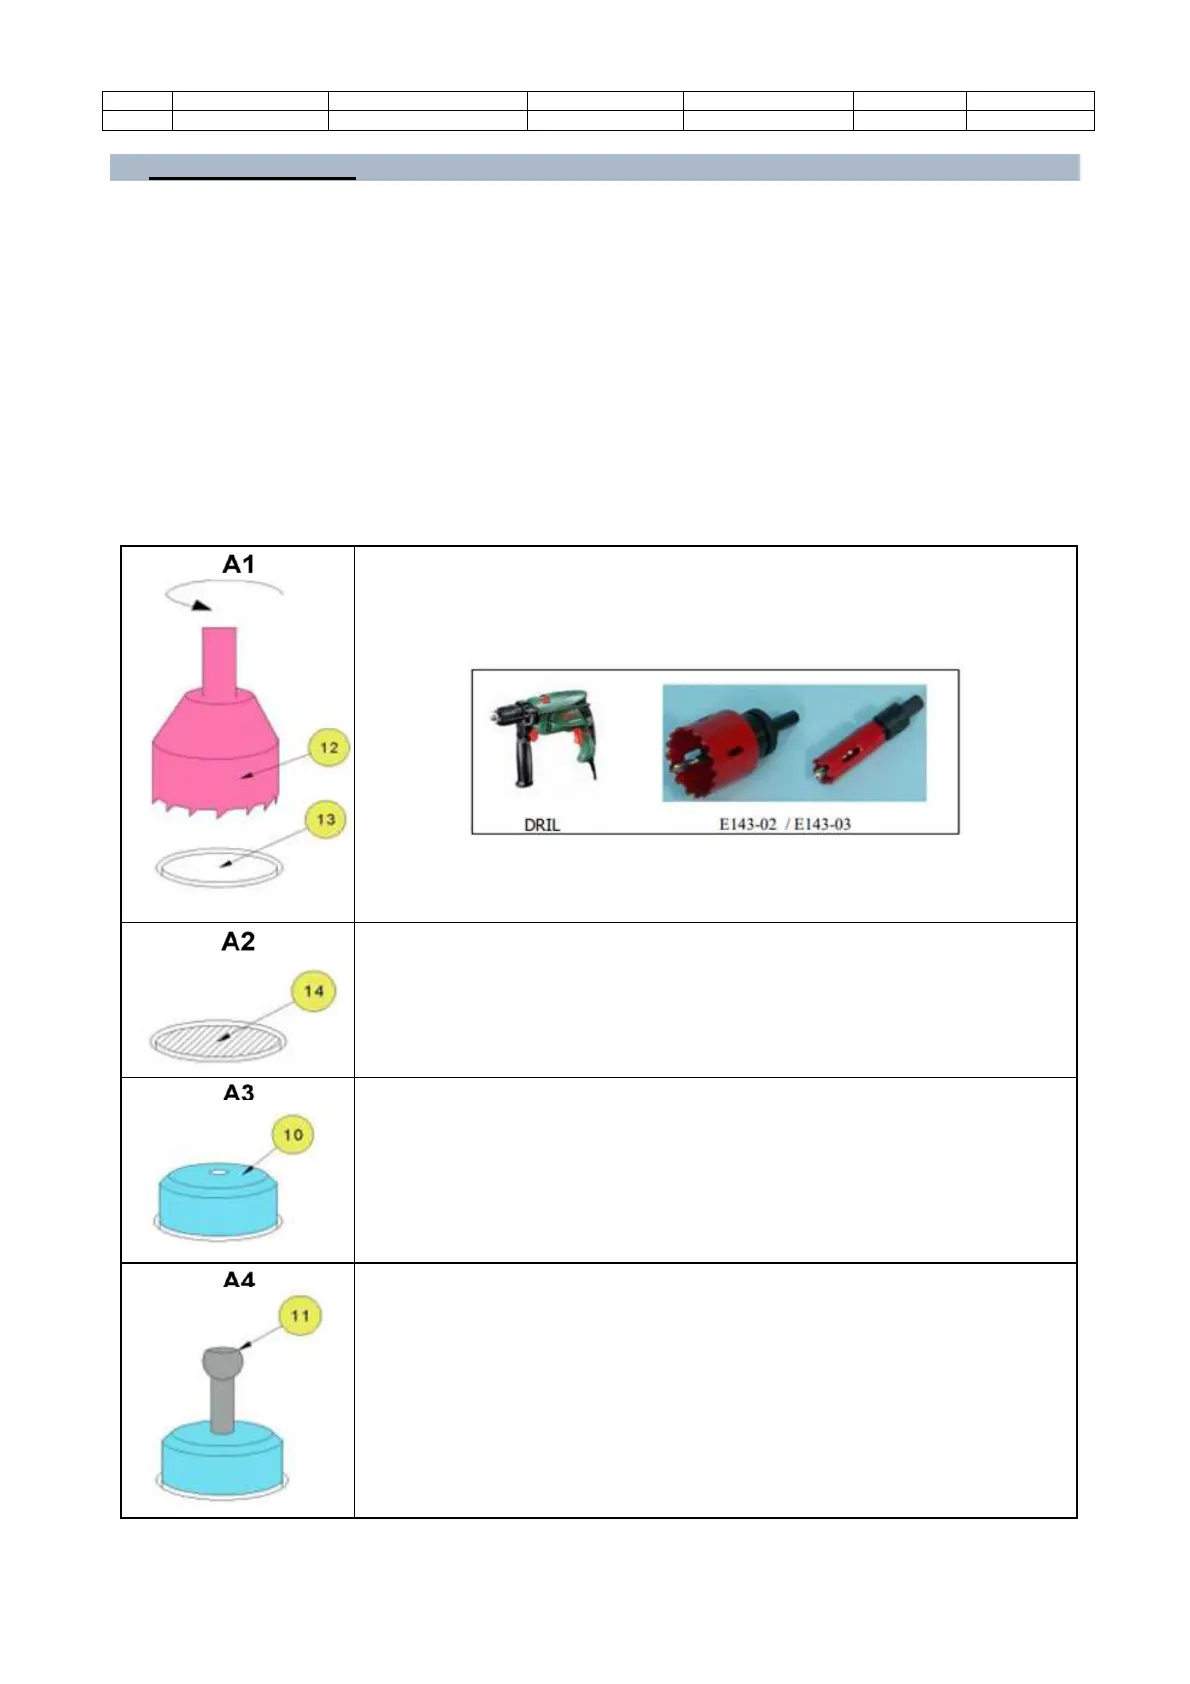
A – HOW TO PREPARE THE TEST SURFACE AND TO GLUE THE ADHESION DISC
A1. Make a square or round carving (13) - depending on the model of adhesion
disc used - on the test surface, by using a drill bit (12) – models E143-03 or E143-
02 - and an electric drill.
The carving has to be perpendicular to the surface.
That allows to exactly define the test area
A2. Apply a layer of quick drying glue (14).
A3. Put the adhesion disc (10) on the test surface by centring it into the carved
area and avoiding the overflow of the glue. Apply a pressure to push out the air
so that the glue creates a uniform layer between the adhesion disc and the test
surface. Wait for the glue hardening as specified by the instructions provided by
the manufacturer.
A4. Screw the tie rod with spherical head (11) into the adhesion disc