4
Section 2: Wiring Configuration
Section 2:
Wiring Configuration
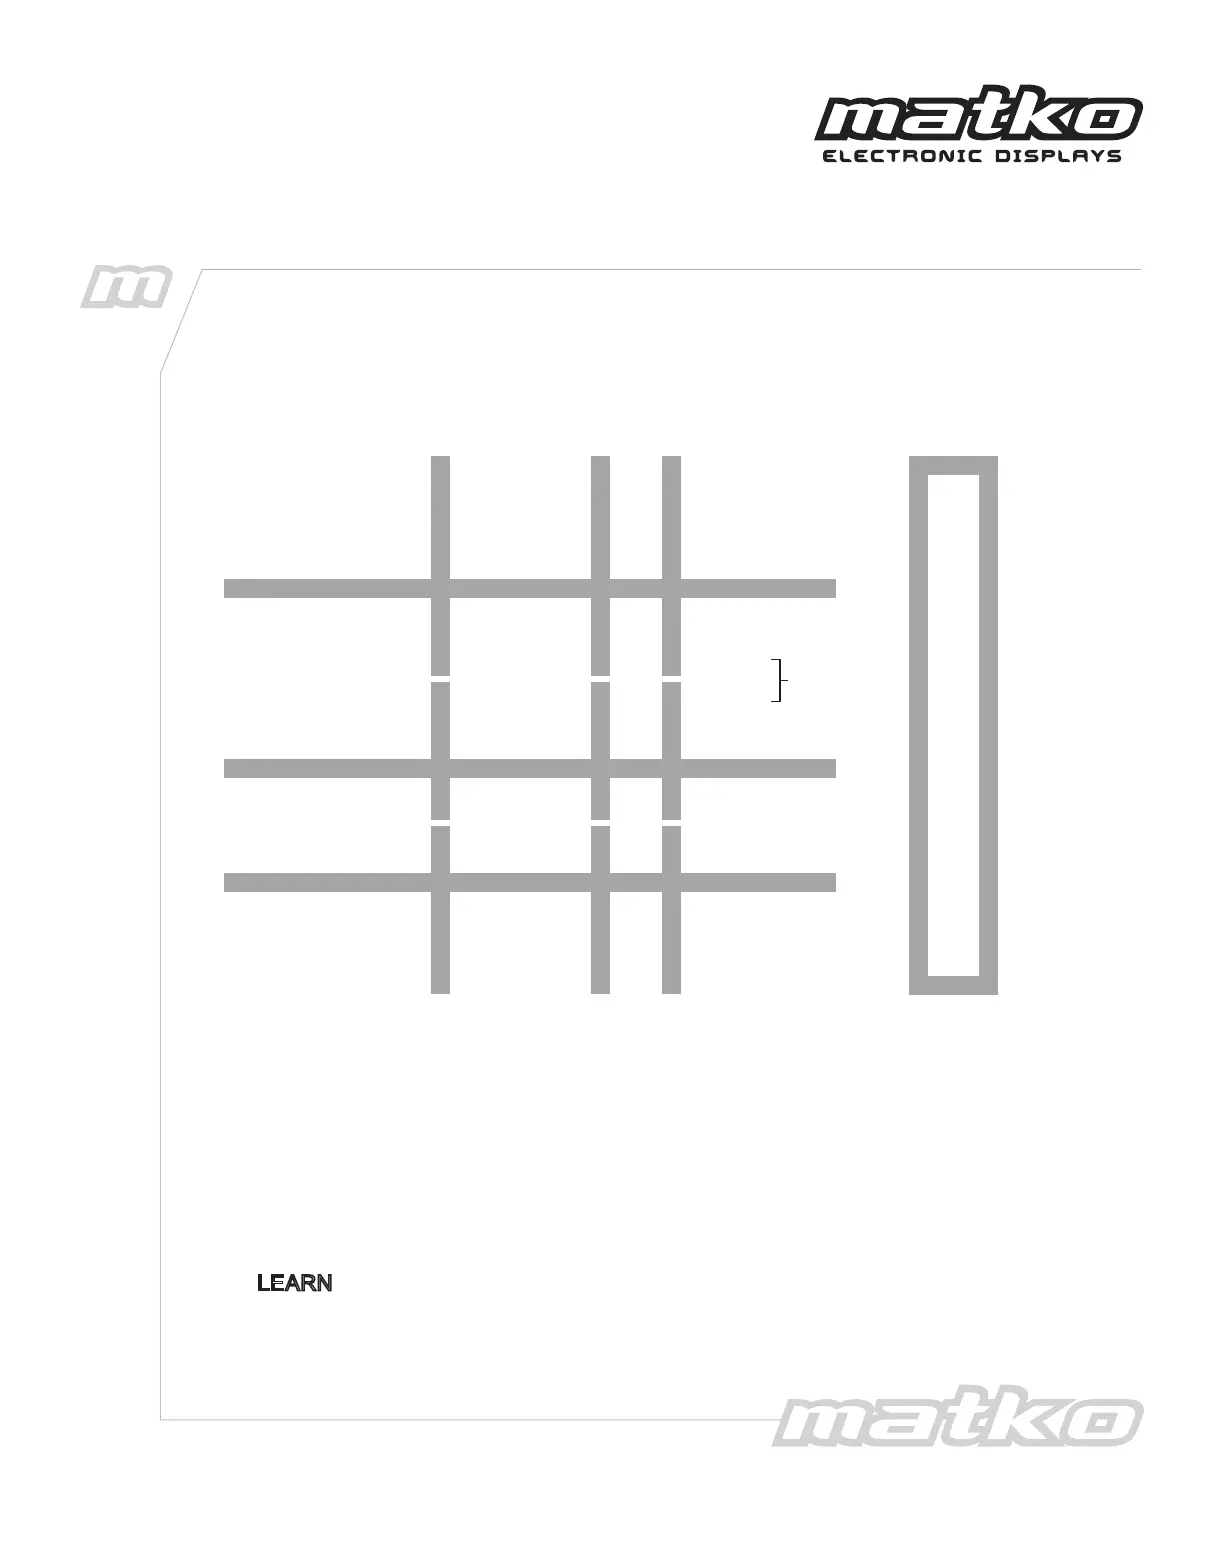
Connect the Scale indicator using the appropriate diagram.
7
8
+20mA
–20mA
Indicators with
Active 20 mA
Output
6
5
CL (+)
CL (–)
TX 422A (+)
TX 422B (–)
RX 422A
RX 422B
Indicators with
RS422 Output
3
2
TXD
GND
Indicators with
RS232 Output
232 RXD
GND
Indicator DisplayPin
Connector Pin Out
1 VCC
2 GND
3 232 RXD
4 232 TXD
5 CL(-)
6 CL(+)
7 RX 422A
8 RX 422B
9 TX CL(-)
10 TX CL(+)
11 TX 422A
12 TX 422B
13 13 GREEN
14 14 RED
1
2
5
6
+20mA
–20mA
VCC
GND
CL(–)
CL(+)
Indicators with
Passive 20 mA
Output
JUMP
The corresponding green LED will blink when the following three requirements
are satisfied.
1. The display is powered on.
2. The indicator’s port is enabled to transmit continuously.
3. The wires are connected to the terminal block as previously described.
The display will learn "automatically configure" to the transmitting device when the
LEARN
button is pressed at the end of startup. It will display the BAUD rate and then
display the weight. Pressing LEFT or RIGHT will move the displayed stream
accordingly until the desired data can be seen on the display.