42
9.8 DRIVE AXLE SET REPLACEMENT - CONTINUED
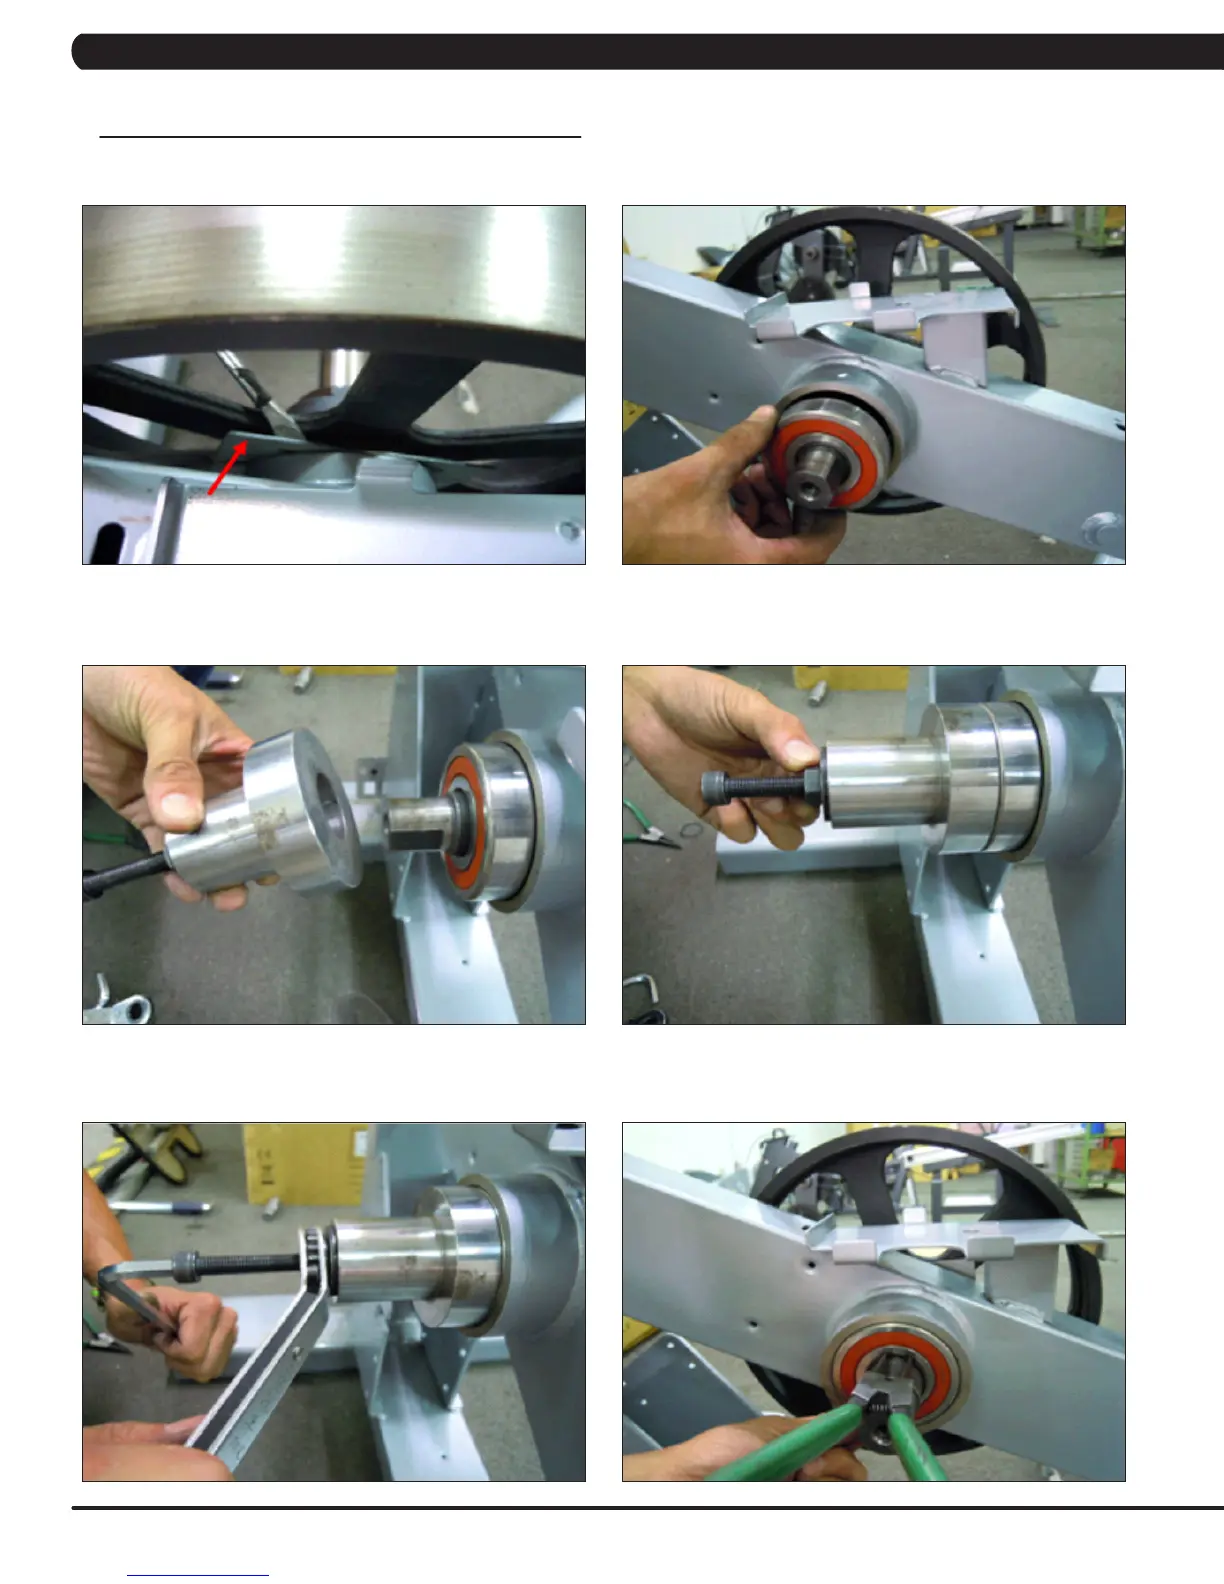
16) Turn the nut until the iron plate is close to the frame on the right side (Figure M).
17) Remove the tools, then insert the bearing into the hole in the frame on the left side (Figure N).
18) Again use the M10 x 65L screw with a washer and a nut to attach the tool to the drive axle (Figure O).
19) Turn the screw at least 4 full revolutions into the drive axle. Then turn the nut until it is close to the cup portion of the tool (Figure P).
20) Use a wrench to hold the screw, then turn the nut to push the bearing into the hole in the frame (Figure Q).
21) Insert the retainer clip to hold the bearing in the frame (Figure R).
FIGURE M FIGURE N
FIGURE PFIGURE O
FIGURE RFIGURE Q
CHAPTER 9: PART REPLACEMENT GUIDE