44
9.9 CRANK REPLACEMENT
1) Turn off the power and disconnect the cord from the machine.
2) Remove the front disks from the machine as outlined in Section 9.1.
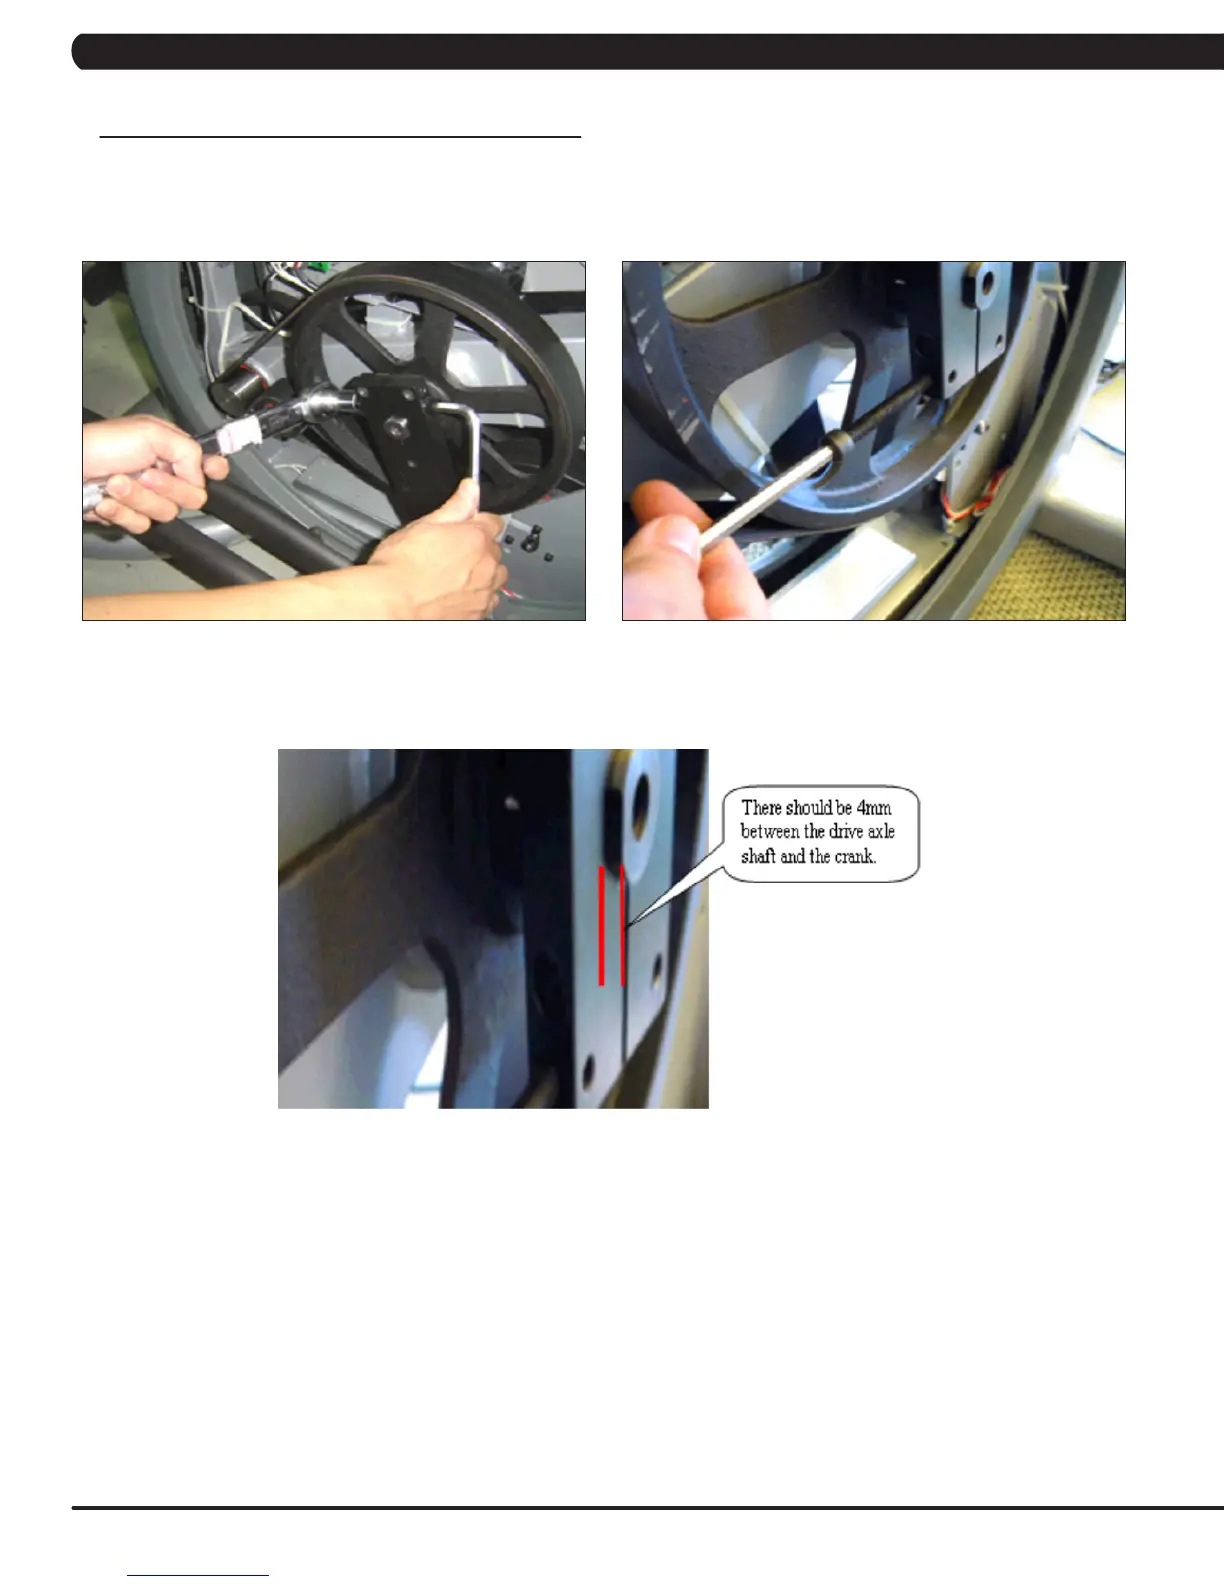
3) Remove the screw from the crank (Figure A).
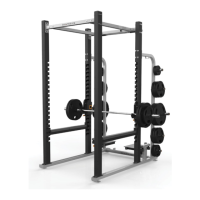
4) Insert an M10 screw (should be at least 40 long) into the crank hole. Then turn the screw until the crank can be separated from the axle
(Figure B).
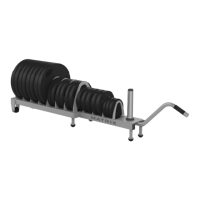
5) Install the replacement crank. There should be a 4mm gap between the end of the drive axle shaft and the crank (Figure C).
6) Install the crank screw. NOTE: This screw should be torqued to 80 N-m.
7) Reverse Steps 1-2 to re-assemble the unit.
FIGURE BFIGURE A
FIGURE C
CHAPTER 9: PART REPLACEMENT GUIDE