78
FIGURE E FIGURE F
9.5 CONSOLE KEYPAD / OVERLAY REPLACEMENT - CONTINUED
FIGURE G FIGURE H
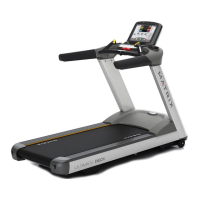
8) Press down on the corners of the overlay / keypad to keep it in place. Then remove the protective film (Figure G).
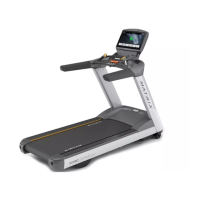
9) Once the overlay / keypad is in the correct position, press down on it to adhere it in positions (Figure H).
10) Use the same procedure to replace any additional faulty overlays / keypads. NOTE: Overlays / keypads cannot be re-used.
11) Test the bike for function as outlined in Section 9.22.
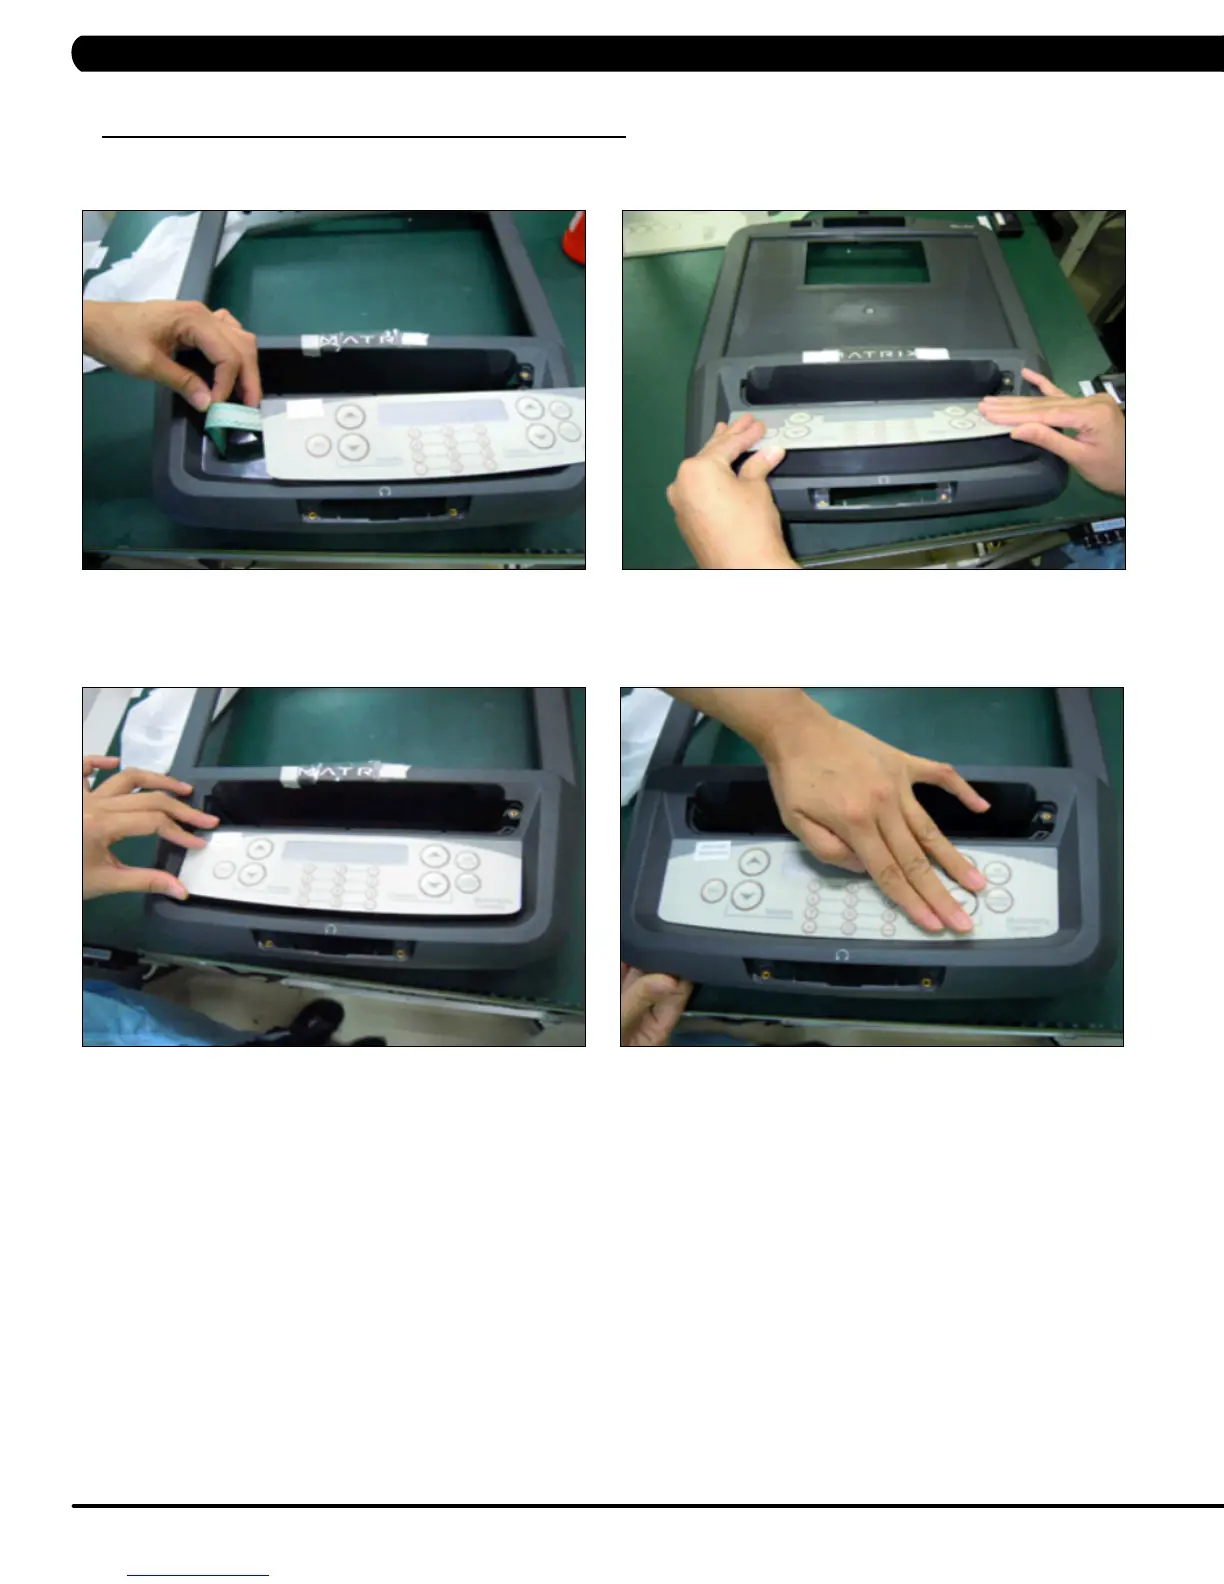
6) Push the overlay / keypad ribbon cable through the hole in the console and plug it in (Figure E).
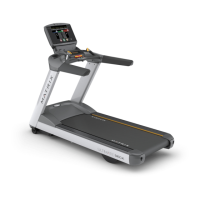
7) Match the overlay / keypad to the cutout in the console (Figure F).
CHAPTER 9: PART REPLACEMENT GUIDE