2 Channel Wireless Communication
miller gate link
Example: Input 3 is
NOT used and MUST
be jumpered to GND.
Sensor
Wires
Jumper UNUSED Entrapment
Protection Inputs or a fault
will occur.
3
2
1
Photo
Cell
Edge 2
Edge 1
GND
GND
Gate Link Receiver/Transmitter Programming:
1. Make sure receiver and transmitters have power.
2. Green power LED stays ON; CH 1 red LED will be blinking on
receiver.
3. To enter Learn mode, press the CH 1 Learn button for 1 sec.
The red led remains ON and the amber status LED will blink.
4. Activate the transmitting edge, the red and amber LEDs will
alternately blink rapidly on receiver. Then the red LED will go out
and the amber LED will remain ON.
5. Channel 1 is now programmed. Repeat steps for Channel 2.
6. To start over or erase programming, press and hold both
LEARN buttons for 3 seconds. The LEDs will blink rapidly and
then go into “fault” mode. Repeat the programming steps above.
An MGL-TX20 transmitter is
needed for each channel of
the receiver.
Mount on Gate’s
OPENING side.
Mount on Gate’s
CLOSING side.
Wire 10K Edges
MGL-TX20
Polarity does
NOT matter.
Terminal Block
Connection
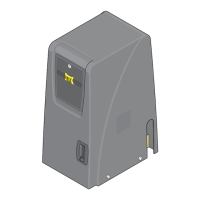
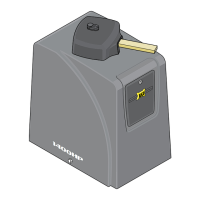
MGL-TX20
Transmitter
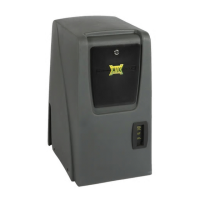
MGL-RX20 Receiver
10K CLOSING Edge
Batteries
MGL-TX
20
Monitor
e
d
Gate Link
M
iller
Ed
g
e
Channel 1
MGL-TX20
Monitor
e
d
Gate Link
M
ille
r
E
dge
Channel
2
Test Button
Green LED
IMPORTANT: Receiver
MUST be powered by MAX
Motor Controller or it will
NOT be MONITORED.
Both DIP-switches (Channel 1 & 2) to “R”
DO NOT set to “P” Pulsed
To PWR 12V and GND
Polarity does NOT matter.
CLOSING 10K sensing edge
connected to Channel 1 (Edge 1).
OPENING 10K sensing edge
connected to Channel 2 (Edge 2).
Channel 1 & 2 transmitters MUST be
programmed by receiver. See below and
Miller Edge Gate Link MGL-K20
instruction sheet for more info.
NOTE:
Edge 1 - CLOSING direction ONLY
Edge 1 is automatically MONITORED.
Edge 2 - “Learned” Open/Close direction
See installation steps #10 note below.
GND
Edge 2
Antenna Mount
P/N.C.
P/N.C.
Edge 1
COM
P/N.C.
10K
COM
P/N.C.
10K
POWER
CH 1
POWER
STATUS
OUTPUT
SELECT
LEARN
P
R
CH 1
CH 2
CH 2
MGL-RX20
Monitored Gate Link
MillerEdge
12
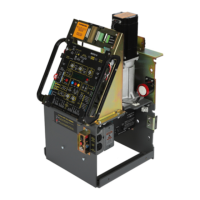
MAX Motor Controller
Channel 1
Channel 2
10K OPENING Edge
MGL-TX20
M
onitore
d
G
at
e Link
Mill
er
Edg
e
Second transmitter
sold separately
MGL-TX20
Monitored
Ga
t
e
Link
MillerE
d
g
e
Transmit
ter
POWE
R
STAT
US
L
EARN
CH
1
CH
2
COM
P/
N.C.
10K
COM
P/
N.C.
10K
POWE
R
C
H
1
CH
2
MG
L-RX20
Monitored Gate
Link
OUTPU
T
SE
L
E
CT
P
R
MillerEd
ge
Receiver
PhotoC
ell
Edge
UL
En
trap
1
2
Limit SW
ON
-
LIN
E
MATRIX
JOG
J
OG
LEFT
RIGHT
Jog LT
Jog RT
GND
Edge 1
Edge 2
Photo
Cell
ER
D
Motor
OverLoad
POWER
MC-200
Motor Controller
16
15
14
13
12
3
4
5
MA
X
LED
ON
S
e
nsitivit
y
Edge
ER
D
MO
TO
RP
o
w
er
In
A
L
A
R
M
BATTE
R
Y
PACK
LI
M
I
T
SWITCH
MO
TO
R
I
N
PU
TS
PWR 12
V
-
GN
D
-
-
-
PWR 24
V
-
GN
D
-
R
S
-
4
8
5
(-)
-
RS
-485
(+
)
-
M
A
TRIX 1
Edge 1
Mon
itore
d
Rever
s
ing
Edge
Monitored
Photo
Cell
OR
GN
D
J
og RT
Jog LT
En
t
r
apment
P
rot
e
ctio
n
Input
s:
MUST
jumper
unuse
d
inp
ut
s
Ent
r
apment Protectio
n
Sensor
G
uidelin
e
s
1
-
-
-
C
AUTION
:
Se
e
installation instr
uctions.
AT
T
ENTION
:
Vo
ir
l
a notice
d
’i
nsta
lla
t
i
o
n.
Ed
ge 2
Ph
oto
Cell
M
C-20
0
PWR
12V
M
U
ST
be
used
ONL
Y
p
ower entrapmen
t prot
ection
se
ns
o
r
s with
MC-2
00 PWR 12V
2
3
•
A
sensor
M
U
ST
be
wi
r
ed
to EDGE
1
or
op
era
to
r
W
IL
L
NO
T funct
i
o
n.
•
W
ire
NORMALLY
CL
OS
ED
(N.C.)
MONIT
ORED sensors
ONL
Y
,
to each
o
p
er
a
tor
’
s MC-2
00
whe
n
dual op
erator
s
ar
e
used.
•
Reversing Ed
ge
a
nd
/or P
h
oto
Cell ca
n
be wired
to
ANY of
th
e
3 I
n
pu
ts
.
•
MC-200 PWR 12
V
MU
S
T
be
u
se
d to
po
we
r
MONI
TORE
D
sen
so
rs.
•
UN
USED inputs M
UST
rem
ain
JUMPER
ED
or
f
ault will occu
r.
G
N
D
1
2
3
In
puts & MUS
T
be “LE
ARN
ED”
to
MONIT
OR sen
so
rs.
T
o
L
EAR
N inp
uts
&
:
1.
M
O
N
IT
OR
E
D
Sens
ors
M
U
ST
be
wired to inputs
BEFOR
E
they
can be
learned.
Any unus
ed inputs M
US
T be
jump
ered.
2.
R
eversing
Edge and/or
Photo
Cell can
be wi
red to either input 2 or 3.
3.
Pres
s and
HOL
D
the O
P
EN
& ST
OP
buttons at the
same ti
me on
Matrix
1
until beep is h
eard, lear
n
m
ode beg
ins.
Learn
m
ode lasts for 5 min.
indicated
by beepi
ng.
4. LE
D
s W
I
LL
be
ON
f
or each
d
etected
sensor
on
M
C-200.
LEDs
W
IL
L
be
O
N
for
BOTH MC
-200s
when dual
operators are us
ed.
5.
Pres
s ST
OP but
ton again
within 5 min.
to learn sensors and end l
earn m
o
de,
beeping stops
.
I
nputs
are now
M
ONIT
O
RE
D
.
2
3
2
3
O
P
EN STO
P
CL
O
SE
M
O
T
O
R
M
OT
IO
N
MC
-
2
00
S
l
id
e
MC-200
Use PRIMARY mot
o
r
contro
ller
when dual operators are
u
s
ed.
Installation Steps:
1. Set Both DIP-switches to “R” on receiver
2. Wire 12V power to receiver, polarity does not matter
3. Wire motor controller EDGE 1 to receiver CH 1-P/N.C.
Wire motor controller GND to receiver CH 1-COM
4. Wire motor controller EDGE 2 to receiver CH 2-P/N.C.
Wire motor controller GND to receiver CH 2 - COM
5. Install antenna on receiver
6. Install batteries in transmitters
7. Wire Channel 1 Transmitter to CLOSING Edge ONLY
8. Wire Channel 2 Transmitter to OPENING Edge
9. Program Channel 1 and 2 on MGL-RX20 receiver
10. Program MAX motor controller to “LEARN” Edge 2
NOTE: Edge 2 will function without being “Learned” but will NOT be
MONITORED by the MAX gate operator.
See your chosen Max operator manual to program the MAX motor
controller to “Learn” Edge 2 if desired.
E
dg
e
1
C
L
OSE ON
L
Y
A GEM-104 module is NOT
needed for the sensing edge
when using a gate link
transmitter.
24
UL 325 2016 Standard-MAX Quick Install Rev 8