Notes on Installation
Disconnect negative battery terminal before starting installation. Consult the vehicle owner’s
manual for proper instruction.
The unit is designed for a 12Volt DC negative ground operation system only. Before installing
the unit, make sure your vehicle is a 12Volt DC negative ground system.
Be sure to connect the colour coded leads according to the diagram. Incorrect connections may
cause the unit to malfunction or damage the vehicle's electrical system.
Be sure to connect the negative (-) speaker leads to the negative (-) speaker terminal.
Never connect negative (-) speaker leads to chassis ground.
The unit is only designed for use with 4 speakers. Do not combine output for use with 2 speakers.
Do not ground negative speaker leads to the chassis ground.
Make sure all the connections are completely correct before turning on your unit.
When replacing the fuse(s), the replacement must be of the same amperage as shown on the
fuse holder.
Do not block vents or heater panels. Blocking them will cause heat to build up inside and
may result in fire.
After completing the installation and before operating the unit, reconnect the battery. Then
press the (RES) button with a pointed object, such as a ball-point pen to set the unit to its
initial status.
If you have difficulty installing this unit in your vehicle. Please contact your dealer.
Before You Install
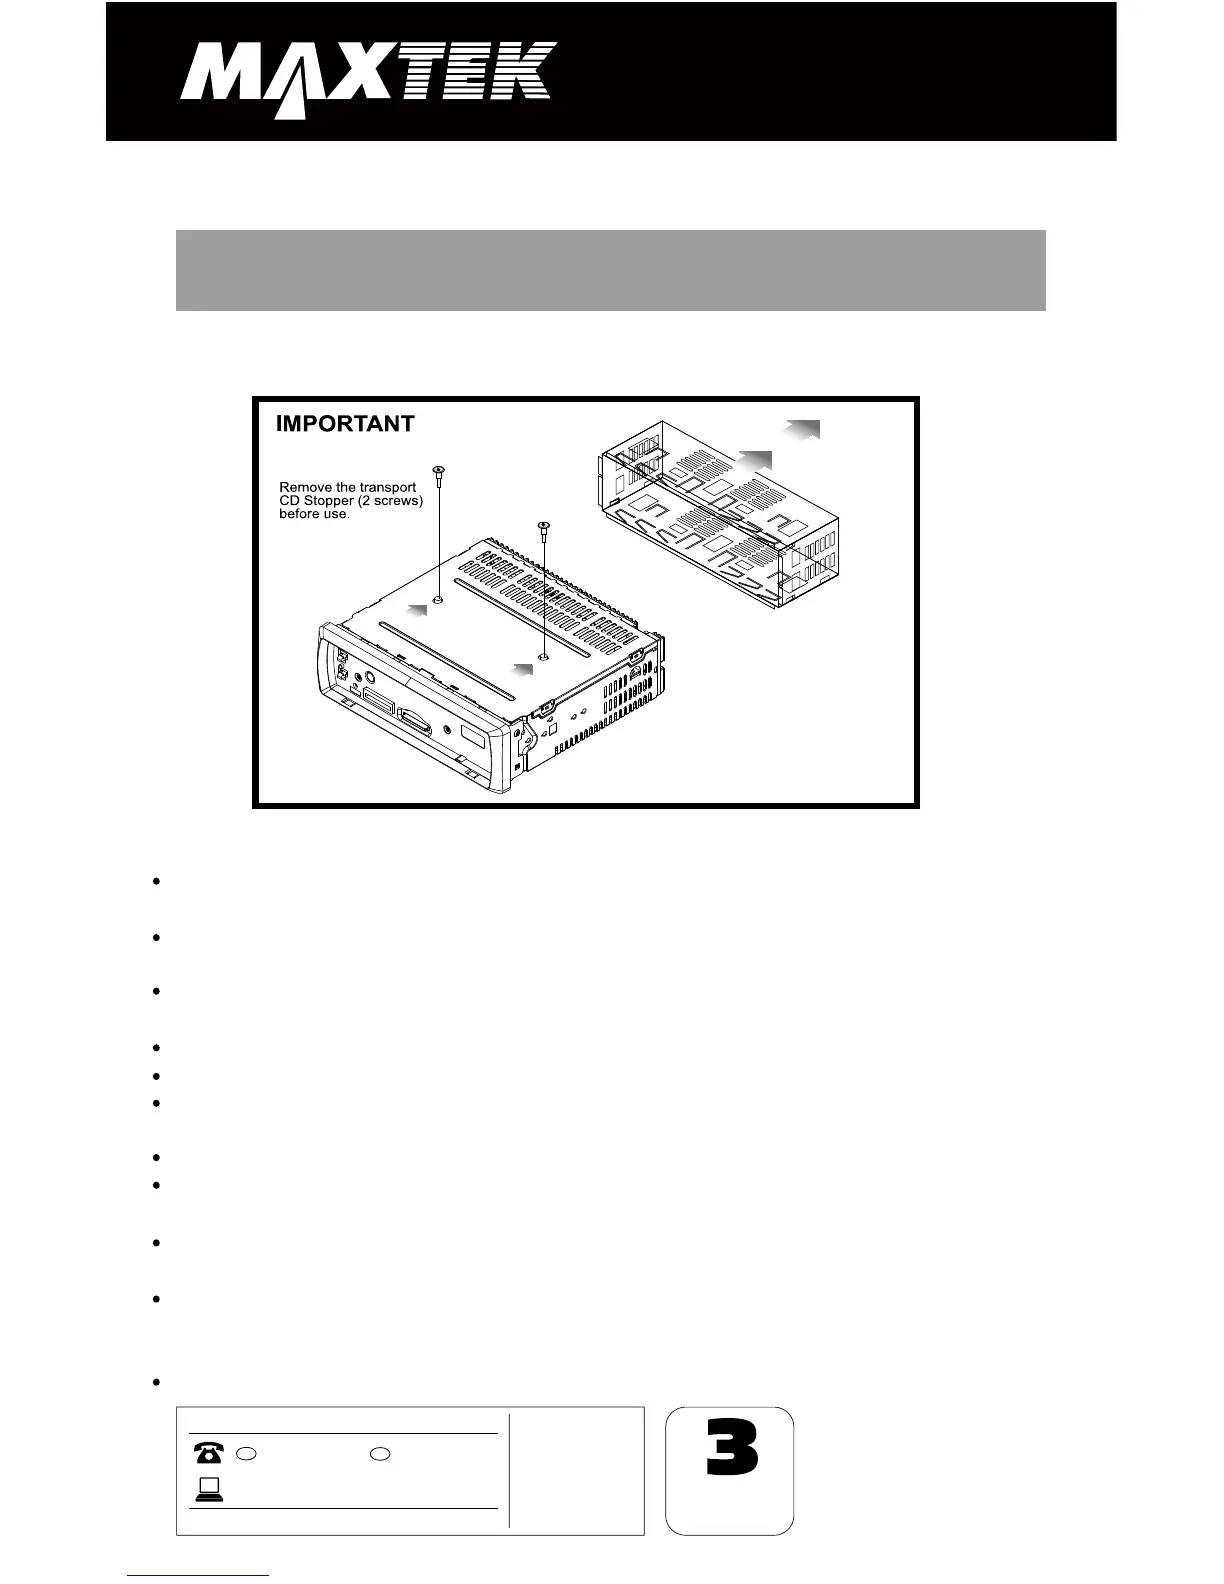
IMPORTANT:
Remove the two transport screws from the
top of the unit before installing.
Please remove the screws before installing the radio; Failure to do so will result in the CD deck
rejecting the disc. Please refer to the illustration below: