Chapter 2: Components/Systems 21
4600 SCB Owner’s Manual Supplement
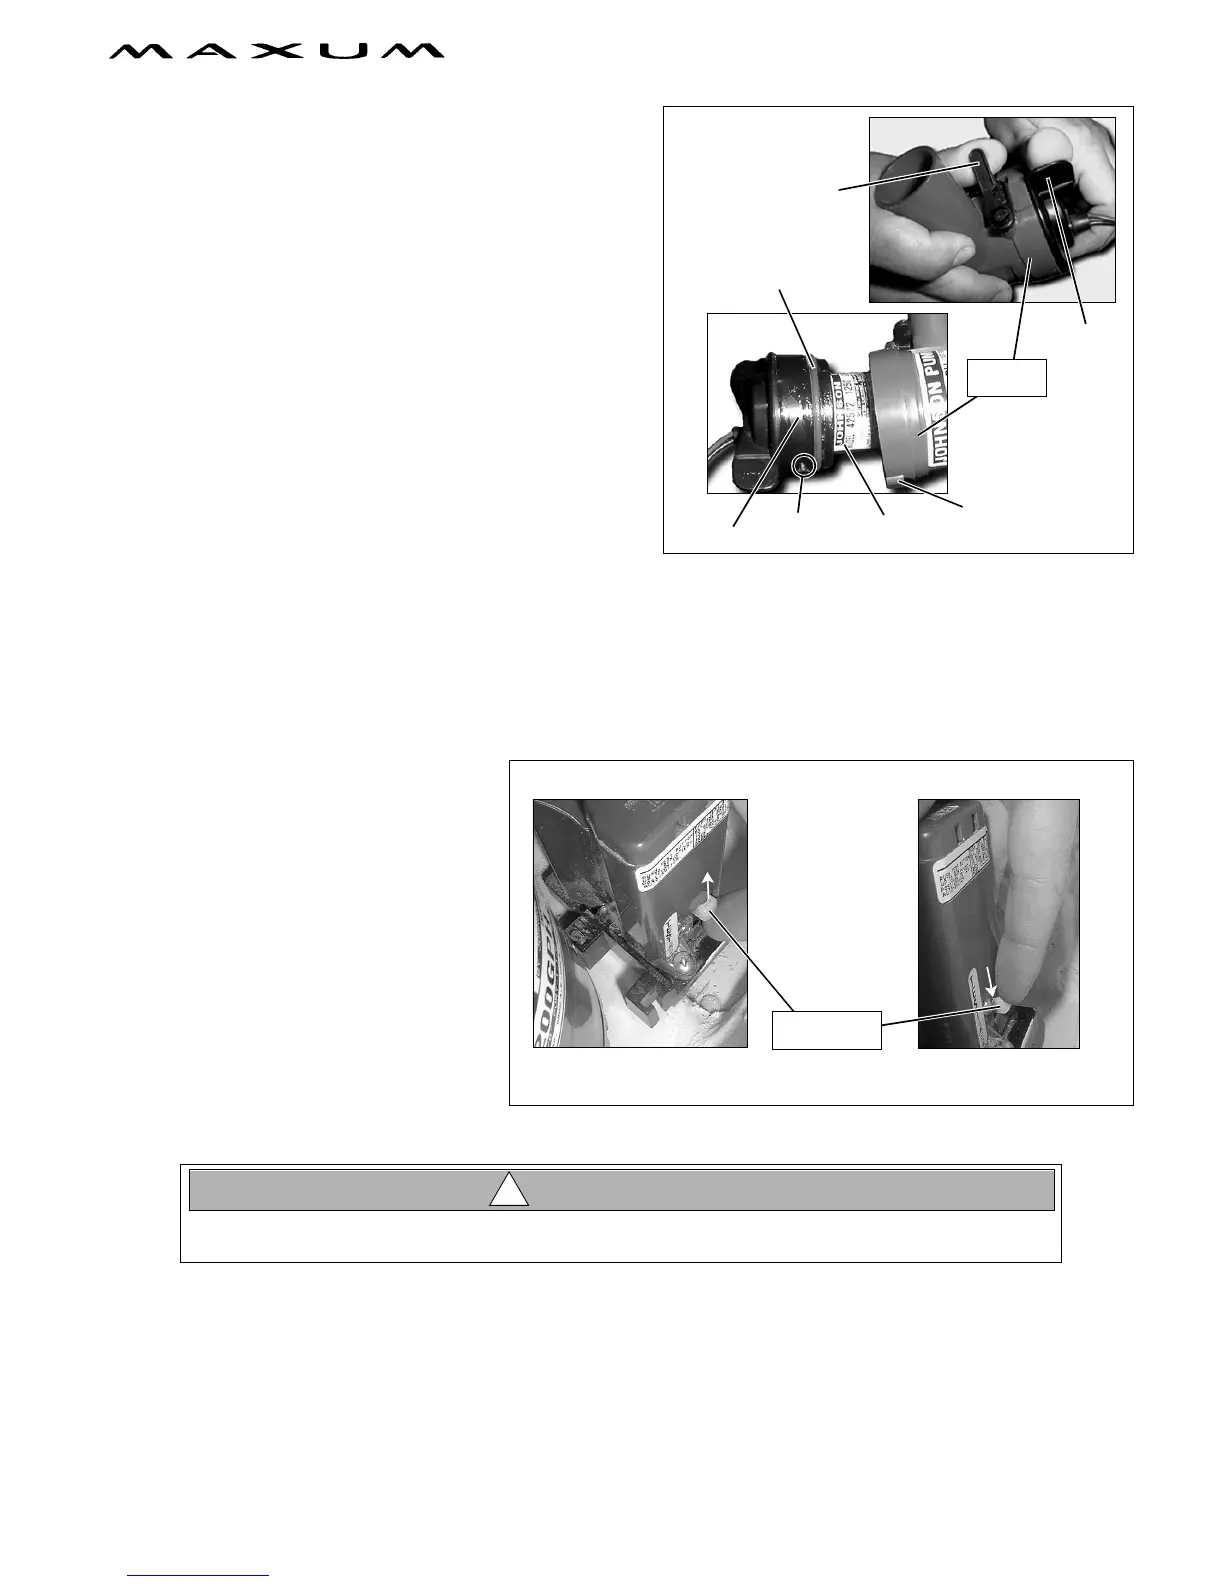
Bilge Pump Cleaning:
1. Remove the power cartridge:
a. Lift the tab while rotating the fins counterclockwise.
b. Lift out the power cartridge.
c. Clear the outer housing of debris.
2. Reinstall the power cartridge:
a. Make sure the “O” ring is properly seated.
b. Coat the “O” ring with a light film of vegetable or
mineral oil.
c. Align the two cams on either side of the power car-
tridge with the two slots on the outer housing and
press the power cartridge into the housing while twist-
ing clockwise.
d. To ensure proper reinstallation of the power cartridge,
attempt to twist the fins counterclockwise without lift-
ing the tab: The cartridge should stay in place.
Autofloat Switches
Automatic bilge pumps use electromagnetic float (autofloat) switches to automatically activate the pump whenever
water accumulates above a preset level in the bilge. One autofloat switch is mounted next to the bilge pump it acti-
vates, and is wired directly to the battery so it will normally function even when the yacht is completely shut down
and left unattended.
Autofloat switches should be tested often for proper operation as follows:
Float Switch Test:
1. Push the float switch test button up to
activate the bilge pump.
If the pump does not turn on, check
the inline fuse. If the fuse is good but
the switch doesn’t work, it may indi-
cate a bad switch or possibly a low
battery.
2. Push the test button all the way down to
return the float switch back into the
auto mode.
OF OIL
FILM
“O” RING
TAB
FIN
POWER
CARTRIDGE
SLOT
CAM
(TYPICAL)
LIGHT
BILGE PUMP
COMPONENTS
(TYPICAL)
OUTER
HOUSING
FLOAT DOWN - AUTO MODE FLOAT UP - TEST MODE
BILGE PUMP SHOULD TURN ON
BILGE PUMP SHOULD TURN OFF
FLOAT SWITCH TESTING
FLOAT SWITCH
TEST BUTTON
When test is completed on a float switch, you must push the test button all the way down to the
auto position to turn the switch back into auto mode!
CAUTION!
!


 To Next Page