14
Original MAXX MOTORS (without Bluetooth)
Operation & Programming Instructions
Solo-A1 - Original Maxx Motor
Rechargeable Wand Control System with Internal Battery Motor
12V DC with Battery Charger
Command Item Operation Result Illustration
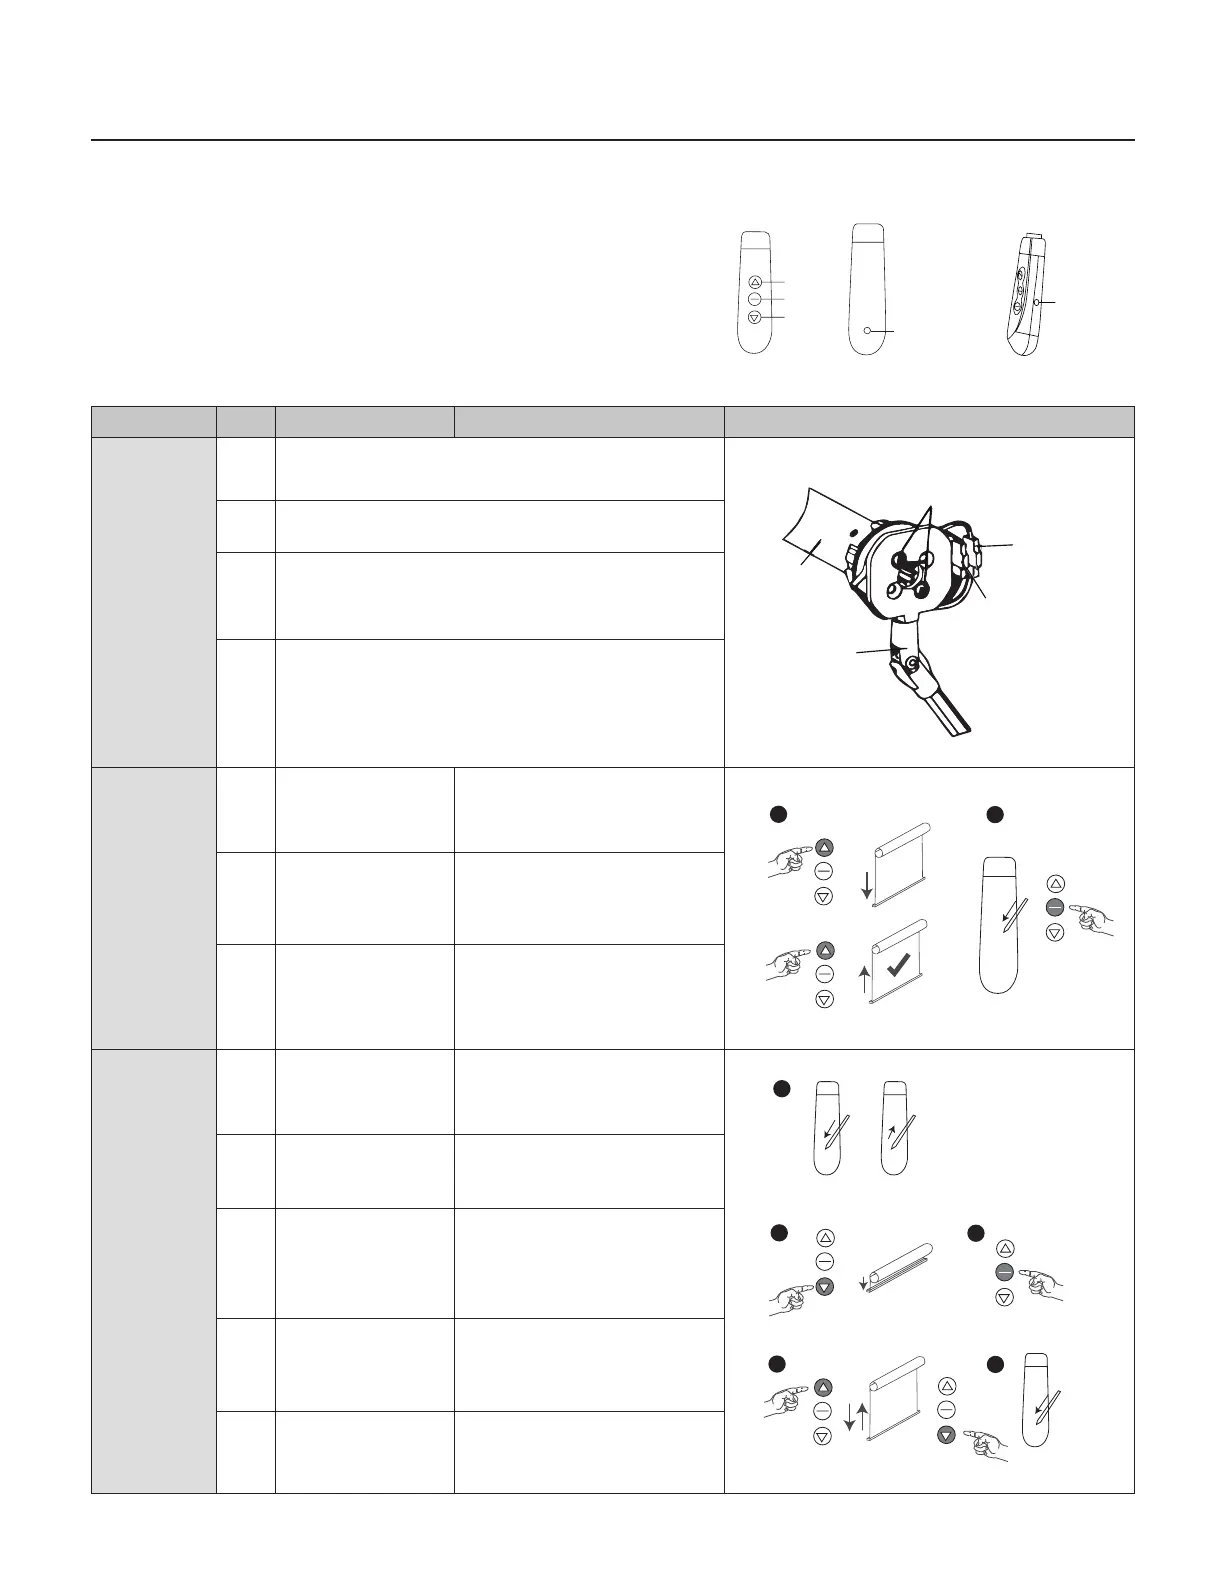
Motor unit
assembling
1 Fix Switch wand with motor using two screws
2 Connect switch wand and motor connector (4 pins)
3 Connect motor power with switch wand (2 pins)
Note: Please disconnect motor power and switch wand con-
nector if this unit needs to be transported after assembling
4 Charging motor battery use a plug charger. Please recharge
motor battery again when the motor alarms DI-DI-DI- or
works faltering.
Charging time: 5 hours. Please take the charger away when
charging full
Change motor
rotation
direction
1 Press UP button If motor goes up, please do
nothing-If motor goes
down, please do next step
2 Press and hold
SETTING button
then press STOP
Release both buttons when
motor sounds DI-DI-DI
3 Press UP button Motor goes up, the motor
rotation direction has been
revised
Lower limit
setting
1 Press and hold
SETTING button
on switch
Release this button
when motor sounds
DI-DI-DIPress
2 Press DOWN button Motor goes down
3 Press STOP button
when close
to the lower limit
position
Motor stops
4 Press UP or DOWN
button to adjust
the nally position
Press UP button
5 Press SETTING
button
Motor sounds DI-DI-DI-,
lower limit setting has
been set
Up
Stop
Down
Settings
key
Charging
port
Motor
Switch
wand
Screws
Power
connector
(2 pins)
Switch wand
connector
(4 pins)
X
1
2
1
2
3
4
5
Switch