Do you have a question about the Maytag Wall Oven and is the answer not in the manual?
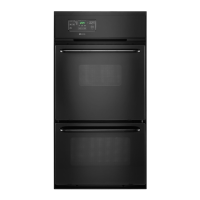
Identification and layout of controls for single and double wall ovens.
How to operate the oven's interior light, with limitations.
Functionality of the clock for time of day and setting timers.
Purpose of the door lock lever, primarily for self-cleaning.
Recommended rack placements for optimal baking and roasting results.
Tips for first-time baking, preheating, pan placement, and testing doneness.
Guidance for using convection feature, temperature adjustments, and pan placement.
Strategies for baking multiple items simultaneously using convection.
Specific instructions for baking pre-packaged frozen foods using convection.
Tips for open pan roasting, using thermometers, and meat placement.
Guidance for roasting meats and poultry in the convection oven.
Advice on meat preparation, pan use, and turning food during broiling.
A chart providing approximate cooking times per side for various foods.
Explanation of how high temperatures remove food soil.
Steps to take before starting the self-cleaning cycle, including removing items.
Basic operation of the automatic self-cleaning function.
How to clean door, control panel, glass, and metal trim.
Instructions for removing and cleaning oven control knobs.
Steps for safely replacing the oven light bulb.
How to remove and reinstall oven racks for cleaning or repositioning.
Specific checks for common problems like no operation, no heat, or improper broiling.
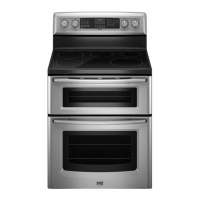
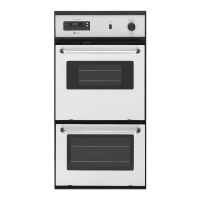
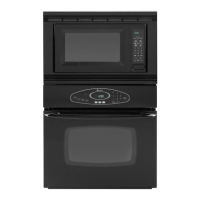
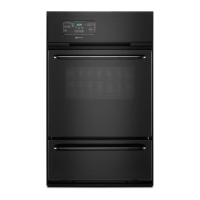
This document describes the operation, maintenance, and troubleshooting of a Maytag wall oven, including both single and double oven models, with a focus on conventional and convection cooking methods.
The Maytag wall oven is designed for baking, roasting, and broiling various food items. It features an OVEN SET knob to select the desired operation (OFF, BAKE, TIMED BAKE, CONVECT, TIMED CONVECT, BROIL, CLEAN) and an OVEN TEMP knob to set the temperature. The oven includes indicator lights for OVEN (when operating), LOCK (when door is locked at high temperature), and CLEAN (during self-cleaning). A clock controls and minute timer allows for time of day display, minute timing, and programmed oven operations (start and stop automatically). The oven also features a door lock lever, primarily used for the self-cleaning process.
To operate the oven, users turn the OVEN SET knob to the desired setting and the OVEN TEMP knob to the desired temperature. The OVEN INDICATOR LIGHT will glow until the set temperature is reached, then cycle on and off to maintain it. Preheating is recommended for baked goods that rise and for richer browning, typically taking 6 to 9 minutes. Casseroles can be started in a cold oven. After cooking, both knobs should be turned to their OFF and counterclockwise positions, respectively.
The oven comes with one flat rack and one offset rack. Rack positions are crucial for optimal browning and efficient cooking. Position #1 is recommended for large cuts of meat, large poultry, angel food cake, loaves of bread, custard pie, and dessert soufflé. Position #2o (offset rack on #2) is for roasting small cuts of meat, loaves of bread, and angel food cake. Position #2 is for small cuts of meat, cakes (tube, bundt, or layer), frozen fruit pie, pie shell, and large casseroles. Position #3o (offset rack on #3) is ideal for most baked goods on cookie sheets, frozen convenience foods, fresh fruit pie, cream pie, layer cakes, and main dish soufflé. Position #3 is for most baked goods on cookie sheets, cakes (sheet and layer). Position #4o (offset rack on #4) is primarily for broiling. For multiple rack cooking, two racks can use #2o and #4, while three racks (only in convection ovens) can use #1, #3o, and #4.
Users should use recipe cooking times and temperatures as a guide, especially for first-time use. Tested recipes from reliable sources are recommended. Proper air circulation is important, so allow 1 to 1½ inches of space between oven walls and baking pans. When baking with multiple pans, place them on opposite corners of the rack and stagger them on two racks to prevent shielding. Dull, dark, enameled, or glass pans produce a brown, crisp crust, while shiny metal pans yield a light, golden crust. Frozen pies in shiny aluminum pans should be baked on a cookie sheet or transferred to a dull/glass pan. To conserve energy, frequent or prolonged door openings should be avoided. Food doneness should be tested by touch (fingertip, toothpick) rather than solely relying on time or brownness.
For convection baking, the oven temperature should generally be set 25°F lower than the recipe's recommended conventional temperature, with similar or slightly shorter cooking times. For better browning, large pans should be placed lengthwise, front to back, on the rack, centering the food in front of the convection fan. Cookie sheets should be without sides, made of shiny aluminum, and ideally 14" x 12". The convection fan automatically turns on when the convection feature is selected. A cooling fan also cycles on and off during all baking/roasting operations and may continue after the oven is turned off.
While single-rack baking is generally recommended for best results, good results can be achieved with multiple racks, especially in convection ovens due to circulating heated air. For two-rack baking, positions #2o and #4 are best for most baked products, though #2 and #4 also work. For three-rack baking, positions #1, #3o, and #4 are used. Foods on positions #1 and #4 may finish before those on #3o, requiring additional cooking time for the middle rack (1 minute for thin foods, 1-2 minutes for biscuits/rolls/muffins, 2-4 minutes for frozen pies/pizzas). Small pans should be staggered. Frozen pies in shiny aluminum pans should be placed on cookie sheets. Oven meals are recommended for energy conservation using racks #1 and #3o or #2o and #4.
Preheating is not necessary for frozen convenience foods. Package recommendations for oven temperature, foil covering, and cookie sheets should be followed. Baking times will be similar. Foods should be centered, and staggered if multiple items or racks are used. Most foods are baked on rack position #3o. For multiple rack baking, racks #1, #3o, and #4 are used, but pizzas should be on cookie sheets at #2o, #3, and #4.
Preheating is not necessary for roasting. For open pan roasting, meat or poultry should be placed on the slotted portion of the two-piece pan provided, without adding water. A meat thermometer is the most accurate guide for doneness, inserted into the thickest part of the meat, avoiding fat, bone, or gristle. Roasts should be placed fat side up for self-basting and on a rack in one of the two lowest rack positions. Meats continue to cook after removal, so remove the roast about 5 degrees below the desired temperature. Allow 15 minutes "standing time" for less juice loss and easier carving. Poultry should be completely thawed. For less tender cuts or meats cooked in bags/covered pans, regular roasting is recommended.
Tender cuts of meat and poultry can be roasted to a rich golden brown in a convection oven, following general roasting recommendations. High-sided roasting pans should be avoided, and the provided pan should be used. Meat should not be covered to allow circulating hot air to seal in juices. For large turkeys, a foil cap can be placed over the breast after desired browning to prevent overbrowning.
To broil, place the oven rack on the suggested position (typically #4o). Turn the OVEN SET knob to BROIL and the OVEN TEMP knob to BROIL. Place food on the broiling pan after the top broil element glows bright cherry red. The oven door should be left open at the broil stop position. Tender or marinated cuts of meat (rib/loin steak, ground beef, ham steaks, lamb chops, poultry, fish) are best for broiling, ideally 1" thick. The broiler grid should not be covered with foil. Excess fat should be removed, and fat edges scored. Fish can be brushed with melted butter to prevent dryness. Foods should be turned only once. The oven has a variable broil feature, allowing temperature adjustment to slow cooking or reduce heat by selecting a lower temperature on the OVEN TEMP knob. A fan should operate during the BROIL cycle; if not, service is required.
The clock is a 12-hour clock, displaying "00:00" when power is first supplied or interrupted. To set the time of day, turn the SET dial counterclockwise until "TIME" appears, then adjust the dial and push ENTER. To change the time, repeat the sequence. To check the time while the timer is in use, push ENTER. The minute timer can be set for up to 99 minutes and 00 seconds, independently of other oven functions. To set, turn the SET dial clockwise until the desired time appears, then push ENTER. The timer will count down, beep, and blink at the end. To cancel, push CANCEL once for the minute timer or twice for all programming (timed bake/self-clean).
To start immediately and shut off automatically, turn the OVEN SET knob to TIMED BAKE or TIMED CONVECT, set the temperature, hold the STOP TIME button, turn the SET dial to the desired stop time, and push ENTER. The oven will start heating, and "AUTO" will appear. To start at a future time and shut off automatically, follow the same steps but hold the START TIME button and set the desired start time first, then set the stop time. The "AUTO" indicator will blink until the start time, then remain constant. To cancel, push CANCEL twice.
If the oven temperature seems off compared to a previous oven, it can be adjusted. Pull the OVEN TEMP control knob straight out, loosen the two screws on the backside, and while holding the center hub still, move the outer portion of the dial counterclockwise to lower the temperature (one notch per 25°F) or clockwise to raise it. Retighten screws and replace the knob. It is recommended to test the adjustment by baking 2-9" white layer cakes.
The self-cleaning process heats the oven to high temperatures, burning off food soil. A device in the oven vent consumes smoke, and the oven vents through an opening on the control panel. Both ovens in a double model cannot be self-cleaned simultaneously.
Remove the broiling pan and all other utensils. Oven racks can be cleaned in the oven, but they may discolor and become difficult to slide. It is suggested to remove them if discoloration is objectionable. Moderately soiled racks can be cleaned with a soapy S.O.S. pad or Scotch-Brite scour-pad. Excess grease and food spillovers, especially acidic foods, should be wiped up before cleaning to prevent heavy smoke or fire. The heating element can be lifted slightly for easier cleaning. Areas not cleaned by the self-cleaning process (porcelain oven door liner outside the gasket, center front of oven and door near opening, oven front frame) should be cleaned with hot water and detergent, nonabrasive cleansers, or soap-filled steel wool pads. The door gasket should NOT be cleaned, rubbed, or have water applied to it, as this can damage the seal. Smoke and odor are normal during cleaning, and the kitchen should be well ventilated.
For average soiled ovens, set the OVEN SET and OVEN TEMP knobs to CLEAN, lock the door, and push ENTER twice. The oven will clean for 2½ hours (plus cool-down time). For heavily soiled ovens or delayed starts, refer to the detailed self-cleaning instructions.
A slight odor and possibly smoke may be detected, which is normal. Occasional flames may be visible due to excessive food soil. The door and window will get warm, so avoid contact. Some soil may leave a light film or ash, which can be removed with a damp sponge after cooling. If dark deposits remain, increase future cleaning times or clean more frequently. If racks were left in, buff their undersides with a Scotch-Brite scour-pad or rub lightly with vegetable oil to make them slide easier. For occasional spills between cleanings, use a soap-filled scouring pad or mild cleanser. Regular cleaning is better than waiting for heavy soil buildup. The kitchen should be well ventilated. Do not force the DOOR LOCK LEVER without power or with the OVEN TEMP knob not in CLEAN, as this can damage the mechanism. Commercial oven cleaners, aluminum foil, or other liners should not be used in the oven.
Before replacing, disconnect power to the oven and ensure the oven cavity is cool. Carefully remove the glass light lens and lens retainer by removing the two screws. The light lens is separate from the retainer. Wear protective rubber gloves to obtain a firm grasp on the bulb, then remove by turning it to the left. Do not touch a hot bulb with a damp cloth. Replace with a 40-watt oven-rated appliance bulb, preferably with a brass base. Place the light lens inside the retainer, insert the two screws, and tighten.
To remove, pull forward to the "stop" position, lift up on the front, and pull out.
| Fuel Type | Electric |
|---|---|
| Number of Racks | 2 |
| Self-Cleaning | Yes |
| Convection Cooking | Yes |
| Power Source | Electric |
| Color | Stainless Steel |
| Installation Type | Built-In |
| Width | 30 inches |
| Capacity | 5.0 cu. ft. |