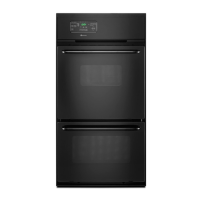
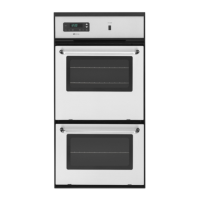
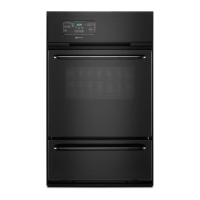
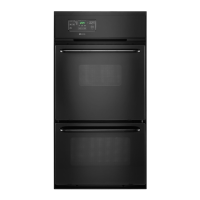
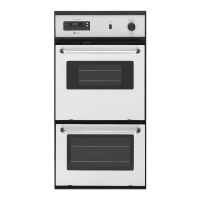
This document is a user's guide for Maytag gas wall ovens, specifically models CWG4100, CWG4600, CWG3100, and CWG3600. It provides comprehensive instructions for safe operation, maintenance, and troubleshooting to ensure optimal performance and longevity of the appliance.
Function Description
The Maytag gas wall oven is designed for baking, roasting, and broiling various foods. It features a pilotless ignition system, which means the oven will not operate during a power failure or if disconnected from its electrical outlet. The electronic clock and oven control manage time-of-day, timer functions, and programmed cooking operations. Users can set desired oven temperatures for baking and roasting, and select between "Hi" and "Lo" heat settings for broiling. The oven also includes a preheating function, which is essential for proper baking results, indicated by a beep when the desired temperature is reached.
Usage Features
Electronic Clock and Oven Control:
The control panel features several function pads:
- CANCEL: Stops all operations except the time-of-day clock and timer. Useful for resetting programming.
- TIMER: Sets a countdown timer from 1 minute to 9 hours and 50 minutes. It does not control oven operation but provides an audible alert when time expires.
- CLOCK: Sets the time-of-day clock and can recall the current time when another function is displayed.
- COOK TIME / OVEN STOP: Used for programmed oven operations, allowing the oven to start and stop automatically, either immediately or at a delayed time.
- BROIL: Activates the broil function with options for "Hi" and "Lo" heat.
- OVEN TEMP: Selects the desired oven temperature for baking and roasting.
- ▲ and ▼ Pads: Used to enter desired times or temperatures, and to select "Hi" or "Lo" broil.
Setting the Clock and Timer:
The clock is set by pressing the CLOCK pad and using the ▲/▼ pads to adjust the time. The timer is set similarly by pressing the TIMER pad and adjusting the time. The display will flash if power is first supplied or after a power failure, indicating the clock needs to be set.
Setting the Oven Controls for Baking/Roasting:
- Position oven racks when the oven is cool.
- Press OVEN TEMP. "Bake" and "000°" will appear.
- Use ▲/▼ pads to set the desired temperature. "ON" will light, and the oven and cooling fan will turn on. The temperature rises in 5° increments during preheating, and a beep sounds when preheated.
- Place food in the center of the oven, ensuring 1-2 inches clearance from walls.
- Check food for doneness at the minimum recipe time.
Preheating:
Always preheat if the recipe calls for it. Allow 10-15 minutes for the oven to reach the desired temperature. Selecting a higher temperature does not speed up preheating and may negatively affect baking.
Oven Racks:
The oven has two racks with a lock-stop position to prevent accidental removal.
- Removal: Pull the cool rack straight out until it stops, tilt the front up, and continue pulling.
- Replacement: Tilt the front up, slide it between supports, push back past the lock-stop, lower the front, and slide it in.
- Rack Positions: Four positions are available. Rack 1 (lowest) is for large meats, poultry, frozen pies, soufflés, and angel food cake. Rack 2 is for most one-rack baking, small meats, casseroles, and various cakes. Racks 3 and 4 are for two-rack baking.
- Air Circulation: Ensure 1-2 inches between utensils and oven walls. Stagger pans when using two racks (e.g., positions 2 and 4, or 1 and 3) for proper airflow. Never place pans directly on the oven bottom.
General Baking Tips:
- Use reliable recipes and accurately measure ingredients.
- Select the correct rack position; top browning is darker at the top, bottom browning darker at the bottom.
- Allow sufficient space between racks for two-rack baking to prevent blocked airflow.
- Use the correct utensil material and size: shiny metal pans for lighter browning (cookies, cakes), dark metal pans for darker browning (pies, bread).
- Reduce oven temperature by 25°F when using oven-proof glassware or dark bakeware for pies and bread.
- Bake cookies and biscuits on flat cookie sheets for optimum results.
- Do not crowd racks; allow 1-2 inches between pans and oven walls.
- Check cooking progress at minimum recipe time. Frequent opening of the oven door wastes energy and affects baking.
- Adjust cooking times for additional ingredients or recipe alterations.
Roasting:
- Used for large, tender cuts of meat (3+ lbs) uncovered, without added moisture.
- Most meats roast at 325°F. Preheating is not necessary.
- Place meat fat side up on a rack in a shallow roasting pan, typically on one of the two lowest rack positions.
- Use a meat thermometer for accurate doneness. Remove roast 5°F below desired doneness, as temperature will rise while standing.
Broiling:
- Used for tender steaks, chops, hamburgers, chicken, fish, fruits, and vegetables.
- Food is placed directly under the burner. Doneness depends on distance from burner and broiling time.
- Use the broiler pan and insert supplied, lining the pan (bottom piece) with foil and spraying the insert with non-stick coating. Do not cover the insert with foil.
- Trim excess fat to prevent spatters and smoke.
- Rack position depends on meat thickness and desired doneness: 2-3 inches for thin cuts, 3-6 inches for thicker cuts. Broil until the top is browned (approximately half cooked).
- Season meat after browning to prevent delayed browning and dryness.
- Never leave a soiled broiler pan in the oven after broiling.
- Setting Controls: Press BROIL, then ▲/▼ for "Hi" or "Lo" temperature. "Hi" for most operations, "Lo" for thicker meats or very short cooking times. Place broiler pan on recommended rack position. Check doneness by cutting a slit. Press CANCEL to end.
Programmed Oven Operations (Cook Time / Oven Stop):
- Allows automatic oven start and stop. Requires the clock to be set.
- Not recommended for highly perishable foods or multiple foods with different cooking requirements.
- If delay between pad touches exceeds 30 seconds, the program may cancel.
- To recall preset times, press the corresponding pad. Press CANCEL to reset or cancel.
Bake By Time (Immediate Start):
- Place food in oven.
- Press COOK TIME. "Set Cook Time" flashes.
- Use ▲/▼ to enter cooking time (max 11 hrs 55 min).
- Press OVEN TEMP. "Bake" and "000°" light up.
- Use ▲/▼ to enter oven temperature.
- Oven turns on, "Timed Bake On" lights.
- Oven turns off automatically, continuous beeps sound. Press CANCEL to stop beeps.
Bake By Time (Delayed Start):
- Place food in oven.
- Press COOK TIME. "Set Cook Time" flashes.
- Use ▲/▼ to enter cooking time (max 11 hrs 55 min).
- Press OVEN STOP. "Set Stop Time" flashes.
- Use ▲/▼ to enter desired turn-off time. "Delay Stop Time" lights.
- Press OVEN TEMP. "Bake" and "000°" light up.
- Use ▲/▼ to enter oven temperature. Press CLOCK; time of day reappears, "Delay Bake" lights.
- When oven turns on, "Timed Bake" appears.
- Oven turns off automatically, continuous beeps sound. Press CANCEL to stop beeps.
Maintenance Features
Oven or Broiler Door:
- Safety: Do not place excessive weight on the door or stand on it. Allow steam/hot air to escape when opening.
- Removal: Open door to stop position (approx. 6 inches), grasp sides (not handle), and lift evenly until it clears hinge arms.
- Replacement: Align door slots with hinge arms, slide down until fully seated. Ensure door is properly seated before operating.
Oven Bottom:
- Protection: Protect from excessive acid or sugary spills to prevent porcelain discoloration. Do not place cookware or foil directly on the bottom.
- Removal: When cool, remove racks. Push bottom to the rear, lift front edge until it clears the frame, then remove.
- Replacement: Fit rear edge into pin on rear wall, push back, and lower into place.
Broiler Bottom:
- Removal: When cool, remove broiler pan and rack. Lift front edge, then rear end, and remove.
- Replacement (CWG4100/4600): Place two slots along rear flange over two screws in rear wall, then lower front edge.
- Replacement (CWG3100/3600): Push bottom to rear and lower into place.
Oven Light:
- Located on the back oven wall.
- Replacement: Disconnect power to oven. Ensure bulb is cool. Use a dry pot holder to remove the bulb. Replace with a 40-watt appliance bulb. Restore power and reset clock.
Electrical Connection:
- Appliances require a three-prong grounding plug into a properly grounded three-hole 120-volt electrical outlet.
- Safety: Always disconnect power before servicing. Do not cut or remove the third grounding prong. If an ungrounded outlet is present, it is the owner's responsibility to have it replaced.
How to Remove Wall Oven for Servicing or Cleaning:
- Shut off gas supply.
- Disconnect electrical supply.
- Disconnect gas supply tubing.
- Remove screws securing oven to cabinet. Remove from cabinet.
- Reverse procedure to reinstall. Check for gas leaks after reconnection if gas line was disconnected. A qualified servicer should handle gas supply disconnection/reconnection.
Cleaning Chart:
- Broiler Insert and Pan: Remove, cool, pour off grease. Soak in soapy water, wash with plastic or soap-filled scouring pad. Dishwasher safe.
- Control Panel: Clean with a clean, soft cloth and mild liquid sprays or detergent water.
- Glass (Oven Door): Wash with glass cleaner or soapy water. Do not oversaturate. Avoid abrasive materials (scouring pads, steel wool, powdered cleaners) as they will damage glass. Rinse with clear water and dry.
- Metal Finishes (Trim Parts): Wash with detergent and water. Avoid abrasive or caustic agents.
- Oven Racks: Clean with soapy water. Remove stubborn soil with cleansing powder or soap-filled scouring pad. Rinse and dry.
- Porcelain Enamel (Interior Oven and Door): Clean with detergent and water when cool. Wipe up spills immediately. Avoid abrasive or caustic agents. Commercial oven cleaners can be used, following manufacturer's instructions. Do not wipe warm/hot enamel with a damp cloth.
Continuous Cleaning Oven (Select Models):
- The oven door liner and bottom are porcelain enamel (refer to cleaning chart for these parts).
- The continuous cleaning finish is dark gray, white stippled, and porous. It absorbs spatters, allowing them to spread and oxidize when exposed to hot oven air.
- Cleaning begins automatically when the oven is on for baking or roasting.
- Higher oven temperatures and longer use times speed up cleaning. Visible soil may gradually disappear with continued use.
- Manually Cleaning Heavy Spillovers: Brush off heavy soil with a nylon brush or plastic pad. Do not use paper towels, cloths, or sponges. Rinse with clean water. Brittle crusts can be loosened by tapping with a wooden or plastic utensil. Varnish-type stains need softening with water/damp cloth.
- Important: Do not use oven cleaner, powdered cleansers, soap, detergent, paste, abrasive materials, steel wool, sharp instruments, or scrapers on continuous cleaning surfaces.
- Avoid spills by using large enough utensils or placing a cookie sheet/foil under the pan.
- Wear marks on embossed rack supports are normal and do not affect cleaning.
Adjusting the Oven Thermostat:
- If the oven seems hotter or colder than desired, the thermostat can be adjusted.
- Procedure: Press OVEN TEMP. Select 500°F-550°F using ▲/▼. Press and hold OVEN TEMP for 4 seconds until "00°" appears. Use ▲/▼ to adjust up to +35°F or down to -35°F. Press CANCEL to return to time-of-day display. This adjustment does not affect broil temperature.
Fault Codes:
- The electronic control has self-diagnostic software. If a "FAULT CODE" (F plus a number) appears with continuous beeps, press CANCEL and reprogram. If it reappears, disconnect power and call a qualified service technician. Do not use the oven until serviced.