EasyManua.ls Logo

Maytag CWE4200ACB - User Manual

Maytag CWE4200ACB
17 pages
Print Icon
To Next Page IconTo Next Page
Loading...
TABLE OF CONTENTS
Page
For Future Reference ........................................................ 1
Consumer Publications ...................................................... 1
Safety Instructions ........................................................ 2-4
Electronic Clock and Oven Control ........................................ 4-5
Explarlation of Function Pads ............................................ 5
Setting the Clock and Timer .............................................. 5
Using Your Oven .......................................................... 6-12
Oven Characteristics ..................................................... 6
Oven Vent ............................................................... 6
Oven Light ............................................................... 6
*Fan ..................................................................... 6
Setting the Oven Controls ................................................ 6
Lower Oven .............................................................. 6
Oven Racks .............................................................. 7
Rack Positions ........................................................... 7
Preheating ............................................................... 7
General Baking Tips ..................................................... 7
How to Roast ............................................................ 8
How to Broil ............................................................. 9
Programmed Oven Operations ....................................... 10-1 1
Common Baking Problems and Why They Happen ....................... 12
Maintenance ................................................................ 13
Oven Light .............................................................. 13
Removable Oven Door ................................................... 13
Adjusting the Oven Temperature ........................................ 13
Care and Cleaning .......................................................... 14
Before You Call For Service ................................................. 15
Wall Oven Warranty ......................................................... 16
Question and Answer IconNeed help?

Do you have a question about the Maytag CWE4200ACB and is the answer not in the manual?

Summary

For Future Reference

Consumer Publications

Order additional booklets from Maytag for more information on products.

Important Safety Instructions

Installation Safety

Ensure proper installation according to codes and secure attachment to avoid hazards.

Electrical Safety

Locate, mark, and correctly replace fuses or reset breakers to prevent electrical hazards.

General Usage Safety

Avoid using oven for heating, wear appropriate clothing, and store flammable materials away.

Servicing Safety Precautions

Only qualified technicians should service the unit; disconnect power before any work.

Fire Safety Procedures

Steps to take in case of oven fire, including using extinguisher or smothering.

Cleaning Safety

Ensure parts are cool before cleaning and use caution to avoid burns from steam or cleaners.

Child Safety

Keep children unsupervised away from the appliance; teach them it's not a toy.

Oven Operation Safety

Use care when opening doors, avoid excess weight on doors, and use correct rack positions.

Venting Safety

Keep the oven vent unobstructed to ensure proper circulation and avoid hot areas.

Material Safety

Keep plastics and aerosol sprays away from hot appliance parts due to flammability.

Aluminum Foil Usage

Use foil only as directed; do not cover racks or bottom to prevent overheating or shock.

Baking Accessories Safety

Use only recommended accessories; unapproved items can create hazards or performance issues.

Prepared Food Safety

Discard plastic containers if damaged during cooking to prevent food contamination.

Electronic Clock and Oven Control

Function Pad Overview

Details the purpose of each pad on the electronic clock and oven control panel.

Explanation of Function Pads

Describes the function of each control pad for operating the oven and clock.

Setting the Clock and Timer

Step-by-step instructions for setting the time-of-day clock and the kitchen timer.

Using Your Oven

Oven Characteristics

Explains that new ovens may cook differently than previous models.

Oven Vent Location

Location and importance of the oven vent; avoid blocking it to ensure proper circulation.

Oven Light Operation

How to turn the oven light on using the control panel.

Cooling Fan Function

The fan operates automatically during cooking for control longevity.

Setting Oven Controls

Instructions for setting oven temperature for baking and roasting.

Lower Oven Controls

Operation of the lower oven's mechanical control knob for temperature setting.

Oven Racks and Positions

Describes rack types, removal, replacement, and positioning for optimal cooking.

Preheating Instructions

Importance of preheating for baking and how long it takes, noting temperature setting impact.

General Baking Tips

Advice on recipes, rack position, pan material, and pan placement for better baking.

Roasting Method

Method for cooking large tender cuts of meat uncovered.

Roasting Tips and Chart

Tips for roasting including temperature, meat selection, seasoning, and pan placement.

Broiling Operations

Broiling Tips

Using the broiler pan, cleaning, preventing spatter, and rack position advice for broiling.

Setting Broil Controls

How to set the broil function to Hi or Lo and use the broiler pan.

Broiling Chart

A chart detailing food types, quantities, temperatures, rack positions, and times for broiling.

Programmed Oven Operations

Immediate Start Baking

Instructions for programming the oven to start cooking immediately and turn off automatically.

Example: Immediate Start

A step-by-step example of setting an immediate start cooking operation.

Delayed Start Baking

Instructions for programming the oven to start cooking at a later time and turn off automatically.

Example: Delayed Start

A step-by-step example of setting a delayed start cooking operation.

Baking Problem Troubleshooting

Baking Problem Causes

Lists common baking issues, their causes, and suggested solutions for better results.

Temperature Conversions

A chart for converting temperatures between Fahrenheit and Celsius.

Maintenance

Oven Light Replacement

Instructions for safely replacing the oven light bulb.

Removable Oven Door

Step-by-step guide on how to remove and replace the oven door.

Adjusting Oven Thermostat

How to adjust the oven thermostat for more accurate temperature control.

Care and Cleaning

Cleaning Chart

A detailed chart listing parts, recommended cleaning agents, and specific cleaning directions.

Before You Call For Service

Oven Not Operating Troubleshooting

Checklist for common issues when the oven or parts of it do not operate.

Baking Performance Troubleshooting

Troubleshooting steps for common baking problems like unevenness or incorrect browning.

Broiling Performance Troubleshooting

Checks to perform if the broiling function is not working as expected.

Oven Light Troubleshooting

Simple checks for when the oven light fails to turn on.

Fault Code Diagnosis

Explanation of fault codes and actions to take when they appear.

Maytag Wall Oven Warranty

One Year Warranty

Details coverage for parts and labor for the first year of ownership.

Limited Parts Warranty

Outlines parts coverage for the second year, with owner paying labor costs.

Third Through Fifth Year Components

Specifies coverage for electronic clocks and heating elements for years 3-5.

Canadian Residents Warranty

Specific warranty conditions for appliances installed in Canada.

International Warranty

Warranty terms for appliances located outside the US and Canada.

How to Obtain Warranty Service

Information on contacting Maytag for service and required details.

Overview

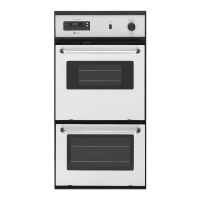
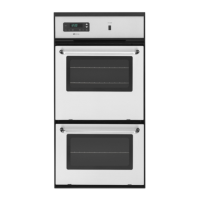
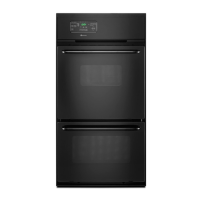
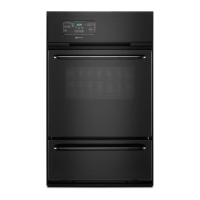
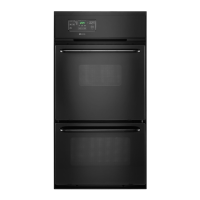
This document is a user manual for a Maytag wall oven, providing comprehensive information on its operation, maintenance, and safety.

Function Description

The Maytag wall oven is designed for baking, roasting, and broiling a variety of foods. It features an electronic clock and oven control that manages time-of-day, timer functions, bake, broil, and programmed operations. The oven can be set for immediate start or delayed start cooking, allowing users to program the oven to turn on and off automatically at specific times. The electronic control includes a self-diagnostic feature that displays fault codes in case of a problem.

The oven is equipped with two lock-stop oven racks, one "straight" and one "off-set," for flexible food placement. For models with a lower oven, it operates with a mechanical control knob for temperature setting. A cooling fan automatically turns on during cooking operations to ensure the longevity of the clock and oven controls. The oven light is controlled by a rocker switch on the control panel.

Important Technical Specifications

  • Oven Temperature Range: The electronic control allows setting oven temperatures from 200°F to 450°F (100°C to 230°C) for baking and roasting. The thermostat can be adjusted up to +35°F hotter or -35°F cooler from the factory setting.
  • Timer Range: The timer can be set from 1 minute (0HR:01) up to 9 hours and 50 minutes (9 HR:50).
  • Cook Time Range: The maximum cook time that can be set for programmed operations is 11 hours and 55 minutes.
  • Broil Settings: Two heat selections are available for broiling: Hi and Lo.
  • Oven Light: Uses a 40-watt appliance bulb.
  • Automatic Shut-off: The oven will automatically turn off if left on for 12 hours.
  • Power Interruption: The new temperature adjustment will be remembered if power is interrupted.

Usage Features

Setting the Clock and Timer:

  • Clock: Press the CLOCK pad, then use the ▲ and ▼ pads to set the time. Pressing once changes the time by one minute; pressing and holding changes it in 10-minute increments. The display flashes until the clock is set.
  • Timer: Press the TIMER pad, then use the ▲ and ▼ pads to set the desired time. Changes occur in 1-minute, 5-minute, or 10-minute increments depending on the total time set. A continuous beep signals the end of the timing operation.

Setting the Oven Controls for Baking/Roasting:

  1. Position racks when the oven is cool.
  2. Press the OVEN TEMP pad.
  3. Use the ▲ or ▼ pads to set the desired temperature.
  4. The oven will preheat, and a beep will sound when the set temperature is reached (approximately 10-15 minutes).
  5. Place food in the center of the oven, ensuring 1-2 inches of space between utensils and oven walls.
  6. For lower ovens (select models), turn the LOWER OVEN TEMP knob to the desired temperature and allow 10-15 minutes for preheating.

Broiling:

  1. Press the BROIL pad, then use the ▲ or ▼ pads to select Hi or Lo broil.
  2. Place the broiler pan on the recommended rack position (refer to the Broiling Chart).
  3. Broil with the oven door opened about 4 inches to prevent excessive browning and smoking.
  4. Check doneness by cutting a slit in the meat.

Programmed Oven Operations (Bake By Time):

  • Immediate Start: Press COOK TIME, set cooking duration with ▲/▼ pads, then press OVEN TEMP and set the desired temperature with ▲/▼ pads. The oven will turn on automatically.
  • Delayed Start: Press COOK TIME, set cooking duration. Press OVEN STOP, set the desired turn-off time. Press OVEN TEMP, set the desired temperature. The oven will calculate the start time and turn on automatically.

Oven Racks:

  • Two lock-stop racks are provided. The off-set rack is recommended for upper positions when using two racks.
  • Removal: Pull rack to "lock-stop" position, tilt up, and continue pulling.
  • Replacement: Place rack on supports, tilt up, and push toward the rear, then pull out to "lock-stop" to ensure correct placement.
  • Rack Positions: Rack 4 (top) for thin foods/two-rack baking; Rack 3 for baking/thicker meats; Rack 2 for one-rack baking/roasting; Rack 1 (bottom) for larger foods/angel food cake/pie shells/two-rack baking.
  • Avoid covering oven bottom or entire racks with aluminum foil.

Maintenance Features

Cleaning Chart:

  • Broiler Insert and Pan: Remove, allow to cool, pour off grease. Wash with mild detergent and water, plastic scouring pad, or soap-filled scouring pad. Dishwasher safe.
  • Control Knob: Gently pull forward to remove. Wash with mild detergent and water. Do not use abrasive cleaners.
  • Control Panel: Use a clean, soft cloth with glass cleaner or soap and water.
  • Glass (Oven Door): Wash with glass cleaner or cloth wrung out in soapy water. Avoid oversaturating cloth. Do not use abrasive materials.
  • Metal Finishes (Trim Parts): Wash with mild detergent and water. Do not use abrasive or caustic agents.
  • Oven Racks: Clean with soapy water. Remove stubborn soil with cleansing powder or soap-filled scouring pad.
  • Porcelain Enamel (Oven and Door): Clean with detergent and water when cool. Wipe spills immediately. Commercial oven cleaners can be used, following manufacturer's instructions. Do not wipe warm/hot enamel with a damp cloth.
  • Oven Elements: Self-cleaning; soil burns off during use.
  • Plastic Finishes (Door Handle): Wash with mild detergent and water or mild liquid sprays. Do not use abrasive or caustic cleaning agents.

Oven Light Replacement:

  1. Disconnect power to the oven.
  2. Ensure the bulb is cool.
  3. Replace with a 40-watt appliance bulb.
  4. Restore power and reset the clock.

Removable Oven Door:

  • Removal: Open door to broil stop position (4-6 inches). Grasp sides of the door and lift straight up until it clears the hinge arms.
  • Replacement: Grasp sides, align slots with hinge arms, slide down, and gently push downward until the door rests evenly.
  • Caution: Hinge arms are spring-mounted; avoid placing hands/fingers between hinges and the front oven frame. Ensure the door is properly seated before operating the oven.

Adjusting the Oven Thermostat:

  1. Press OVEN TEMP.
  2. Set a temperature between 500°F and 550°F.
  3. Press and hold OVEN TEMP for about four seconds until "00°" appears.
  4. Use ▲ or ▼ pads to adjust the thermostat up to +35°F hotter or -35°F cooler.
  5. Press CANCEL to return to the time of day display. This adjustment does not affect broil temperature.

Maytag CWE4200ACB Specifications

General IconGeneral
BrandMaytag
ModelCWE4200ACB
CategoryOven
LanguageEnglish

Related product manuals