This document is a user's guide for Maytag gas wall ovens, specifically models CWG4100, CWG4600, CWG3100, and CWG3600. It provides comprehensive information on the operation, maintenance, and troubleshooting of these appliances.
Function Description:
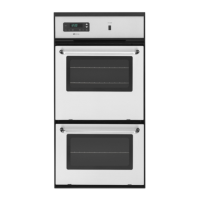
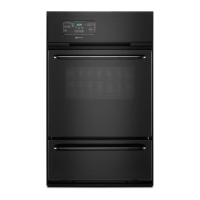
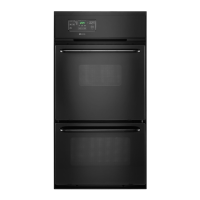
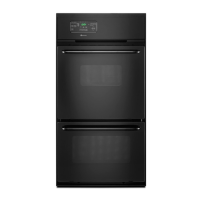
The Maytag gas wall oven is designed for baking, roasting, and broiling various foods. It features an electronic clock and oven control system that manages time-of-day, timer functions, and programmed cooking operations. The oven utilizes a pilotless ignition system, where a Glow Bar ignitor lights the oven burner. It is equipped with multiple rack positions to accommodate different cooking needs and ensure proper air circulation. The oven also includes a continuous cleaning feature in select models, which uses a special catalytic finish to gradually reduce soil during normal oven use.
Important Technical Specifications:
- Models Covered: CWG4100, CWG4600, CWG3100, CWG3600.
- Ignition System: Pilotless ignition with a Glow Bar ignitor.
- Power Requirement: Appliances requiring electrical power are equipped with a three-prong grounding plug for a properly grounded three-hole 120-volt electrical outlet.
- Gas Type: Adjustable for use with NATURAL or LP (bottled) gas.
- Oven Temperature Range (Baking/Roasting): Typically 325°F to 450°F, with specific recommendations for different foods.
- Broiling Temperatures: Hi and Lo selections available.
- Timer Range: 1 minute to 9 hours, 50 minutes.
- Cook Time Range: Up to 11 hours, 55 minutes for programmed operations.
- Oven Light: 40-watt appliance bulb.
- Automatic Shut-off: The oven automatically turns off if left on for 12 hours.
- Thermostat Adjustment: Can be adjusted up to +35°F hotter or -35°F cooler.
- Continuous Cleaning Oven (select models): Features a dark gray, white stipple, and rough porous textured porcelain enamel finish with a special catalyst for soil oxidation.
Usage Features:
- Electronic Clock and Oven Control: A central control panel with function pads for TIMER, CLOCK, COOK TIME, OVEN STOP, BROIL, and OVEN TEMP. A beep sounds with each pad press. The display flashes when power is first supplied or after a power failure, stopping once the clock is set.
- Setting the Clock: Press the CLOCK pad, then use the ▲ or ▼ pads to set the time. Pressing once changes by one minute; pressing and holding changes by 10-minute increments.
- Setting the Timer: Press the TIMER pad, then use the ▲ or ▼ pads to set the desired time. Changes by 1 minute (up to 1 hour), 5 minutes (over 1 hour), or 10 minutes (over 2 hours). The timer counts down and signals with a continuous beep and "End" when complete.
- Baking and Roasting:
- Position racks when the oven is cool.
- Press OVEN TEMP, then use ▲ or ▼ to set the desired temperature.
- The oven preheats for 10-15 minutes, indicated by a beep.
- Place food in the center of the oven, allowing 1-2 inches between utensils and oven walls.
- Preheating is necessary for proper baking but not for roasting.
- General baking tips include using reliable recipes, correct rack positions, appropriate utensil materials (shiny metal for lighter browning, dark metal for darker browning), and ensuring free airflow by not crowding racks or placing pans directly on the oven bottom.
- Broiling:
- Requires the broiler pan and insert supplied with the range.
- Line the broiler pan (bottom piece) with aluminum foil and spray the insert with non-stick vegetable coating, but do not cover the insert's slits.
- Trim excess fat to prevent spattering and smoking.
- Select Hi or Lo broil using the BROIL pad and ▲ or ▼ pads. Hi is for most operations; Lo is for thicker meats or short cooking times.
- Rack position depends on meat thickness and desired doneness (thin cuts 2-3 inches from heat, thicker cuts 3-6 inches).
- Season meat after browning to avoid delaying browning.
- Programmed Oven Operations (Bake By Time, Delayed Start):
- Allows setting the oven to start and stop automatically.
- Immediate Start: Press COOK TIME, set cooking duration, then press OVEN TEMP and set temperature.
- Delayed Start: Press COOK TIME, set cooking duration, then press OVEN STOP and set the desired stop time, then press OVEN TEMP and set temperature.
- Highly perishable foods are not recommended for delayed cooking.
- Oven Racks: Designed with a lock-stop position. To remove, pull until it stops, tilt up, and continue pulling. To replace, tilt up, slide in, lower, and slide to lock-stop position.
- Oven Vent: Located between the control panel and oven door; must not be blocked to ensure proper airflow.
- Oven Light: Turned on by a rocker switch on the control panel.
Maintenance Features:
- Cleaning Chart: Provides instructions for cleaning various parts:
- Broiler Insert and Pan: Remove, cool, soak in soapy water, wash with plastic/soap-filled scouring pad, or dishwasher.
- Control Panel: Clean with a soft cloth and mild liquid sprays or detergent and water.
- Glass (Oven Door): Wash with glass cleaner or soapy water; avoid abrasive materials.
- Metal Finishes (Trim Parts): Wash with detergent and water; avoid abrasive/caustic agents.
- Oven Racks: Clean with soapy water, cleansing powder, or soap-filled scouring pad.
- Porcelain Enamel (Interior Oven and Door): Clean with detergent and water when cool. Wipe acid/sugary spills immediately. Commercial oven cleaners can be used, following manufacturer's instructions. Avoid abrasive/caustic agents.
- Continuous Cleaning Oven (select models):
- Cleaning action occurs automatically when the oven is on for baking or roasting.
- Heavy spillovers may require manual cleaning: brush off with a nylon brush or plastic pad. Do not use paper towels, cloths, or sponges. Rinse with clear water.
- Brittle crusts or stains can be loosened by gently tapping with a wooden or plastic utensil.
- Do not use oven cleaner, powdered cleansers, soap, detergent, paste, or abrasive materials on continuous cleaning surfaces.
- Oven or Broiler Door Removal: Open to "stop" position (approx. 6 inches), grasp with both hands, and lift evenly until it clears hinge arms. To replace, align slots with hinge arms and slide down.
- Oven Bottom Removal: Remove racks, push to rear, lift front, and remove. To replace, fit rear edge into pin, push to rear, and lower.
- Broiler Bottom Removal: Remove broiler pan and oven rack, lift front edge, then lift rear end and remove. To replace, for CWG4100/CWG4600, place slots over screws in rear wall, then lower front. For CWG3100/CWG3600, push to rear and lower.
- Oven Light Bulb Replacement: Disconnect power, ensure bulb is cool, use a dry pot holder to remove/replace with a 40-watt appliance bulb.
- Thermostat Adjustment: Can be adjusted by the user if the oven seems hotter or cooler than desired. Press OVEN TEMP, set a high temperature (500-550°F), press and hold OVEN TEMP for 4 seconds, then use ▲ or ▼ to adjust by up to +/-35°F.
- Fault Codes: If an "F" code appears with continuous beeps, press CANCEL and reprogram. If it reappears, disconnect power and call a qualified service technician.
- Removing Wall Oven for Servicing/Cleaning: Shut off gas and electrical supply, disconnect gas tubing, remove mounting screws, and remove oven from cabinet. Reinstall in reverse, checking for gas leaks after reconnection.