EasyManua.ls Logo

Maytag CWG4600 - User Manual

Maytag CWG4600
24 pages
Print Icon
To Next Page IconTo Next Page
Loading...
GAS WALL OVEN MODELS CWG4100, CWG4600, CWG3100, CWG3600
USER’S GUIDE
KEEP THESE INSTRUCTIONS FOR FUTURE REFERENCE
Question and Answer IconNeed help?

Do you have a question about the Maytag CWG4600 and is the answer not in the manual?

Summary

For Future Reference

Model and Serial Number Recording

Instructions for recording appliance model and serial numbers for future reference.

Contact Information and Support

Maytag customer service contact details for questions and support.

Important Safety Instructions

General Safety Precautions

Covers fire hazards, gas safety, electrical safety, and general misuse warnings.

Fire Safety Procedures

Steps to take in case of an oven fire, including extinguisher types.

Installation and Servicing Safety

Ensures installation and servicing are performed by qualified personnel only.

Cooking Safety

Safe Use of Oven Door and Racks

Warnings against using the door as a step stool and proper rack handling.

Preventing Gas Poisoning and Fires

Avoid blocking vents, handle gas leaks safely, and use caution with flammable materials.

Child Safety Precautions

Guidelines to ensure children's safety around the appliance.

Utensil and Food Safety

Advice on cookware, pot holders, and handling prepared foods.

Additional Safety Warnings

Grease, Venting, and Cleaning Safety

Precautions for handling grease, oven venting, and safe cleaning practices.

Material Safety Considerations

Warnings regarding plastics, aerosol sprays, and baking accessories.

California Proposition 65 Notice

Information regarding substances known to cause cancer or reproductive harm.

Electronic Clock and Oven Control

Function Pad Overview

Explanation of the various pads on the electronic control panel.

Timer and Clock Pad Functions

How to set and use the timer and clock features.

Cooking Operation Pads

Functions of Cook Time, Oven Stop, Broil, and Oven Temp pads.

Setting the Clock and Timer

Setting the Time-of-Day Clock

Step-by-step guide to setting the appliance's clock.

Setting the Timer

Instructions for setting and cancelling the oven timer.

Using Your Oven

Oven Characteristics and Features

Information on pilotless ignition, oven vent, and oven light.

Setting Oven Controls for Baking;Roasting

Guide to setting temperature and using the oven controls.

Preheating the Oven

Importance and procedure for preheating the oven for baking.

Oven Racks and Rack Positions

Rack Removal and Replacement

Procedure for safely removing and reinstalling oven racks.

Rack Position Guidelines

Recommendations for optimal rack placement for various cooking tasks.

General Baking Tips

Recipe Accuracy and Utensil Selection

Importance of reliable recipes and choosing the right pan size and material.

Pan Types and Oven Airflow

How pan material, placement, and airflow affect baking results.

Monitoring Cooking Progress

Tips for checking food doneness and managing oven door use.

Baking Chart

Cake, Pie, and Cookie Baking Guidelines

Reference chart for temperatures, rack positions, and times for common baked goods.

Bread Baking Guidelines

Reference chart for temperatures, rack positions, and times for bread types.

Common Baking Problems and Solutions

Baking and Roasting Issues

Troubleshooting common problems like slow baking and uneven results.

Cake Appearance and Texture Issues

Diagnosing and fixing cake problems such as falling, cracking, or tunnels.

Pie Baking Issues

Addressing problems with pie crust browning and texture.

Temperature Conversion Chart

Converts Fahrenheit temperatures to Celsius for baking.

Roasting Guide

General Roasting Tips

Advice on roasting meats, including temperature and rack placement.

Roasting Chart for Meats

Guidelines for roasting various cuts of beef, pork, lamb, and poultry.

Broiling Guide

General Broiling Tips

Advice on broiling techniques, including pan use and fat trimming.

Setting Broiling Controls

How to select broil settings (Hi/Lo) and rack positions.

Broiling Chart

Reference chart for broiling various foods, including time and position.

Programmed Oven Operations

Baking by Time (Immediate Start)

How to set the oven to cook for a specific duration starting immediately.

Example: Immediate Start Cooking

Practical example demonstrating how to use the immediate start feature.

Programmed Oven Operations (Delayed Start)

Baking by Time (Delayed Start)

How to set the oven to start cooking at a later time.

Example: Delayed Start Cooking

Practical example demonstrating how to use the delayed start feature.

Maintenance

Oven Door and Bottom Care

Instructions for cleaning and maintaining the oven door and bottom.

Broiler Bottom Care

Procedure for removing and replacing the broiler bottom.

Oven Light and Electrical Connection

Oven Light Replacement

Steps for replacing the oven light bulb safely.

Electrical Connection Requirements

Ensuring proper grounding and electrical hookup for the appliance.

Removing Oven for Servicing;Cleaning

Procedure for safely removing the wall oven from its installation.

Care and Cleaning

Cleaning Chart Overview

Guide to cleaning various oven parts using recommended agents.

Specific Part Cleaning Instructions

Details on cleaning the broiler pan, control panel, glass, racks, and finishes.

Continuous Cleaning Oven Features

Understanding Continuous Cleaning

Explanation of the catalytic finish and how it cleans.

Manual Cleaning of Spillovers

How to manually clean heavy spillovers on continuous clean surfaces.

Cleaning Hints and Warnings

Tips and precautions for maintaining the continuous cleaning finish.

Service Information

Adjusting the Oven Thermostat

How to calibrate the oven temperature for accuracy.

Understanding Fault Codes

Explanation of error codes and initial troubleshooting steps.

Before You Call For Service

Oven Operation Troubleshooting

Checks for general oven operation issues and baking problems.

Broiling and Oven Light Troubleshooting

Troubleshooting specific issues with broiling and the oven light.

Fault Code Troubleshooting

Steps to take when a fault code appears in the display.

Service & Warranty Information

Limited One Year Warranty Details

Terms and conditions of the manufacturer's limited warranty.

What is Not Covered by Warranty

Exclusions from the warranty coverage.

How to Obtain Service

Procedures and information needed for warranty service requests.

Overview

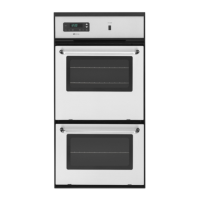
This document is a user's guide for Maytag gas wall oven models CWG4100, CWG4600, CWG3100, and CWG3600, providing comprehensive instructions for operation, maintenance, and troubleshooting. It emphasizes safety, proper usage, and care to ensure optimal performance and longevity of the appliance.

Function Description

The Maytag gas wall oven is designed for baking, roasting, and broiling, offering a versatile cooking experience. It features a pilotless ignition system, which uses a glow bar ignitor to light the oven burner, ensuring efficient and reliable operation. The oven is equipped with an electronic clock and oven control, which manages various functions including the time-of-day clock, timer, bake, broil, and programmed oven operations. This control allows users to set precise cooking times and temperatures, and even program the oven to start and stop automatically.

For baking and roasting, the oven allows for temperature selection and preheating. Preheating is crucial for proper baking results, and the oven signals when the desired temperature is reached. The oven racks are designed with a lock-stop position to prevent accidental removal when food is placed on them, enhancing safety and convenience. The oven vent, located between the control panel and the oven door, ensures proper airflow for combustion and ventilation, which is critical for both performance and safety. An internal oven light, controlled by a rocker switch, illuminates the oven cavity for easy monitoring of food.

The broiling function offers two heat selections: Hi and Lo. Hi broil is suitable for most broiling operations, while Lo broil is recommended for thicker meats or foods requiring shorter cooking times to prevent excessive browning. The broiler pan and insert, supplied with the oven, are designed to drain excess liquid and fat away from the cooking surface, minimizing spatters, smoke, and fire hazards.

Programmed oven operations allow for advanced cooking scheduling. Users can set the oven to turn off at a specific time or delay the start of cooking and then turn off automatically. This feature is particularly useful for meal planning and convenience, though it comes with warnings about highly perishable foods.

Usage Features

The electronic clock and oven control are central to operating the oven. The display flashes when power is first supplied or after a power failure, prompting the user to set the time-of-day clock. A beep sounds with each pad press, providing tactile feedback. The oven automatically turns off if left on for 121 hours as a safety measure. The control also includes a self-diagnostic feature that displays fault codes (e.g., F1) and emits a continuous beeping sound if a functional error is detected, guiding users to troubleshoot or seek service.

Setting the time-of-day clock involves pressing the CLOCK pad and using the arrow pads to adjust the time. The timer function, accessible via the TIMER pad, can be set for durations from 1 minute to 9 hours and 50 minutes, counting down in seconds or minutes. The CLOCK pad can also be used to recall the current time of day while the timer is active.

For baking and roasting, users press the OVEN TEMP pad, then use the arrow pads to select the desired temperature. The display shows "Bake" and the temperature, rising in 5° increments during preheating. The oven light can be turned on or off using the OVEN LIGHT rocker switch on the control panel.

The oven racks can be easily removed and replaced. To remove, pull the rack straight out to its stop position, tilt the front end up, and continue pulling. To replace, tilt the front end up, slide it between the supports, push it back past the lock-stop, then lower the front and slide it straight in. Proper rack positioning is crucial for optimal air circulation and even cooking, with specific recommendations for different types of food and multi-rack baking.

Broiling involves pressing the BROIL pad and selecting either Hi or Lo heat using the arrow pads. The broiler pan should be placed on the recommended rack position, and food should be checked for doneness by cutting a slit near the center.

Programmed oven operations are initiated by pressing the COOK TIME pad to set the cooking duration, followed by the OVEN STOP pad to set the desired turn-off time, and then the OVEN TEMP pad to set the cooking temperature. The control confirms these settings with specific messages in the display.

Maintenance Features

The user's guide provides detailed instructions for cleaning and maintaining various parts of the oven to ensure its continued performance and appearance. It emphasizes that all parts should be cool before cleaning and correctly replaced afterward.

For the oven or broiler door, instructions are given for safe removal and replacement, highlighting the importance of not placing excessive weight on an open door and being cautious of spring-mounted hinge arms. The oven bottom can also be removed for cleaning, with specific steps to lift and clear it from the oven frame. Similarly, the broiler bottom has removal and replacement instructions, varying slightly by model.

The oven light bulb, located on the back oven wall, requires power disconnection before replacement. Users are advised to ensure the bulb is cool and to use a dry pot holder to prevent burns or breakage.

The guide includes a comprehensive cleaning chart detailing appropriate cleaning agents and directions for different oven components:

  • Broiler Insert and Pan: Detergent and water, plastic scouring pad, soap-filled scouring pad, or dishwasher.
  • Control Panel: Detergent and water, mild liquid sprays, and a clean, soft cloth.
  • Glass (Oven Door): Glass cleaner or soapy water, applied with a cloth wrung out, avoiding abrasive materials or excessive water.
  • Metal Finishes (Trim Parts): Detergent and water, avoiding abrasive or caustic agents.
  • Oven Racks: Soapy water, cleansing powder, plastic pads, or soap-filled scouring pads.
  • Porcelain Enamel (Interior Oven and Door): Detergent and water, cleansing powder, plastic pads, or commercial oven cleaner. Spillovers, especially acidic or sugary ones, should be wiped immediately with a dry cloth when cool.
  • Continuous Cleaning Oven (select models): This special finish absorbs spatters, and a catalyst speeds oxidation when exposed to heat during normal oven use. Manual cleaning of heavy spillovers is recommended using a nylon brush or plastic pad, avoiding paper towels, cloths, or sponges, and never using oven cleaners, abrasive materials, or sharp instruments.
  • Plastic Finishes (Door Handle): Detergent and water, or mild liquid sprays, avoiding abrasive or caustic agents.

For servicing or cleaning that requires removing the wall oven from the cabinet, the guide outlines steps to shut off gas and electrical supplies, disconnect gas tubing, and remove securing screws. It stresses that a qualified servicer should handle gas supply disconnection and reconnection and warns against abnormal usage or tip-over risks if the appliance is not reinstalled according to instructions.

Maytag CWG4600 Specifications

General IconGeneral
BrandMaytag
ModelCWG4600
Fuel TypeGas
Capacity5.0 cu. ft.
Number of Oven Racks2
Self-CleaningYes
Convection CookingNo
Installation TypeFreestanding
Width30 inches
Product TypeOven
ColorStainless Steel
Oven TypeSingle

Related product manuals