EasyManua.ls Logo

Maytag CWE9000BCB - User Manual

Maytag CWE9000BCB
20 pages
Print Icon
To Next Page IconTo Next Page
Loading...
TABLE OF CONTENTS
Page
For Future Reference ................................................................................ 1
Consumer Publications .............................................................................. 1
Important Safety Instructions .................................................................. 2-3
Electronic Cloek and Oven Control ........................................................ 4-5
Setting the Clock and Timer .............................................................. 5
Using Your Oven .......................................................................................... 6-13
Baking .................................................................................................. 7-9
Roasting ............................................................................................... 10
Broiling ................................................................................................ 11-12
Delay Start Oven Cooking .................................................................. I2-13
Care and Cleaning ...................................................................................... 13-15
Self-Clean Oven .................................................................................. 13-14
Oven Cleaning Chart .......................................................................... 15
Maintenance ................................................................................................. 16-17
Adjusting the Oven Thermostat ......................................................... 16
Light Replacement ............................................................................. 17
Oven Door ........................................................................................... 17
Fuses (Canadian Wall Ovens Only) .................................................... 17
Before You Call for Service ....................................................................... 18
Warranty ....................................................................................................... 19
Question and Answer IconNeed help?

Do you have a question about the Maytag CWE9000BCB and is the answer not in the manual?

Overview

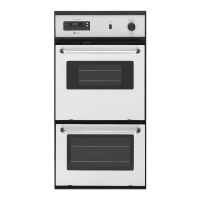
This document describes the features, usage, and maintenance of a Maytag wall oven.

Function Description

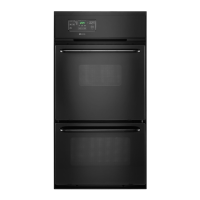
The Maytag wall oven is a cooking appliance designed for baking, roasting, and broiling. It incorporates an electronic clock and oven control system that manages various functions including:

  • Time-of-day clock: Displays the current time.
  • Timer: A countdown timer that can be set from 5 seconds to 9 hours and 50 minutes.
  • Bake: Standard oven baking function with adjustable temperature.
  • Broil: Offers two heat selections (Hi and Lo) for broiling.
  • Delay Start Oven Cooking: Allows programming the oven to start and stop automatically at a preset time.
  • Self-Clean: An automatic cleaning cycle that uses high temperatures to remove soil.

Important Technical Specifications

  • Temperature Range (Bake): Adjustable up to 550°F (230°C).
  • Temperature Adjustment (Thermostat): Can be adjusted up to +35°F hotter or -35°F cooler from the factory setting. This adjustment does not affect Broil or Clean temperatures.
  • Timer Range: 5 seconds to 9 hours, 50 minutes.
  • Self-Clean Cycle Duration: Automatically sets to 3 hours, but can be adjusted to 2 or 4 hours.
  • Oven Light: Uses a 40-watt appliance bulb.
  • Fuses (Canadian Wall Ovens Only): Equipped with seven (7) type "P" fuses located in a separate box.
  • Electrical Circuit (Broil): Broil times may need to be increased if the wall oven is installed on a 208-volt circuit.

Usage Features

Electronic Clock and Oven Control: The control panel features a display and several pads: CANCEL, TIMER, CLOCK, COOK TIME, SELF CLEAN, OVEN STOP, BROIL, and OVEN TEMP. A SET knob is used to enter desired times or temperatures. A beep sounds with each pad press, and consecutive beeps indicate the end of an operation. The display blinks when power is first supplied or after a power failure, stopping once the time-of-day clock is set. A self-diagnostic feature may display fault codes (e.g., F1) with a continuous beep, which can be canceled by pressing the CANCEL pad.

Setting the Clock and Timer:

  • Clock: Press CLOCK, turn SET knob to desired time. The word "Time" will disappear after one minute.
  • Timer: Press TIMER, turn SET knob to desired time. The timer starts automatically and beeps when time elapses. To cancel, turn SET knob to :00 or press and hold TIMER.

Using Your Oven (Baking, Roasting, Broiling):

  • Rack Positions: Five rack positions are available. Racks should be placed in the desired location when the oven is cool. The two oven racks have a lock-stop edge.
    • Rack 1 (lowest): Roasting large cuts, frozen pies, souffles, angel food cake, loaves of bread.
    • Rack 2: Roasting small cuts, large casseroles, baking loaves, cakes (tube, bundt, layer pans), two-rack baking.
    • Rack 3 (middle): Most baked goods (cookie sheet, jelly roll pan), frozen convenience foods.
    • Rack 4: Most broiling, two-rack baking.
    • Rack 5 (highest): Some broiling.
  • Preheating: Necessary for proper baking. Takes 10-15 minutes.
  • Baking: Press OVEN TEMP, turn SET knob to desired temperature (5° increments). "On" lights up, and temperature rises. Place food in the center, allowing 2 inches clearance from walls. Do not open door until minimum time elapsed.
  • Roasting: Most meats roasted at 325°F. No preheating needed. Place meat fat-side-up on a rack in a shallow pan in one of the two lowest rack positions. Use a meat thermometer for accurate doneness.
  • Broiling: Uses broiler pan and insert. Trim excess fat to prevent spatters. Broiler element can be preheated, but not the broiler pan. Hi broil for most operations, Lo broil for well-done foods or very short cooking times. Place broiler pan on recommended rack position.
  • Delay Start Oven Cooking: Cannot be used for highly perishable foods.
    • Bake by Time (immediate start): Press COOK TIME, turn SET knob for cooking duration, press OVEN TEMP, turn SET knob for temperature. Oven starts immediately.
    • Bake by Time (delayed start): Press COOK TIME, turn SET knob for cooking duration, press OVEN STOP, turn SET knob for desired stop time, press OVEN TEMP, turn SET knob for temperature. Oven starts automatically to finish by the stop time.

Oven Light: Automatically turns on when the door is opened. A rocker switch on the control panel turns it on/off when the door is closed.

Maintenance Features

Self-Clean Oven:

  • Preparation: Remove all pans and utensils (racks will discolor if left in). Clean oven frame, door frame, and vent with non-abrasive cleaner (e.g., Bon Ami). Wipe up excess grease. Do not use oven cleaners or liner coatings. Do not clean or rub the door gasket.
  • Operation: Close door, move door lock lever to the right. Press SELF-CLEAN. "Clean On" lights up. "Lock" lights up when cleaning temperature is reached.
  • During Cycle: Some smoke/odor is normal, especially initially or with heavy soil. Ensure kitchen is well-ventilated. Avoid contact with door/window. Metal parts expanding/contracting is normal.
  • Interrupt/Reset: If door not locked, move lock lever left. If locked, press CANCEL. Door unlocks after "Lock" turns off (approx. 1 hour after cycle completion).
  • After Cycle: Wipe up gray ash with a damp cloth. If racks were left in and stick, wipe with vegetable oil. Fine hair-like lines on interior/door are normal.

Adjusting the Oven Thermostat:

  • Press OVEN TEMP. Select 500-550°F with SET knob.
  • Press and hold OVEN TEMP for 4 seconds until "00" appears.
  • Turn SET knob to adjust up to +35°F or down to -35°F.
  • Press CANCEL to return to time-of-day. Adjustment is retained even if power is interrupted.

Light Replacement:

  • Disconnect power. Ensure bulb is cool.
  • Carefully unscrew lens cover with a dry pot holder.
  • Remove bulb with a dry pot holder. Replace with a 40-watt appliance bulb.
  • Reconnect power and reset clock.

Oven Door:

  • Do not place excessive weight on an open door.
  • To Remove: Open door 4-6 inches, grasp with both hands at each side (not handle), lift evenly until it clears hinge arms.
  • To Replace: Align door slots with hinge arms, slide down until seated. Do not open/close door or turn oven on until fully seated.

Fuses (Canadian Ovens Only):

  • If part of the oven does not operate, check the seven type "P" fuses in the separate fuse box. Replace blown fuses with the same type and amperage.

Maytag CWE9000BCB Specifications

General IconGeneral
BrandMaytag
ModelCWE9000BCB
CategoryOven
LanguageEnglish

Related product manuals