14
Publication: ZTS-080812
M-B Companies, Inc. 11/15/12
INTRODUCTIONADJUSTMENT AND SERVICE
BRUSH HEIGHT ADJUSTMENT
CAUTION!
If brush height is set too low, the
brush can drive machine rearward
when attachment clutch is engaged.
Engage brush slowly with brush set
at proper height.
For hard surfaces, adjust the caster wheels so that the brush just
touches surface. The brush works best with the brush properly leveled.
To adjust the brush height:
1. With the brush off, move to a dusty, at surface. Leave the
engine running.
2. Start the brush at a slow speed. Run the brush in a stationary
position for 30 seconds.
3. Lift the brush head assembly off the ground and reverse the unit
to move it away from the swept area.
4. Stop engine and allow all moving parts to stop.
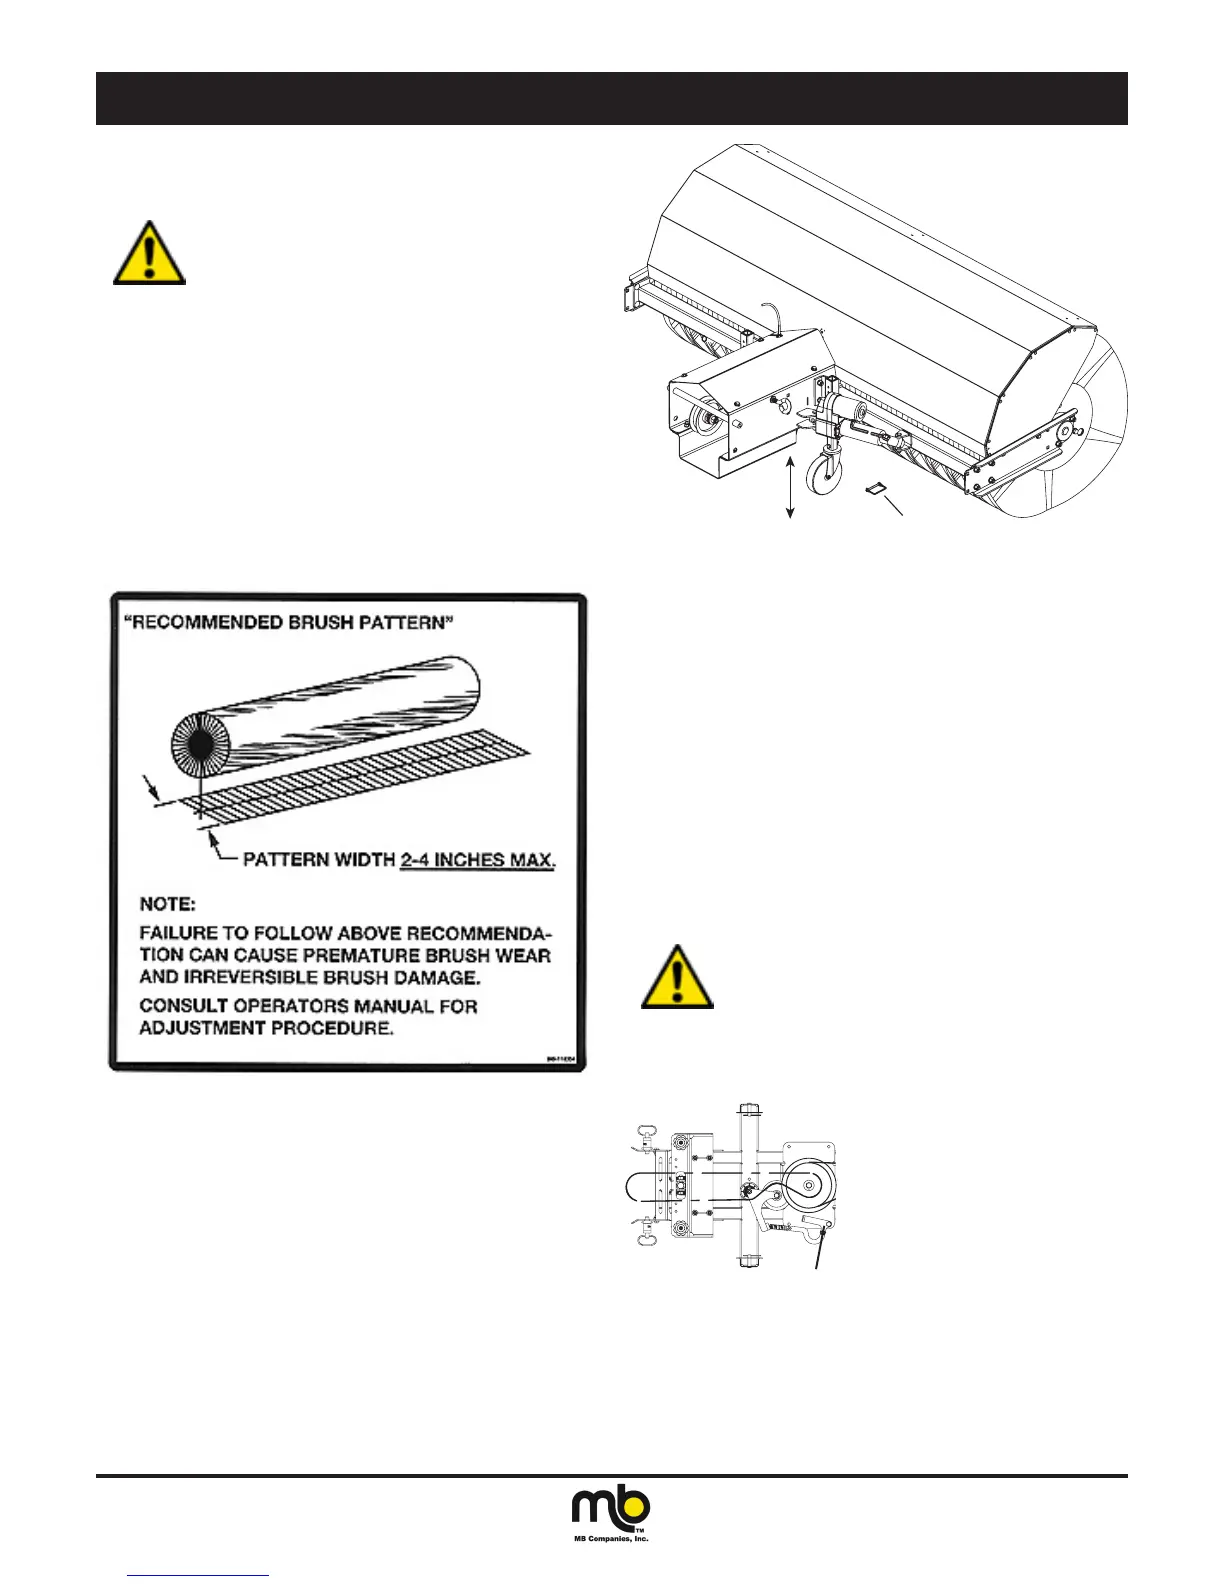
5. Check the width of the swept area. The brush pattern should be
2-3 inches wide, running the length of the brush. (See Figure 14
Brush Sweeping Pattern)
Figure 14 Brush Sweeping Pattern
6. To adjust:
a. Remove the caster wheel lock pin. (See A, Figure 15 Pattern
Adjustment).
b. Raise or lower the caster wheel as needed.
c. Insert the caster wheel lock pin into the hole in the caster
bracket and through the caster tube. Use the attached spring
clip to secure the pin.
NOTE: If using the power broom for turf applications, less ground
contact is required.
A. Caster Wheel Lock Pin
Figure 15 Pattern Adjustment
Adjust for Wear
As the broom core wears the diameter of the broom is smaller. The
brush pattern will become smaller causing the sweeping action to be
ineffective.
To regain the correct brush pattern, the casters are raised up.
BELT REPLACEMENT
The tension on the two belts is maintained by the tension pulleys. Over
time the belts will wear and may pull apart.
Visually inspect the belts for signs of wear. The belts may become
narrow and ride low in the pulleys. Also look for frayed edges and parts
missing.
WARNING!
Do not work on drive belts while
the engine is running. Turn off the
engine and allow parts to cool.
To replace the belts:
1. Lower the attachment to its lowest position.
2. Release the two tension pulleys.
Push in to release.
Figure 16
3. Remove the rear belt to the engine. Refer to the Attachment
Mount Installation manual.
4. Remove the front belt.
5. The front belt is installed rst by placing it over the center pulley.