3.
Before making or checking carburetor adjustments, in-
stall
the bar and chain and be
sure
that the chain is
being lubricated properly. A properly lubricated chain
will throw a fine spray of oil off the nose of the bar when
the chain is moving at operating
speeds.
4.
Before checking carburetor
adjustments,
be
sure
that the
air
filter is
clean
and
securely
in place on the air box.
5.
All engines lose power as altitude
increases.
This
is due
to the "thin" air
(less
oxygen in the atmosphere at
higher
altitudes).
The rate of power
loss
is approximately
3%
per 1,000 feet (300 meters) of elevation. Therefore,
an
engine will develop only 85% of its sea level power at
an
altutude of 5,000 feet (1,500
meters),
and only 70%
at
10,000 feet (3,000
meters).
Other factors,
such
as
temperature and humidity, will affect power
output
also.
Adjustment
Procedures
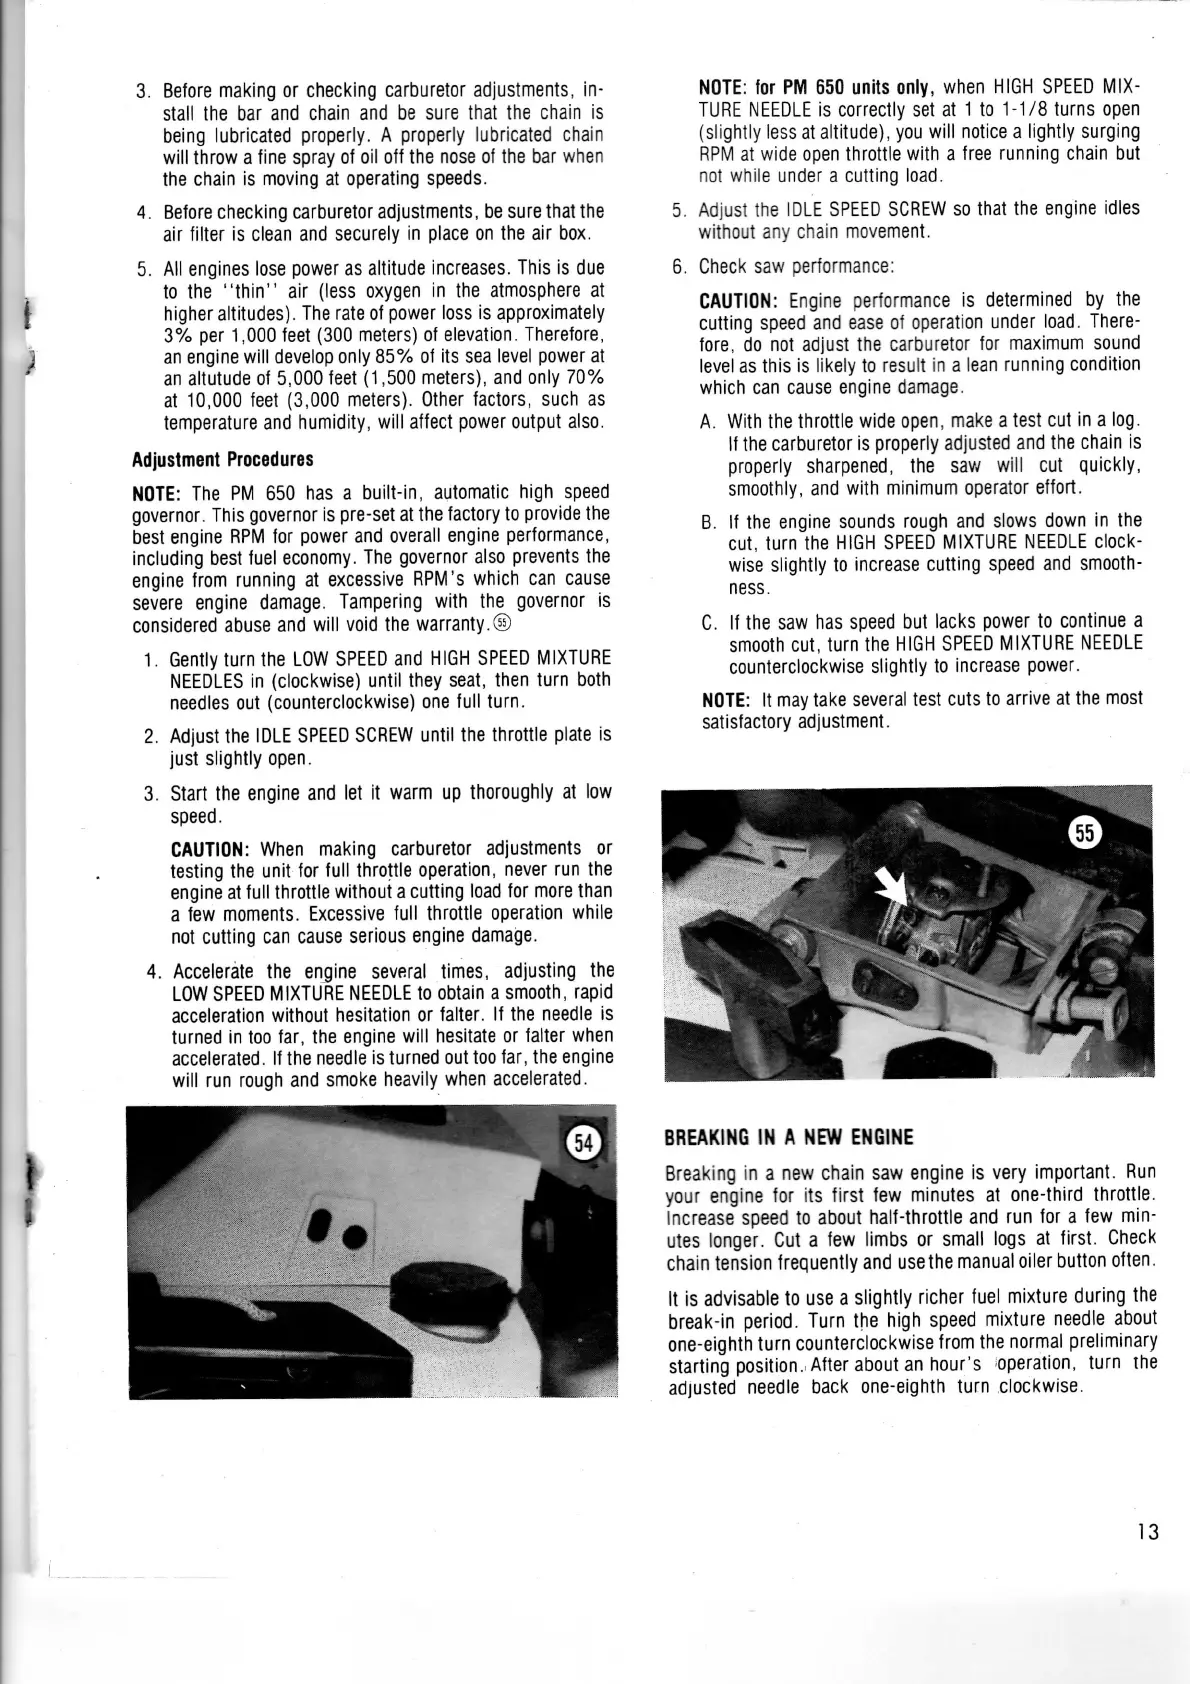
NOTE:
The PM 650 has a built-in, automatic high speed
governor.
This
governor is pre-set at the factory to provide the
best
engine RPM for power and overall engine performance,
including best fuel economy. The governor
also
prevents the
engine
from running at
excessive
RPM's
which can
cause
severe
engine damage. Tampering with the governor is
considered
abuse
and will void the
warranty.®
1.
Gently
turn
the LOW
SPEED
and
HIGH
SPEED
MIXTURE
NEEDLES
in
(clockwise)
until
they
seat,
then
turn
both
needles
out (counterclockwise) one
full
turn.
2.
Adjust the
IDLE
SPEED
SCREW
until
the
throttle
plate is
just
slightly open.
3.
Start the engine and let it warm up thoroughly at low
speed.
CAUTION:
When making carburetor adjustments or
testing the unit for
full
throttle
operation, never run the
engine
at
full
throttle
without
a cutting load for more than
a
few moments.
Excessive
full
throttle
operation while
not cutting can
cause
serious engine damage.
4.
Accelerate the engine
several
times, adjusting the
LOW
SPEED
MIXTURE
NEEDLE
to obtain a smooth, rapid
acceleration
without
hesitation or falter. If the needle is
turned in too far, the engine will hesitate or falter when
accelerated.
If the needle is turned out too far, the engine
will run rough and smoke heavily when
accelerated.
NOTE:
for PM 650 units only, when
HIGH
SPEED
MIX-
TURE
NEEDLE
is correctly set at 1 to 1-1/8 turns open
(slightly
less
at altitude), you will notice a
lightly
surging
RPM
at wide open
throttle
with a free running chain but
not while under a cutting load.
5.
Adjust the
IDLE
SPEED
SCREW
so that the engine idles
without
any chain movement.
6.
Check
saw performance:
CAUTION:
Engine
performance is determined by the
cutting speed and
ease
of operation under load.
There-
fore,
do not adjust the carburetor for maximum sound
level
as this is likely to result in a lean running condition
which
can
cause
engine damage.
A.
With the
throttle
wide open, make a test cut in a log.
If
the carburetor is properly adjusted and the chain is
properly sharpened, the saw will cut quickly,
smoothly, and with minimum operator effort.
B.
If the engine sounds rough and
slows
down in the
cut,
turn
the
HIGH
SPEED
MIXTURE
NEEDLE
clock-
wise
slightly to
increase
cutting speed and smooth-
ness.
C.
If the saw has speed but
lacks
power to continue a
smooth cut,
turn
the
HIGH
SPEED
MIXTURE
NEEDLE
counterclockwise
slightly to
increase
power.
NOTE:
It may take
several
test cuts to arrive at the most
satisfactory
adjustment.
BREAKING
IN A NEW
ENGINE
Breaking
in a new chain saw engine is very important. Run
your engine for its first few minutes at one-third
throttle.
Increase
speed to about half-throttle and run for a few min-
utes
longer. Cut a few limbs or small logs at first.
Check
chain
tension frequently and
use
the manual oiler
button
often.
It is advisable to use a slightly richer fuel mixture during the
break-in
period. Turn the high speed mixture needle about
one-eighth
turn
counterclockwise from the normal preliminary
starting position. After about an hour's operation,
turn
the
adjusted
needle back one-eighth
turn
clockwise.
13